This article was co-authored by wikiHow Staff. Our trained team of editors and researchers validate articles for accuracy and comprehensiveness. wikiHow's Content Management Team carefully monitors the work from our editorial staff to ensure that each article is backed by trusted research and meets our high quality standards.
This article has been viewed 133,997 times.
Learn more...
Water slides are the perfect way for kids and adults alike to cool off and have fun in hot summer months. You don’t have to spend money going to a water park, or even buy water slide to experience this fun activity in your own backyard. Learn how to make your own water slide with a few simple materials.
Steps
Laying Down the Plastic for the Slide
-
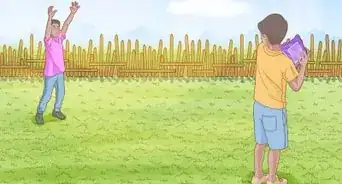
1Choose a gentle hill for the slide. Find a soft grassy hill to begin creating your own water slide. The best location is a hill with plenty of flat space to get a running start at the top, as well as more flat space to slow down at the bottom.
- Use measuring tape and help from a friend to determine how long the space is that you’ll be using. This will help you to buy the right length of plastic for the slide.
- Note that the steeper the hill is, the more material you will need to extend past the hill, where sliders can slow down on a flat surface.
- Note that you will also need the slide to be positioned somewhere close enough for access to a garden hose.
-
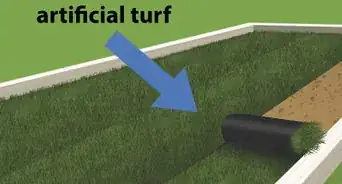
2Purchase thick plastic at the right length. Based on your measurements, buy a length of heavy plastic sheeting for your slide. Opt for a width of about 6 feet for a good amount of sliding area, and plastic thickness of 6 millimeters for the most durability.[1]
- Look or ask for plastic sheeting at a hardware store. You can use a heavy-duty contractor drop cloth, a long tarp, or other plastic sheeting available.
- It’s best to buy clear or light-colored plastic, as black will absorb more heat and become very hot in the sun.
Advertisement -
3Roll out the plastic over your hill. Spread out your plastic sheeting over your grassy hill. Get assistance from friends or family to help unroll or unfold and adjust the plastic.
- Use sandbags or other heavy objects on the corners or sides of your plastic to help hold it in place, especially if it is windy.
- Remember to position your plastic so that there is a flat portion of the slide at the bottom of the hill you set up on. Otherwise, sliders will come to an abrupt and painful stop on the grass after building up speed from sliding on the hill.


Securing and Finishing the Slide
-
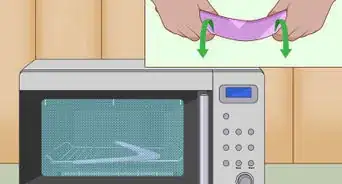
1Add pool noodle buffers if desired. Create a soft barrier to prevent slipping off the edges of the slide if you wish to. Wrap foam pool noodles in the edges of the plastic and secure them with velcro to make the buffers.
- Lay out pool noodles end to end on both long sides of your plastic, as well as the end if you want a stopper. The number of pool noodles will vary depending on your plastic length, but you can calculate based on a typical pool noodle length of 5 feet and a suggested 1 foot of space in between each noodle.
- Wrap the edges of the plastic all the way around the pool noodles so that the plastic touches itself again. Place 2 inch pieces of velcro where the plastic overlaps, at the ends and middle of each pool noodle, to keep them wrapped securely.
- Flip the whole slide over once all the pool noodles are secured in the plastic with velcro. This will create a smooth surface for sliding and prevent the velcro from coming undone.[2]
-
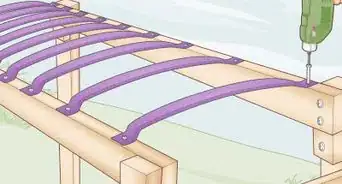
2Stake down the plastic with garden staples. Use U-shaped garden staples to stake down the plastic for your slide. Push the staples through the plastic and into the ground at intervals along each long side of your slide to hold it in place. Make sure the plastic is pulled very taut before staking.
- Cover each garden staple with a piece of duct tape to protect them from being stepped on or slid over. Use a bright color for the tape so that it’s highly visible.
- If you have enough material, fold over a small portion of your plastic once or twice at the top of the slide to double or quadruple it before staking it down. This will reinforce against tears at the beginning of the slide, which will get the most pull when sliders run and jump onto it.
-
3Set up a garden hose. Place a garden hose at the top of your slide so that the water runs down the length of the plastic. Use a sprinkler or multiple water sources for a greater spread of water.
- Use a sprayer attachment on your hose, or a full sprinkler, to create a spray or mist of water so that it covers the whole slide. Use several sprinklers if you have them.
- You can also purchase a long sprinkler hose to run down the whole length of the slide to keep it wet.[3]


Using the Slide
-
1Turn the hose on and add dish soap. Add inexpensive dish soap or shampoo to the surface of your slide to make sliding easier and faster. Then turn on your hose or sprinkler to get water flowing down the slide.
- Add more of the dish soap/shampoo to the slide periodically to keep it slippery.[4]
- Keep the water from running down just the middle or one part of the slide by making sure there are no major creases or wrinkles in the plastic, or using multiple hoses/sprinklers.
-
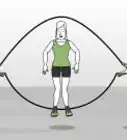
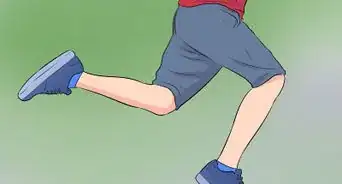
2Get a running start to slide. Give yourself enough room to get a running start at the top of the slide to gain speed. Then jump on the plastic on your stomach, back, or rear end to slide all the way down.
- Make sure to wear a bathing suit or clothing that will slide easily and that you don’t mind getting dirty or grass stained in the event that you slide off the plastic.
- It will help to get yourself wet or even lightly covered with the dish soap/shampoo before your first run on the slide for the best results.
-
3Roll up the slide after use. Take down the slide after one or two uses to prevent the death of the grass underneath if that’s a concern. Grass will easily get ripped up by the friction of sliding and/or browned by the accelerated heat of the plastic over it.
- There is also the chance of the plastic getting dirty, ripped, or even melted by environmental factors if left out between uses.
- If you used pool noodles, simple roll up the slide over the noodles at either edge, removing the stopper noodle if you have one, and fold it at the breaks in between noodles. At the end of the season, you can take all the noodles out to store the slide more compactly.
- You should be able to get several uses, even the whole summer, out of your homemade water slide with durable plastic and normal use. This can be a cost savings over store-bought water slides, which often have to be replaced after the first use.


Community Q&A
-
QuestionCan I use tarpaulin?
 Community AnswerYes, you can. Just be careful as it can be extra slippery.
 -
QuestionHow do I make a waterslide without a tarp and a hill?
 Community AnswerConnect trash bags together (possibly with duct tape underneath) to make a tarp and pile up dirt to make your own hill.
 -
QuestionCan I put one end (like a ramp) into an inflatable kiddie pool or would it shoot me over the pool if I was going fast?
 Community AnswerIt sounds like it would be dangerous. You would likely be going too fast and would overshoot the kiddie pool. It is best not to do that.
Warnings
- Avoid using nails, tent stakes, or other materials with an exposed sharp point to secure the edges of your slide, as these can cause injury when skin makes contact with them during sliding. Use the U-shaped garden staples and cover with duct tape or a durable waterproof covering to avoid injury.⧼thumbs_response⧽
- Always use caution when using a water slide, as the slippery surface and fast speeds can cause accidents and injury. Provide adult supervision at all times to children using the slide.⧼thumbs_response⧽
Things You’ll Need
- 6 mil thick plastic sheeting
- Garden staples
- Duct tape
- Hose (sprinkler or sprinkler hose optional)
- Dish soap or shampoo
- Foam pool noodles & velcro (optional)


References
About This Article

Water slides are great fun for the whole family during the warmer months, and it's pretty easy to make one at home using plastic sheeting. First, choose a gentle, grassy hill for the location of the water slide. Try to pick a hill with plenty of flat space at the top and bottom so that there is enough room to run up to the slide and then to land safely at the end. Next, choose heavy plastic sheeting for the water slide that’s at least 6 millimeters thick. This ensures that the water slide is durable and less susceptible to damage. Finally, use garden staples to secure the water slide once it’s rolled out on the hill. Pick U-shaped staples and insert these through the plastic and into the ground at even intervals down the slide. When the water slide is ready to use, pour some inexpensive dish soap onto the slide to make it more slippery. Then, turn the hose on and direct it at the start of the slide so that it easily flows down. For more tips on homemade water slides, like the best way to use the slide, read on!