This article was co-authored by wikiHow staff writer, Jessica Gibson. Jessica Gibson is a Writer and Editor who's been with wikiHow since 2014. After completing a year of art studies at the Emily Carr University in Vancouver, she graduated from Columbia College with a BA in History. Jessica also completed an MA in History from The University of Oregon in 2013.
There are 10 references cited in this article, which can be found at the bottom of the page.
wikiHow marks an article as reader-approved once it receives enough positive feedback. In this case, 91% of readers who voted found the article helpful, earning it our reader-approved status.
This article has been viewed 308,627 times.
Learn more...
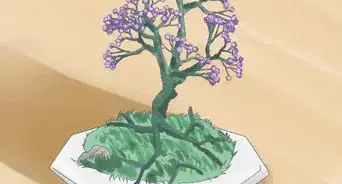
Turning a Japanese maple (Acer palmatum)[1] into a bonsai tree is a wonderful project; they are trees that lend themselves particularly well to bonsai growing. The small maple tree will grow just like its normal larger version, including changing into the gorgeous fall (autumn) colors as the season arrives. You only need a few things to complete this project and an interest in growing bonsai.
Steps

Preparing the Cutting
-
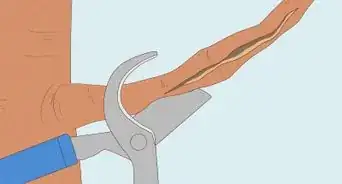
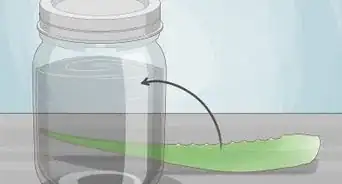
1Cut around the base of the branch where the roots will sprout. Make a circular cut through the bark and into the hardwood underneath.[3]
-
2Make a duplicate cut about two branch widths below the first cut.
-
3Make a straight cut to connect the first two cuts.[4]
-
4Peel off the bark between the first two cuts. The bark should peel off fairly easily.[5] Make sure none of the cambium layer (the green layer under the bark) is left.


Planting the Bonsai Maple Tree
-
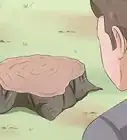
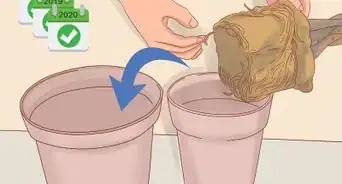
1Separate the tree. When the roots start to thicken and turn brown, separate your new tree by cutting it off below the new roots.
-
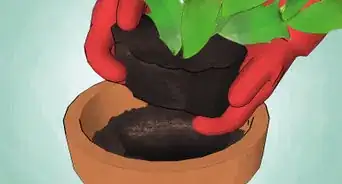
2Place small pebbles for drainage in the bottom of a pot.[7] Partially fill the container with good quality topsoil (a good mix consists of about 80 percent bark and 20 percent peat, as this tends to promote fine fibrous feeder roots and gives good drainage.[8] Unwrap the plastic and without disturbing the roots, plant your new tree, adding additional soil as needed to firmly set the tree in place.
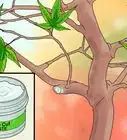
- The addition of sphagnum moss is helpful in hard water areas.[9]
-
3Insert a small stake.[10] A stake will help to keep the tree from moving; while it is establishing itself, any movement can damage its delicate roots.
-
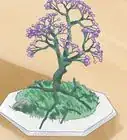
4Enjoy your new tree! Find a suitable outdoor area to keep your bonsai, such as a porch, garden bed area or patio. Bonsai are not meant to be indoor plants;[8] if brought indoors, only keep them inside for a one to two days before returning them outdoors again; only bring them in when in leaf, or only for an hour during winter.[9]
- Keep the bonsai maple tree sheltered for the first few years. Don't leave it outside where frost can get to it for the first 2 to 3 years, as this can kill it. Avoid placing the plant anywhere windy and do not let it sit in direct sunlight for the whole day.[11]
- Feed a balanced feed after the buds form until late summer. During winter, feed with a low- or zero-nitrogen feed.[9]
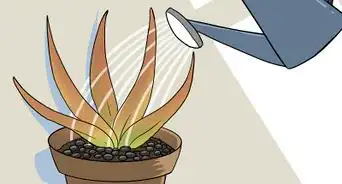
- Never let a bonsai tree dry out.[12] It needs to be kept slightly moist at all times.[8] Wherever possible, use rainwater rather than tap water; it's healthier for the tree. Regular spraying with water is helpful for healthy growth.
- Learn to "style" the tree as it gets established. This is where you learn to reproduce what nature normally does, to give the tree the look of a real tree.[8] It consists of careful pruning and wiring. Getting this aspect right can take a lot of practice but that's all part of the fun of growing your own bonsai.


Community Q&A
-
QuestionAre there any cheap places from which to get a young tree?
 Community AnswerIn late summer, The Home Depot has great deals on junipers and Japanese maples.
 -
QuestionWhat kind of climate is most suitable for Japanese maple tree?
 Community AnswerJapanese Maples need a period of cold dormancy, so they will not do well in hot climates. If you look outside and see maple trees, your Japanese Maple will thrive. But, if you look around and see nothing but cactus or palm trees, your tree will most likely not survive.
 -
QuestionHow are the roots trimmed and how often?Community AnswerThe roots are trimmed when you repot the tree, usually every 2 - 3 years. You use a small rake to remove the soil between the roots and cut off about 1/3 of them.
Warnings
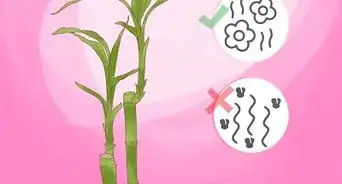
- If the leaves stay green and fail to turn into colored foliage, this suggests that light levels are too low and need to be increased.⧼thumbs_response⧽
- The new roots are very delicate and can be easily damaged. Use care when unwrapping the plastic and potting the tree.⧼thumbs_response⧽
- Do not remove or disturb the sphagnum moss during the process.⧼thumbs_response⧽
- If wiring the tree when styling it, do not pull tightly. This can damage the tree and scars can take years to grow out or may deform the shape as the tree continues to grow.⧼thumbs_response⧽
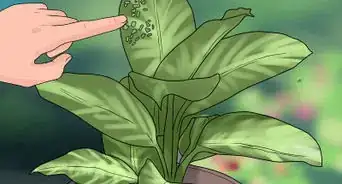
- Aphids love the new shoots of the Japanese maple. Remove quickly or they will cause deformed leaf formation.[14]⧼thumbs_response⧽
- Root decay caused by overwatering or a waterlogged soil is the main enemy of a bonsai plant. Ensure that the soil has good drainage and don't overwater. If you see water lying on the surface, the drainage quality of the soil is poor and needs replacing.[9]⧼thumbs_response⧽
Things You'll Need
- A maple tree
- Sharp (and clean) knife or scissors
- Sphagnum moss - soak it in water for at least 15 minutes
- A small sheet of heavy plastic
- String
- Rooting hormone, available at any garden center
- Container with good drainage holes for growing (there are many bonsai container options available at local nurseries and garden centers)
- Small pebbles for water drainage at base of container
- Suitable soil medium (such as a mix of bark and peat)
- Small stake, such as split bamboo canes
- Grass or anything for decoration (optional)
- Wire for styling or training, along with wire cutters
References
- ↑ https://bernheim.org/learn/trees-plants/bernheim-select-urban-trees/japanese-maple/
- ↑ https://www.bonsaitreegardener.net/bonsai-trees/species/japanese-maple
- ↑ https://www.bonsaitreegardener.net/bonsai-trees/species/japanese-maple
- ↑ https://www.bonsaitreegardener.net/bonsai-trees/species/japanese-maple
- ↑ https://www.bonsaitreegardener.net/bonsai-trees/species/japanese-maple
- ↑ https://www.bonsaitreegardener.net/bonsai-trees/species/japanese-maple
- ↑ https://www.bonsaiempire.com/basics/cultivation/from-cuttings
- ↑ 8.08.18.28.38.48.5Peter McMahon, Return to Lilliput, in Growing Today, pp. 30-34, (January 1995)
- ↑ 9.09.19.29.39.49.59.6Colin Lewis, Bonsai Basics, p. 73, (1997)
- ↑ https://www.bonsaitreegardener.net/bonsai-trees/species/japanese-maple
- ↑ https://www.mendocinomaples.com/maple-care
- ↑ https://www.bonsaiempire.com/basics/bonsai-care/watering
- ↑ https://www.youtube.com/watch?v=ff1L8MVERO0
- ↑ https://www.bobvila.com/articles/how-to-get-rid-of-aphids/
- http://www.evergreengardenworks.com/japmaple.htm – research source
- Peter McMahon, Return to Lilliput, in Growing Today, pp. 30-34, (January 1995) – research source
- http://en.wikipedia.org/wiki/Japanese_maple – Wikipedia on the Japanese maple tree
About This Article

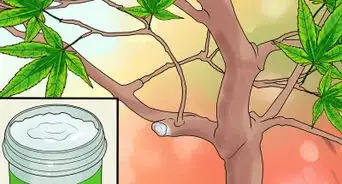
To make a japanese maple bonsai tree, choose the maple branch you’d like to grow a new tree from during early summer. It should be about the diameter of your little finger. Make one circular cut around the base of the branch where the roots will sprout, and a second cut two branch widths below the first. Then, connect the two cuts with a third straight cut. Peel the bark between the two circular cuts, also removing the green layer under the bark. Wipe the top cut with rooting hormone or a rooting gel. Afterwards, wrap the unpeeled area with wet sphagnum moss first then plastic, and tie in place. Sever the cutting from the tree below the new roots when the roots thicken and turn brown. Finally, unwrap the plastic and plant the new tree in a pot with pebbles at the bottom, and insert a stake to keep the tree from moving and damaging its roots. Scroll down for more information on how to care for your new bonsai tree! Scroll down for more information on how to care for your new bonsai tree!