X
wikiHow is a “wiki,” similar to Wikipedia, which means that many of our articles are co-written by multiple authors. To create this article, 13 people, some anonymous, worked to edit and improve it over time.
wikiHow marks an article as reader-approved once it receives enough positive feedback. This article received 23 testimonials and 93% of readers who voted found it helpful, earning it our reader-approved status.
This article has been viewed 207,006 times.
Learn more...
Pretty wire tree centerpieces can be produced in just a few simple steps. These unique display items are elegant and complex in appearance, belying the fact that the entire project can be completed in less than two hours.
Things You Should Know
- Cut 90 pieces of wire that are the same length.
- Secure a bead on each piece of wire.
- Braid the pieces of wire together to create the branches and trunk of the tree.
- Mount your tree on a rock or decorative plate with hot glue.
Steps
Method 1
Method 1 of 6:
Preparing the Wire
-
1Cut 90 pieces of wire that are 18" (43cm) long. Here the wire is wrapped around a book 90 times. Then wire cutters were used to cut all of the pieces at once.
-
2Remove one wire from the bundle. Bend it in half as you smooth out the kinks in the wire, using the cloth. You can smooth the wire with your bare hands but it's easier on your fingers if you use a cloth.


Advertisement
Method 2
Method 2 of 6:
Adding the Beads
-
1Slide a bead onto the wire and center it at the bend. Cross the ends of the wire directly below the bead and twist the wires together tightly at least three times to secure the bead.
-
2Repeat this step with all the remaining wires. Varying the number of twists below each bead will make the tree less uniform and more interesting.


Advertisement
Method 3
Method 3 of 6:
Making the Branches


Method 5
Method 5 of 6:
Making the Roots
-
1Separate the root wire into three groups. Twist each group together to begin forming the roots. Continue separating each root into smaller roots until you run out of wire to twist.
-
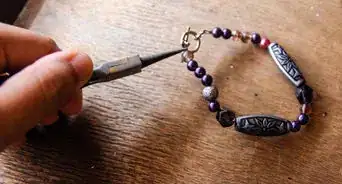
2Use the wire cutters to trim the ends of the roots. Bend or straighten the roots as needed so that the tree sits level.


Advertisement

Community Q&A
-
QuestionWhat size and type of beads would work best with this project?
 Community AnswerYou could use any beads, but I'd guess the ones used for this tree are small, glass beads. I've seen larger trees done with chunks of amethyst, and I've seen tiny ones made using glass seed beads. The general idea for bead shape is that you're trying to make it look like leaves or flowers. Glass or stone beads look great, but plastic or wood could still give a nice effect while being less expensive.
 -
QuestionWhat if I don't have hot glue?
 Community AnswerHot glue is necessary for this craft. You can buy a hot glue gun at your local craft store if you don't have one.
 -
QuestionCan I make the tree with less than 90 wires?
 Community AnswerYes, but it will have fewer branches, and might end up looking a bit thin. You can also shorten the wires if you want the tree to be smaller.
Advertisement
Things You'll Need
- 90 feet/27.5 meters of wire (24-32 gauge works best)
- Ruler
- Wire cutters
- Beads
-
Cloth or leather for smoothing wire.


About This Article
Advertisement