This article was co-authored by Amy Guerrero. Amy Guerrero is an Arts and Crafts Specialist and the Owner of Sunshine Craft Co., a crafting studio based in Phoenix, Arizona. Amy specializes in macrame, DIY crafting, and teaching fiber arts. She offers monthly in-person and online workshops along with having developed a range of DIY craft kits for at-home projects. Amy holds a BS in Industrial Design from Philadelphia University. She worked as a graphic designer before starting her own business. Sunshine Craft Co. is a creative hub that offers a wide range of workshops, tools, and resources for any craft project to inspire creativity and community engagement.
There are 7 references cited in this article, which can be found at the bottom of the page.
wikiHow marks an article as reader-approved once it receives enough positive feedback. In this case, 93% of readers who voted found the article helpful, earning it our reader-approved status.
This article has been viewed 169,942 times.
Originally made by Southwestern Native Americans, a suncatcher is a small ornament that hangs on the inside of a windows in order to "catch the light" and reflect it inward. Suncatchers may be manufactured, but they're also a popular craft that often sells well at craft fairs. Simple or complicated, suncatchers are as unique as the people making them and are limited only by your imagination. In fact, there are countless ways to make suncatchers!
Steps
Making a Beaded Suncatcher
-
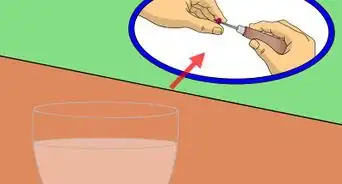
1Cut several loops of bracelet-size memory wire. Use a pair of heavy duty wire cutters to do this. Memory wire is very hard, and it can ruin a pair of more delicate jewelry-making wire cutters.
-
2Use a pair of round nose pliers to fold the end of the memory wire into a loop.[1] Pinch the end of your memory wire with the tips of your round nose pliers. Twist the pliers away from yourself to form, but don't close the loop all the way.Advertisement
-
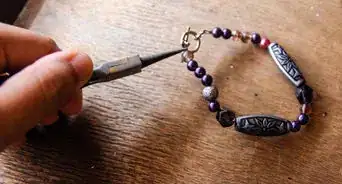
3Slip a faceted bead onto a headpin.[2] You can use the standard teardrop shape, or something more interesting, such as a ball, heart, or star. For best results, use a crystal or glass bead; it will catch and reflect the light much better than a plastic one.
- This only works for beads that have a hole going straight up and down through them, and not for the pendant-style beads.
-
4Trim the headpin down to ¼-inch (0.64-centimeters), then use a pair of round nose pliers to twist the tip into a loop. Cut the head pin with a pair of wire cutters (you can use jewelry making wire cutters here).Next, grip the tip of the headpin with your pliers, and roll it towards the bead to form a loop.[3]
- If the loop is off-centered or crooked, use a pair of needle nose pliers to fix it.[4]
-
5Slip the headpin onto the memory wire, then close the memory wire's loop all the way. Use a pair of needle nose pliers to open the loop on the memory wire, if needed. Slip the headpin onto the memory wire's loop, then use your needle nose pliers to close it again.
-
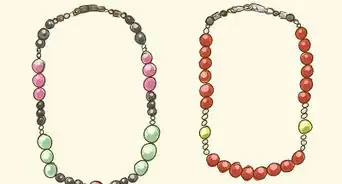
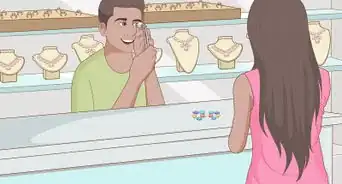
6Slip beads onto the memory wire.[5] You can use all one type of bead, or experiment with different shapes, sizes, and colors. For example, you could use seed beads, small faceted beads, and large faceted beads.
-
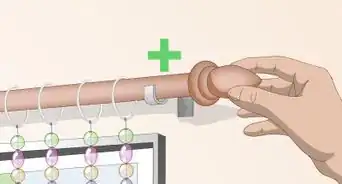
7Twist the other end of your memory wire into a loop.[6] Use the same technique as before: pinch the end of the memory wire with your round nose pliers, then roll it into a loop.
-
8Slip some string through the loop.[7] Tie the ends of the string to form a loop, then hang it from a hook.


Making a Glass Gem Suncatcher
-
1Find a plastic lid. The best type of lid to work with is the kind that comes from a yogurt, butter, or margarine container. Make sure that the lid is clean and dry.
-
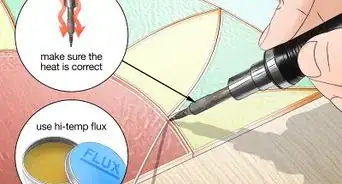
2Spread a thick layer of clear school glue over the bottom of the lid. Turn the lid over so that the inside is facing you. Fill the bottom with a thick layer of clear school glue.[8] Make sure that there aren't any gaps or holes in the glue, or your suncatcher will fall apart. It may seem as though you are using more glue than necessary, but clear glue tends to shrink a lot as it dries.[9]
- Do not use a clear, industrial-strength glue for this; you want to be able to remove the suncatcher from the lid when you are done.
- White school glue may also be used, but your finished suncatcher may look cloudy and not sparkle as much.[10]
-
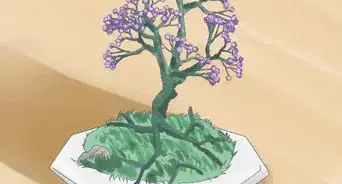
3Arrange glass, flat-backed gems in the lid. You can arrange them randomly or in a pattern, but make sure that you fill the entire bottom of the lid in an even layer. To make a more interesting looking suncatcher, experiment with different sizes and colors.
- Make sure that the flat size of the gems is facing down.
- Try planning out your pattern before arranging it in the glue.
-
4
-
5
-
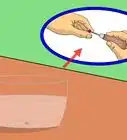
6Carefully peel the lid off of the suncatcher. Turn the suncatcher over, so that the back is facing you, and let it finish drying.[15]
-
7Thread some clear thread through a thick part of your suncatcher with a needle. Find an area near the edge of the suncatcher where the glue is thick. Thread some clear string through a needle, then push the needle through the glue.[16] Tie the ends of the string into a loop.
-
8Hang the suncatcher indoors in front of a window. You can hang the suncatcher from a suction cup that has a hook on it, or you can hang it from the window latch.[17]
- Do not let this suncatcher get wet. The glue will dissolve.


Making a Tissue Paper Suncatcher
-
1Cut two pieces of contact paper, peel the backing off of one, and set it down in front of you, sticky-side-up. Make sure that both pieces of contact paper are the same size. You will be sticking them together in the end to seal your suncatcher.
-
2Cut or tear colorful tissue paper into small pieces.[18] The pieces don't all have to be the exact same size and shape, but they should all be around 1 inch (2.54 centimeters).
-
3Place the tissue paper pieces on top of the sticky side of the contact paper. Don't worry about making a specific shape just yet; focus instead on the size and the design. You can overlap the pieces, if you want to, but try not to leave any gaps.[19]
-
4Peel the backing off of the second piece of contact paper, and place it on top. Run your hands across the contact paper to smooth out any air bubbles and to seal the design in.
-
5Cut your shape out. You can draw your shape first, if you want to. Don't worry if the tissue paper extends past your design; the goal is to completely fill your design with color.[20]
-
6Punch a hole into the top of your suncatcher, then thread some string through it. You can also use fishing line, yarn, or ribbon.
-
7Tie the ends of the string together to form a loop, then hang your suncatcher in a bright window. Keep your suncatcher indoors and don't let it get wet, or it will fall apart.
-
8Finished.


Community Q&A
-
QuestionCan I use coffee filters instead of tissue paper?
 Community AnswerYes, coffee filters can be used instead of tissue paper. They can be dyed and colored with Sharpies.
 -
QuestionWhere do I find the crystals for the suncatchers? I have looked everywhere.
 T. ChinsenTop AnswererCraft stores will have faceted crystal beads, as well as colored glass beads in the jewelry section. The round glass pieces are in the floral department.
 -
QuestionWhere do I purchase the equipment to make suncatchers?
 Community AnswerAnywhere that sells beads and wire! Ebay's a great place to buy cheap, crafting beads in bigger sized lots, but you can also get them at your local craft store (Michael's, Hobby Lobby, etc.).
Things You'll Need
Making a Beaded Suncatcher
- Memory wire
- Head pin
- Faceted glass or crystal bead
- Assorted beads
- Heavy-duty wire cutters
- Round nose pliers
- Needle nose pliers
Making a Glass Gem Suncatcher
- Plastic yogurt container lid
- Colorful glass gems/vase fillers
- Clear school glue
- Needle
- Clear thread or fishing line
- Scissors
- Suction cup with hook (optional)
Making a Tissue Paper Suncatcher
- Contact paper
- Tissue paper
- Scissors
- Hole puncher
- String
References
- ↑ http://www.northshoredays.com/2013/06/spiral-suncatchers.html
- ↑ http://www.northshoredays.com/2013/06/spiral-suncatchers.html
- ↑ http://www.jansjewels.com/basic-jewelry-making-instructions.html
- ↑ http://www.jansjewels.com/basic-jewelry-making-instructions.html
- ↑ http://www.northshoredays.com/2013/06/spiral-suncatchers.html
- ↑ http://www.northshoredays.com/2013/06/spiral-suncatchers.html
- ↑ http://www.northshoredays.com/2013/06/spiral-suncatchers.html
- ↑ http://suzyssitcom.com/2015/06/easy-to-make-glass-sun-catchers.html
- ↑ http://kidsactivitiesblog.com/16045/glass-gem-sun-catcher-craft
- ↑ http://kidsactivitiesblog.com/16045/glass-gem-sun-catcher-craft
- ↑ http://suzyssitcom.com/2015/06/easy-to-make-glass-sun-catchers.html/2
- ↑ http://kidsactivitiesblog.com/16045/glass-gem-sun-catcher-craft
- ↑ http://suzyssitcom.com/2015/06/easy-to-make-glass-sun-catchers.html/2
- ↑ http://kidsactivitiesblog.com/16045/glass-gem-sun-catcher-craft
- ↑ http://suzyssitcom.com/2015/06/easy-to-make-glass-sun-catchers.html/2
- ↑ http://kidsactivitiesblog.com/16045/glass-gem-sun-catcher-craft
- ↑ http://kidsactivitiesblog.com/16045/glass-gem-sun-catcher-craft
- ↑ https://feltmagnet.com/crafts/Suncatcher-Craft-Projetc-for-Toddlers
- ↑ https://mommyapolis.com/tag/preschool-easter-crafts/
- ↑ https://mommyapolis.com/tag/preschool-easter-crafts/
About This Article

To make a tissue paper suncatcher, start by cutting a bunch of 1-inch tissue paper squares in a variety of colors. Then, tape a piece of contact paper down on a flat surface sticky-side up, and arrange the tissue paper squares in a pattern on the paper so there are no gaps between them. Next, take a second piece of contact paper and press it sticky-side down over the top of the tissue paper squares to secure them in place. Finally, cut out a shape from the paper and punch a hole in it so you can hang your suncatcher up in a bright window. To learn how to make a glass or bead suncatcher, keep reading!