wikiHow is a “wiki,” similar to Wikipedia, which means that many of our articles are co-written by multiple authors. To create this article, 18 people, some anonymous, worked to edit and improve it over time.
There are 9 references cited in this article, which can be found at the bottom of the page.
This article has been viewed 57,008 times.
Learn more...
Commercial pencils are produced through a time-consuming process and many special machines. You can easily make your own pencil at home, however, with store-bought pencil lead and a few readily available supplies.
Steps
Paper Pencil
-
1Trim the paper. Start with a square of origami paper, inner side facing up, and a length of pencil lead. Both are available at stationery stores. Lay your pencil lead flat on the paper and measure out the length. Use scissors to trim away any excess paper that extends beyond the length of the lead.
- When measuring out the length of your pencil, make sure that one end of the lead is flat against one edge of the paper. Measure out the length using the other end.
- Origami paper works best, since it's pretty and easy to manipulate. Newspaper or other waste paper is harder to wrap round the pencil, but friendlier to the environment.[1]
- In terms of hardness, make sure that your pencil lead is HB. A lead that is 2B or above might be too soft and could snap as you work with it.
- You can use standard graphite leads or colored graphite leads.
-
2Coat the paper with Mod Podge. Use a wide, flat paintbrush to apply an even coating of Mod Podge to the inner side of the paper. Apply a generous amount, coating the entire piece of paper.
- Temporarily set the lead aside as you apply the adhesive.
- You can use glossy or matte Mod Podge; either option is appropriate.
- If you cannot find Mod Podge, look for any combination glue/sealer in your craft store.
- The adhesive will ensure that the lead sticks to your paper as you work with it. It also makes the paper more flexible, and as a result, the paper will be easier to roll.
Advertisement -
3Place the lead on the paper. Line up one end of the lead with the perfectly straight side of your paper. The lead should be about ½ inch (13 mm) up from the bottom of the paper.
- If the lead has a blunt end and a pointed end, line up the blunt end of the lead with the straight edge of the paper.
-
4Fold the paper over the lead. Bring the bottom edge of the paper up and over the lead. Stick this flap of paper on top of the lead and onto the paper just above it, sealing the lead in place.
- The lead must be tight and secure. Using your thumbnail, carefully press along the length of the wrapped lead from the top, forcing it further into the fold of the paper and flattening the paper flap in the process.
- Use your paintbrush to coat the decorative side of the paper flap with Mod Podge or white glue after it has been secured in place.
-
5Roll the lead in the paper. Use your fingers to gently roll the lead upward and into the paper. Continue rolling until you reach the opposite end of the paper.
- Apply a firm amount of pressure as you roll the lead. You need to make sure that there are no gaps in between each layer of paper.
- Be careful, however, since applying too much pressure can cause the lead to snap.
- Keep the lead as straight as possible as you roll it up.
- Let the wrapped lead pencil dry before continuing past this step. The drying process can take an hour or so, but you can help speed things up by letting it dry in the sun.
-
6Sharpen the pencil. As soon as the pencil is completely dry, use a sharp craft knife to shave away some of the paper layers at the pointed end of the lead. Shave the paper away gradually, bringing it to a slanted point.
- You might be able to use a standard handheld pencil sharpener instead of the craft knife as long as the sharpener has a sharp blade and the pencil has sturdy, gap-free layers. Apply light pressure to avoid snapping the lead in the process.
-
7Use your new pencil. Your pencil is now ready to use and should write as well as any standard, store-bought version does.


Twig Pencil
-
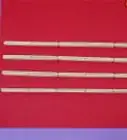
1Select a good twig. Find a straight twig that fits comfortably in a pencil grip. It should be at least three to four times thicker than the 2-mm pencil lead you'll be using for the project, but no more than ½ inch (13mm).[2]
- You can get creative by looking for a twig with an interesting color pattern or texture. Avoid selecting any piece of wood that could give you a splinter.
-
2Cut the twig down to size. Use small to medium pruning clippers to trim the twig down to about 5 inches (13 cm).[3] Also cut away any parts that could get in the way as you write.
- Take this time to examine the interior of your twig. If you see bugs or holes from pest damage, discard it and find a new one.
-
3Clamp the twig down. Use a clamp to secure the twig to the edge of a workbench or to a piece of plywood. Apply enough pressure to hold the twig in place, but no more. Too much pressure can snap the twig.
- Situate the twig so that the cut end hangs slightly over the edge of your work station. This will be the writing end of your pencil.
-
4Dent the end of the twig. Locate the center of the cut end (the intended writing end) of your twig. Firmly yet carefully press into this center point with a scratch awl. You should use just enough force to leave an indentation in the wood at this point.
- You can use a sharp nail tip instead of a scratch awl.
- This indentation will become the starting point for your drill bit.
-
5Drill into the twig. Fit your drill with a 3/32-inch (2.4-mm) drill bit. Drill straight into the twig using the indentation you just made as a starting point. Keep going until you hit a depth between 1 and 1.25 inches (2.5 and 3.2 cm).
- Pull the drill bit out occasionally as you work, to clear away wood chips from the flutes or grooves. If these wood chips appear stuck in the drill bit, stop the drill and quickly scrub the sides of the bit with an old toothbrush or similar utensil.
-
6Coat your lead in glue. Test that the lead fits in the hole, then drill the hole wider if necessary. Once you're sure it fits, squirt a shallow puddle of white craft glue onto a piece of scrap cardboard. Roll the bottom 1 to 1.25 inch (2.5 to 3.2 cm) of your lead in this glue.
- Make sure that the lead is coated all the way around its perimeter.
- The glue will help hold your pencil lead in place when you insert it into the twig. You only need to coat a length of lead equal to the depth of your hole.
-
7Insert the lead into the twig. Carefully wedge the glue-covered end of lead into the hole of your twig. You may need to wiggle it back and forth a bit to spread the glue inside the hole.
- Work carefully to avoid snapping the lead.
- Keep going until you have pushed the lead completely inside the hole. Do not leave part of the hole vacant.
-
8Trim the end of the lead. A significant portion of lead will still extend past the hole of your twig. Trim it down to size by pressing it against the side of the twig, snapping it off in the process.
- Allow the glue to dry for several hours or overnight before continuing.
-
9Sharpen the pencil. Use a sharp utility knife to whittle away the wood at the tip of your twig, revealing a small tip of lead and sharpening the pencil in the process.
- For safety purposes, move the knife in short strokes and work away from your body.
- Gradually remove thin shavings of wood until your pencil is sharp enough to write with.
-
10Use your new pencil. At this point, your pencil is complete and should be ready to write with.


Factory-Made Pencils
-
1Grind graphite into powder. Here's an odd fact: "pencil lead" is made from graphite, not lead. This soft, black form of carbon has come a long way since the English used it to draw on sheep five hundred years ago.[4] Because graphite sticks to regular grinding equipment, pencil manufacturers break it apart in rotating drums, or bash it together with jets of air.[5] [6]
- Colored pencils are made with wax, pigment, and clay instead, with no graphite involved.[7]
-
2Add clay and water. Mix china clay and water into the graphite, and you get a vat of grey sludge. This sounds simple, but it can take an entire week of mixing and drying to get the right consistency![8] [9]
- China clay gets its name from the first people to use it for pottery. For centuries, only Chinese craftsmen knew which clay to use, and how to turn it into porcelain. It's a little less mysterious now that it's used to doodle on math homework.
-
3Heat the mixture into hard rods. Machines now push the paste through a small metal tube. The long rod that comes out is cut into pencil-sized pieces. Finally, these enter a kiln heated to about 2,000ºF (1100ºC), to make them hard and smooth.[10]
-
4Cut wood into thin slats. Meanwhile, at a lumber mill, durable wood is cut into slats half the width of a pencil. In North America, pencil manufacturers usually use incense cedar wood from the west coast.[11]
- If you see short or thin pencils for sale, the wood they came from probably had a defect. The mill cuts off the weak or damaged areas and tries to use the rest for these "weird" pencils or other purposes.
- The wood may also be waxed and stained to make the color uniform, and to make the pencils easier to sharpen.[12]
-
5Sandwich the wood and graphite. The pencil lead and lumber finally get to meet. After carving grooves in the wooden slats, machines insert the graphite rods into each one. A second layer of wood clamps down over the graphite and gets glued on tightly.[13]
-
6Finish the pencils. The factory now saws the wood apart into separate pencils. The final batch of machines trims these to uniform length, paints them, and stamps them with a company logo or other writing. If an eraser is attached, the factory crimps the end of the wood to get the metal band (ferrule) to stay in place.[14]


Community Q&A
-
QuestionCan I use a chapstick, then sharpen it and color it with markers to make a fake pencil?
 Otterly BadgerificTop AnswererA chapstick would be very difficult to turn into a pencil shape and it is very unlikely that you'd be able to color it. It also wouldn't have any graphite to write with. It would just be easier to buy a pencil than to expend the effort on trying to reshape a chapstick for this purpose.
Things You'll Need
Paper Pencil
- 2-mm lead
- 6-inch (15.25-cm) origami paper (or newspaper)
- Mod Podge or white glue
- Scissors
- Paint brush
- Craft knife
- Scrap paper
Twig Pencil
- Twig
- Pruning clippers
- Drill with 3/32-inch (2.4-mm) bit
- Clamp
- Scratch awl or nail
- Old toothbrush (optional)
- White glue
- Scrap cardboard
- 2-mm diameter drafting lead, 2B grade
- Utility knife
References
- ↑ http://www.ecomena.org/tag/how-to-make-pencils-from-papers/
- ↑ http://www.madewithhappy.com/make-twig-pencils/
- ↑ http://www.madewithhappy.com/make-twig-pencils/
- ↑ http://www.geog.port.ac.uk/webmap/thelakes/html/lgaz/lk00976.htm
- ↑ https://www.lead.org.au/lanv4n3/lanv4n3-11.html
- ↑ http://www.generalpencil.com/how-a-pencil-is-made.html
- ↑ http://pencils.com/the-unleaded-pencil/
- ↑ https://www.lead.org.au/lanv4n3/lanv4n3-11.html
- ↑ http://www.generalpencil.com/how-a-pencil-is-made.html
- ↑ https://www.lead.org.au/lanv4n3/lanv4n3-11.html
- ↑ http://www.spi-ind.com/product_brochures/brochure-IncenseCedarFacts.pdf
- ↑ http://pencils.com/pencil-making-today/
- ↑ http://pencils.com/pencil-making-today/
- ↑ http://pencils.com/pencil-making-today/
- Twig pencil adapted from http://boyslife.org/hobbies-projects/projects/5095/the-write-stuff/
About This Article
To make a pencil, first graphite is ground into a powder. Then, clay and water are mixed into the graphite powder to make a thick, sludge-like substance that will eventually become the pencil lead. Once the liquid graphite has been made, it's poured into a small metal tube and heated in a kiln at 2,000 degrees Fahrenheit. Finally, the solidified graphite is sandwiched between 2 thin, wooden slats that are glued together to make the outside of the pencil. To learn how to make a pencil out of paper or a twig, read on!