wikiHow is a “wiki,” similar to Wikipedia, which means that many of our articles are co-written by multiple authors. To create this article, 11 people, some anonymous, worked to edit and improve it over time.
This article has been viewed 44,753 times.
Learn more...
For thousands of years, different cultures around the world have burned various herbs for spiritual and healing purposes. The act of smudging is a traditional method of burning herbs to create a smoke cloud that is used in ceremonies and rituals. Native Americans traditionally would burn sage in a bowl or over the coals of a fire to purify or cleanse energy of people or places. Today you can make your own smudging stick out of home-grown sage to create the same effect.
Steps
Growing the Sage (Optional)
-
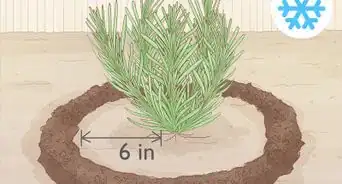
1Find an ideal place to plant the sage. Before you start your sage plant, you will want to find a place outdoors that will provide optimal growing conditions. Sage grows best in full sun and well-drained soil.
A clay pot is ideal to help with drainage for your sage plant especially if you live in a rainy climate. If you have to keep your plant indoors, make sure to keep it next to a sunny window. -
2Plan ahead when you will start your plant. There are two methods to starting your plant:
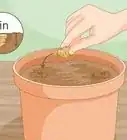
- Start from seed. If you decide to grow from seed, plant the seeds 6-10 weeks before the last frost. You can sow the seeds outside in a bed placing them about 18–24 inches (46–61 cm) apart. However, growing sage from seed can be challenging and it can take up to two years for the plant to reach maturity. Many gardeners choose to start plants from cuttings because of this.
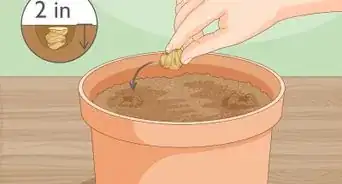
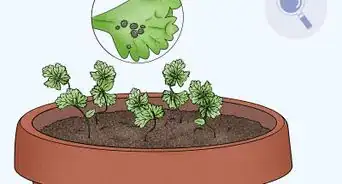
- Start with cuttings. If you tried starting fro seeds, and the plants didn't germinate properly, then try to start a plant with sage cuttings. Cut a stem off a healthy mature sage plant at least 3 inches (7.6 cm) long. Remove the leaves at the bottom, but make sure to keep at least a couple pairs of leaves at the top. Place your sage cutting into soil and water it. Be careful not to give it too much or too little water.
Advertisement -
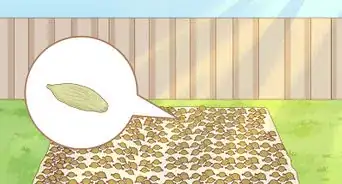
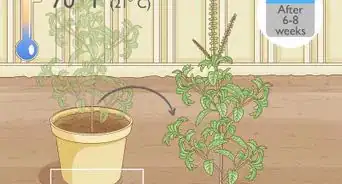
3Wait for the right time to harvest. It will take approximately 75 days, or two and a half months for the sage to be ready to be harvested.
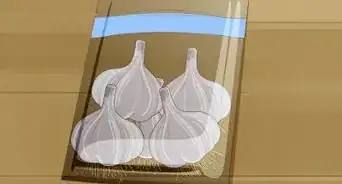
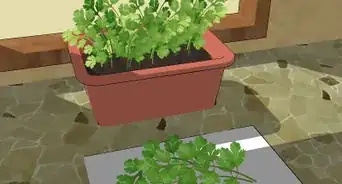
Once it's ready, take the trimmers and cut the stems of the desired leaves at the base of the plant. Be sure not to harvest more than half the plant so it will continue to grow for future harvests.- If you are not confident enough to grow your own sage, or if it is too late in the season to start a new plant, you can purchase a sage plant.
-
4Wait one day before you start wrapping your sage. Place your trimmings in a paper bag or on top of newspaper overnight. Make sure they are not left in plastic or out in sunlight because this can cause the sage to wilt or it could start to decompose.


Making the Smudge Stick
-
1Clip the sage into relatively same lengths. Remove any spotted or brown leaves. Arrange the leaves into bundles of the same lengths.
-
2Grab the string and tie a knot at the base of the stems of the leaves. Hold the bundle in one hand and wind the string up the bundle.
Once you reach the top, wind the string down the bundle creating a crisscross design. This helps hold all the leaves in place. Wrap the leaves as tightly as possible. Tie another knot at the bottom of the bundle. -
3Set the bundles inside somewhere where it is dark and dry. You can hang them on a drying line, or lay them flat to dry.
If you lay them down flat, it is better to put them on a screen to help airflow. It is also good to flip them over every day or so. Depending on how humid it is, it can take up to a few weeks


Using the Smudge Stick
-
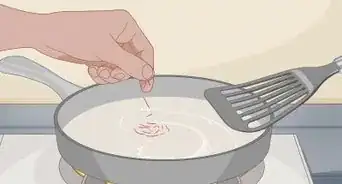
1Ensure the stick is dry. After the smudge sticks have dried, now they are ready to burn. Holding the stick at the base, use a match or lighter to ignite the top end of the smudge stick.
- Allow the sage to catch fire for a moment, and then carefully blow out the flame. Let the stick smolder and white smoke will start to travel upwards. Hold the sage over an ashtray or bowl to catch any fallen debris. Traditionally a shell is used for this purpose.
-
2Use the white smoke from the smudge stick to cleanse rooms, spaces or people. Gently wave the smoke from the smudge stick around the room where you want to clear the energy. The smoke will remove any negative energy left behind and leave a nice fragrance in the room.
The same process can be done on a person. Slowly moving the smoldering sage around the person’s feet, limbs and head to help cleanse the energy around them. -
3Fully extinguish the flame when you are finished cleansing an area. Press the smudge stick down to stifle the smoke completely. Try to avoid using water to put out the smudge stick because this can damage the stick for future use. Never leave burning sage unattended.


Community Q&A
-
QuestionWhat type of string should I use?
 ChrisTop AnswererYou can use normal string or twine to bind the smudge stick. As long as the string is made from natural materials, it's safe to burn.
 -
QuestionDoes it matter how thick the stems are?ChrisTop AnswererYou should try to keep all the stems a consistent length, so they all burn at the same rate. It doesn't matter too much how thick they are, so long as they aren't really thick and woody. The branches that have bark on them don't have as many essential oils in them, causing an unpleasant odor when burnt.
Things You'll Need
- Sage seeds or cuttings from a mature sage plant
- Clay pot
- Hand shovel
- Quality soil that will provide drainage
- Gardening clippers
- String or twine
- Newspaper


References
About This Article
If you want to make your own smudge stick, gather sage leaves and clip them so they’re all about the same length. Remove any brown or spotted leaves, then gather the healthy leaves into bundles. Wrap a piece of string around the base of the leaves and tie a knot to keep it in place. Once it’s secure, wind the string tightly up the bundle of leaves all the way to the end, then wrap it back down the bundle to create a crisscross design. Tie another knot at the bottom of the bundle, and hang the smudge stick to dry for several weeks. Read on to learn how to use your smudge stick!