This article was co-authored by wikiHow Staff. Our trained team of editors and researchers validate articles for accuracy and comprehensiveness. wikiHow's Content Management Team carefully monitors the work from our editorial staff to ensure that each article is backed by trusted research and meets our high quality standards.
The wikiHow Video Team also followed the article's instructions and verified that they work.
This article has been viewed 169,245 times.
Learn more...
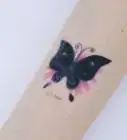
Temporary tattoos are a great way to see what a real tattoo will look like before getting one or for just having some fun and trying out a new look! You can use a pencil to create a simplistic, easy-to-remove, temporary tattoo. It won’t be great for drawing fine details and will fade fairly quickly, but it’s nonetheless something fun you can do with just a pencil, some warm water, and sprayable liquid bandage.
Steps
Tattooing Yourself
-
1Use rubbing alcohol to clean the area where the tattoo will go. Dip a cotton ball in rubbing alcohol and thoroughly wipe down your skin. This helps remove dirt and grease that might prevent the pencil from actually showing up on your skin. Let the rubbing alcohol air-dry completely before you start drawing.[1]
- You can blow on the rubbing alcohol to get it to dry faster, but don’t wipe it off.
-
2Opt for a pencil with a rounded tip rather than one that is sharp. A sharp tip won’t leave much of a mark, plus it could irritate your skin. Instead, pick a pencil that has been used and that hasn’t been sharpened recently so that the tip is more rounded. If all you have is sharp pencils, rub one on some paper until the tip is worn down a little bit.
- The larger the surface area of the lead, the easier it’ll be to draw on your skin.
Advertisement -
3Dip the tip of a pencil in warm water for 5 seconds to soften the lead. Get a cup and fill it with warm water from the sink. Take your pencil and put the tip into the water. You can use a regular #2 pencil or colored pencils, whichever you have on hand.[2]
- You’ll need to dip the pencil into the water several times, so don’t just run it under warm water. Use a cup to make the process easier on yourself.
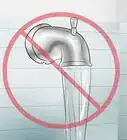
Warning: Don’t try to use a mechanical pencil to give yourself a temporary tattoo. The lead isn’t thick enough and it won’t work.
-
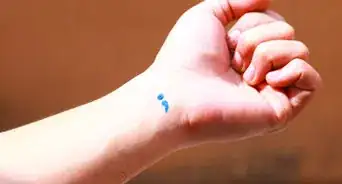
4Draw the design on your arm, dipping the pencil back into the water often. The first line you make will be barely visible, so you’ll need to go over each line of the image 10-15 times to make it stand out. Don’t press down too hard, because you don’t want to irritate your skin. Just keep wetting the pencil and retracing the drawing.[3]
- Wet the pencil when the tip looks dry.
-
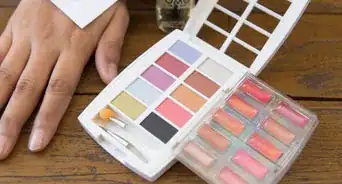
5Add color to your design by using colored pencils. You can use colored pencils to draw the design, or you could use them to simply fill in areas that have already been drawn. The color won’t be as vibrant as it would be on paper, so keep in mind that the ending result will look muted. Reds, greens, blues, and yellows are the most likely to show up on your skin. Use the same method of dipping the end into the water for the best results.[4]
- Just like with the regular pencil, you’ll need to retrace each section multiple times with the colored pencil to get it to show on your skin.
-
6Draw a design on tracing paper if you don’t want to draw it on yourself. For a temporary tattoo, you can usually just draw the design you want right onto your arm. But, if you want a design that’s a little more complicated, use tracing paper and a pencil. After the design is on the paper, place the paper design-side down on your arm. Wet the back of it with a damp washcloth or paper towel and hold it in place for 30 seconds. Carefully peel the paper away to reveal a faint outline of your design.[5]
- If your tattoo has text in it, flip the text so it’ll appear the right way once you put it on your body.
- You’ll need to go over the outline with the pencil several more times to get it to stand out, but you won’t have to worry about messing up the outline.
-
7Spray the tattoo with liquid bandage to help it last for longer. Once you’re done drawing the tattoo onto your skin, let it dry completely. After it has dried, spray liquid bandage over top of it—this will help protect it from getting smudged and will make it last much longer.[6]
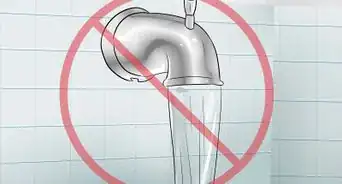
- On average, your pencil tattoo will last 2-3 days if you use liquid bandage. If you don’t, it’ll come off the next time you take a bath or shower. Avoid rubbing, touching, or scrubbing it to make it last as long as possible.
- If you don’t have liquid bandage, you could also use hairspray for the same effect.[7]
Tip: To remove the temporary tattoo, simply scrub it off with a cotton ball soaked in rubbing alcohol.


Choosing a Design
-
1Pick a place for your tattoo that you’ll be able to easily see. The most popular place for a temporary tattoo is somewhere on your arm so it’ll be easy to put on and enjoy. But, you could also put one on your ankle or the front of your shoulder. If you want one in a harder to reach place, like your back, you’ll need to ask a friend to help you.[8]
Tip: Keep in mind that your temporary tattoo will fade faster if it's covered or rubbing against something.
-
2Browse online and in-person to find a simple design that speaks to you. Magazines, books, artwork, and sites like Pinterest and Instagram are great places to find potential tattoo images. Look for designs that are fairly simple in nature, like a flower, arrows, or a word. Because you’ll be using a pencil, simple is better—you won’t be able to make a really detailed drawing on your skin.[9]
- Some other popular tattoo images and ideas are feathers, quotes, Bible verses, names, trees, abstract designs, animals, and images from books and movies.
- Keep in mind that you don’t have to copy an actual tattoo—you can be inspired by pretty much anything.
- Lots of tattoo shops have online galleries of different images you can choose from. They can be super fun to look through and pick out ideas from.
-
3Design your own image to create a one-of-a-kind temporary tattoo. If you want to express your artistic side, drawing your own tattoo is a nice way to ensure that no one else will have the same design. Take one of your favorite drawings and scale it down so it is tattoo-sized, or take some time to draw something completely new.
- Because you’ll be working with pencil, it’s best to make a design that doesn’t have too many thin or intricate lines, just because it’ll be harder to get those to show up on your skin.
-
4Practice drawing your design on paper before you tattoo yourself. For most temporary tattoos done with pencil, you’ll draw right on your skin, so it’s a great idea to practice your design ahead of time! Use scrap paper and a pencil to sketch out the design a few times until it looks exactly like how you imagined.[10]
- For pencil tattoos, you can also trace the image onto a piece of tracing paper and then transfer a light version of the tattoo onto your skin. You’ll still have to go over the tattoo in pencil more once it’s outlined on your skin, but it can be easier to do it this way if you’re worried about drawing directly on yourself.


Community Q&A
-
QuestionHow can I make a tattoo without drawing on my skin?
 Community AnswerYou can draw a design on a piece of paper with a marker. Then, you place the paper on your desired place for the tattoo and put a wet washcloth on top of it. Push down, and after a few minutes, take it off.
 -
QuestionHow long does the tattoo last?
 Community AnswerBoth the pencil and colored pencil tattoos will last until the next time you take a bath or shower. If you sealed the tattoo with hairspray or liquid bandage, it might last up to three days, as long as you don't rub it or scrub it.
 -
QuestionWill this method ruin my colored pencil?
 Community AnswerNo. You will need to let it dry for about 12 hours or overnight, but once it's dry, it will be back to normal. The warm water simply makes the pencil softer and brighter, and the color may smudge a little on the pencil, so until you sharpen it again it will look a little messy, but your colored pencil will be totally fine.
Things You’ll Need
- Temporary tattoo design
- Rubbing alcohol
- Cotton balls
- Pencil
- Colored pencils (optional)
- Cup of warm water
- Tracing paper (optional)
- Washcloth or paper towels (optional)
- Liquid bandage

References
- ↑ https://lifehacker.com/diy-temporary-tattoos-5945600
- ↑ https://youtu.be/wQA3iYF_j-M?t=76
- ↑ https://youtu.be/wQA3iYF_j-M?t=119
- ↑ https://youtu.be/wQA3iYF_j-M?t=100
- ↑ https://lifehacker.com/diy-temporary-tattoos-5945600
- ↑ https://lifehacker.com/diy-temporary-tattoos-5945600
- ↑ https://www.firstforwomen.com/posts/how-to-make-temporary-tattoos-165495
- ↑ https://www.bangbangbodyarts.com/blog-1http/2016/3/21/w30frjlsphq7a78pquier7p96letxa
- ↑ https://www.bangbangbodyarts.com/blog-1http/2016/3/21/w30frjlsphq7a78pquier7p96letxa
About This Article

To make a temporary tattoo, use a pencil with a rounded tip, or rub a sharp pencil on paper until the tip is worn down. Dip the tip of your pencil in warm water for 5 seconds to soften the lead. Then, draw your design onto your skin, dipping the pencil back in the water every few lines. You’ll need to go over each line 10-15 times to make it stand out and look like a real tattoo. If you have a more complicated design, draw it on a piece of tracing paper. Once you’ve finished your design, place the paper face-down on your skin and press a damp washcloth against it for 30 seconds to transfer the image. For more tips, including how to make your temporary tattoo last longer, read on!