wikiHow is a “wiki,” similar to Wikipedia, which means that many of our articles are co-written by multiple authors. To create this article, 17 people, some anonymous, worked to edit and improve it over time.
This article has been viewed 78,101 times.
Learn more...
Ever wanted to be Thor, the Norse God of thunder and war, for Halloween? Luckily, the Thor costume is very easy to make, and mostly requires items which can be found in any household. Whether it be Thor's hammer, his cape, or helmet, all three are fun to create. Soon you will look just like Thor for Halloween, and be able to join the other Avengers to take down the evil villains of the world!
Steps
Making Thor's Hammer
-
1Purchase a tissue box. The tissue box should be one of the long, full-sized boxes, rather than the smaller, square ones. Peel off the perforated top, but leave the tissues in the box. The tissues will give some weight to your hammer. Then, grab a paper towel roll. You can take the paper towels off an existing roll, or just wait until you have finished off a roll.[1]
- Note: you should only use tissue boxes that have an opening at the top, rather than an opening over the top and side.
-
2Secure the box and roll together. Place one of the ends of the paper towel roll into the top of the tissue box (the plastic covered opening). Take some duct tape and wrap it around where the roll meets the box. Wrap enough tape around so that the roll is secured to the box. Feel free to add some pieces of duct tape, laid across perpendicular to the existing tape.[2]Advertisement
-
3Tape the rest of the box and roll. Wrap the roll in duct tape in a circular motion, starting from the base to the top of the roll. Leave the opening at the top of the roll free of tape. Duct tape the tissue box as well, using long continuous pieces of tape. The goal is to get the box to look as smooth as possible. Make sure the entire box gets covered in tape.[3]
- Remember to use silver (or standard gray) duct tape for this part of the project, as the tape on the tissue box will show on the final product.
-
4Fill up your paper towel roll. Take some tinfoil and break it into small strips. Ball each of the small strips up, and place them down into the opening in the paper towel roll. Every time you get a few in, take the end of a spatula, or a long utensil, and shove it into the roll. Press the tinfoil down so that it is compacted. Remove your utensil, and continue to add more crumpled strips or tinfoil.[4]
- Do this until the entire roll is filled. Once you are done, take a strip of duct tape and place it over the opening so that the tinfoil does not fall out.
-
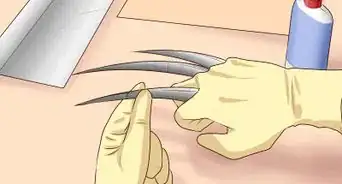
5Wrap your handle. Purchase a brown piece of construction paper. Lay a thin line of super glue down one of the short ends of the paper. Place that end against the handle, centered, so that there is equal space on both sides. Then wrap the piece of paper around the handle.[5]
- Once the entire piece is wrapped around, add another small layer of super glue to the short edge of the paper. Press it down against the handle with your hand until it is dry (about 1 minute).


Making Thor's Cape
-
1Pick out the correct fabric. Go to your nearest arts and crafts store to purchase a large piece of red flannel. The color red should be between pure red and maroon. Use a measuring tape to measure from your neckline to your feet. Also measure from outside one shoulder to the outside of the other shoulder. These two measurements will be the dimensions of your fabric.[6]
- You can either buy the flannel directly off the bar, or buy it prepackaged. If you buy it prepackaged, then you won't be able to buy the correct size. Make sure to buy a prepackaged piece of fabric that is larger than what you need so that you can cut it down to the correct size later on.
- While this section is dedicated to showing you how to make a cape, you can, if you want, substitute this step by buying a simple red apron or robe, and tying it to your neck backwards.
-
2Cut out a section of your fabric. Lay your flannel on a flat surface, free of other items, food, etc. At one of the short ends of the fabric, lay a ruler down. Find the middle of the short end (will vary depending on your individual dimensions) and make a pencil mark. On each side of this mark, measure 4 inches away along the edge. Make a mark at each of these two points.[7]
- Use scissors to cut into your fabric longways about 10 inches at each of the two 4 inch marks. You should now have a rectangular flap with only one side still left on. Cut this side off as well and throw away the rectangle.
-
3Make the medallions. Grab a piece of black felt. Take an empty, dry drinking cup and flip it upside down. Trace the rim of the cup against the black felt with a pencil. Do this twice so that you have two circles. Use a pair of scissors and cut each of these circles out of the felt.[8]
-
4Sew the cape and medallions together. Get out your sewing machine. You will want to use standard red thread for this project. Turn your cape so that the bright side you wish to show off is facing upright. Take one of your shoulder flaps, and place it halfway down one of the black felt circles. The middle edge of the strap should meet the middle of the felt circle. You can either pin them together, or hold them together tightly with your hands, as you apply a 1/2 inch inseam with your sewing machine.[9]
- Attach the second black felt circle to the other shoulder strap in the same way.
- You can also sew them together by hand. For more information on how to do this, visit How to Sew Blanket Stitch
-
5Finish your cape. All you have to do is to attach a safety pin to each of the black medallions. Then simply pull the cape around your shoulders, and slide each of the pins through your shirt to keep it from falling off.[10]


Making Thor's Helmet
-
1Grab a paper plate. Wrap a fabric tape measure around the edge of the plate. Hold it there, as you make a pencil mark every third of the way around. For example, if the total distance around the plate was 24 inches (61 cm), it would be best to make marks on the edge of the plate at the 8, 16, and 24 inch (61 cm) marks. Remove the tape measure, and draw a dot in the center of the paper plate.[11]
- Use a ruler to connect each of the outside edge marks to the center dot. Draw connecting lines with a pencil.
- Then, use a pair of scissors to cut out each of the three pieces. You will only need two pieces but leave the third piece aside in case you make a mistake later on.
-
2Measure and cut your wings. Place your two pieces together on a flat surface, as if they were the bottom two pieces of a plate. Use a fabric tape measure, and start measuring at the bottom corner where both plates meet. First, measure along the edge of the right piece, making a pencil mark at the 1 1/2, 3, and 4 1⁄2 inch (11.4 cm) marks. Flip your tape measure around to the other piece, once more starting to measure from the bottom corner where both pieces meet. Make a mark along the outside edge of the left piece at the 1 1/2, 3, 4 1/2 inch marks.[12]
- Between the 1 1/2 and 3 inch marks on both pieces, you will use a pair of scissors to cut out a triangle that is about 1 inch (3 cm) tall. The edge of the paper plate is the base of the triangle. It does not matter if it is perfect, but the edges you cut out should be straight, and fairly symmetrical between right and left pieces.
- Do the same thing in between the 3 and 4 1/2 inch marks on both pieces. However, instead of a 1 inch tall triangles, you will make these about 1 1⁄2 inch (3.8 cm) tall. Try to keep the edges of the triangle straight, and fairly symmetrical between right and left pieces.
-
3Measure and cut your headband. First, take a measuring tape, and wrap it around your head. Hold the end of the measuring tape down against your head, as you bring the other end around to meet it. Make sure it is sitting on your ears as you wrap it around. You will want to determine the circumference of your head in inches.[13]
- Add three inches to the circumference length. Take a ruler and measure out a rectangle on a piece of paper that is 2 inches wide X (circumference + 3 inches) long. For example, if the circumference is 10 inches, the dimensions of your rectangle would be 2X13 inches.
-
4Design your headband. Cut out a triangle from the middle part of the top edge of your rectangle. On the top long edge, make a pencil mark at the middle (use a ruler). Then make a pencil mark on each side of the middle mark, each 1 inch away. Use a pair of scissors to cut out an upside-down triangle 1 inch tall (the two 1 inch marks will be the distance of your base).[14]
- When you get done, you should have one long strip of paper, with an upside-down triangle cut out of it.
-
5Paint your headband and wings. Lay old newspapers down on a table, and place your three pieces (headband, two wings) on top of them. Get out a can of acrylic silver spray paint. Use slow, smooth strokes as you spray the paint. Wait about an hour for one side of the three pieces to dry before you flip them over and coat the other side.[15]
- It is important that you do this in a safe location. You do not want to spray paint around other people, and you do not want to spray paint in a contained room, like a garage. If the room you are painting in has windows or doors, open them up to get air circulation.
- You should also consider wearing a doctor's mask so that you don't breathe in the fumes. Wearing old t-shirts is also important so that you don't get paint on your nice clothes.
-
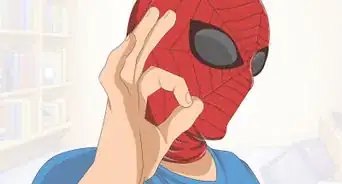
6Put your helmet together. First, place a small amount of super glue on the end of the headband. The glue should cover 3 inches at the end of the strip of paper. Curl the headband around, bringing both ends together. Press them together so that the glue binds them. Hold them for about a minute.[16]
- Place a small amount of super glue in the middle of each of the wings. Note that when you place your wings on the headband, the wings will curve inward. This means the glue goes on the sides of the pieces of paper plate where you would put food on.
- Position the headband so that the triangle is upside-down, and in front. The cut out triangles of the wings are positioned low, while the uncut part of the wings are positioned high.
- Press each wing onto each side of the headband. Hold them there for about a minute so that the glue has time to dry.


Finalizing Your Costume
-
1Pick out appropriate clothes to wear. You will want to find a pair of black boots. These could be work boots, or ones you find at a costume shop. The closer the boot rises to the knee, the better. A pair of dark blue or black pants should also be worn with your costume. Leather works best, however you can also wear a dark pair of jeans.
-
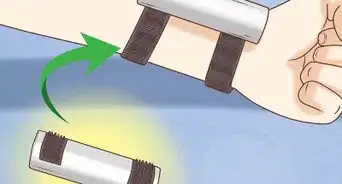
2Use accessories to compliment your costume. Look for stores which sell tights for your arms. You will want a silver pair which will cover your forearm areas, up to your shoulders. If you can only find standard colors, you can always spray paint the tights a silver color. Leggings can also be substituted for arm tights. You simply have to cut the feet out of them so your hands can slide through.
- Any silver medallions (broaches) you own should be pinned to your chest area. It is best to keep the medallions symmetrical, so make sure you have two, one for each side of your chest. These medallions should also be round.
-
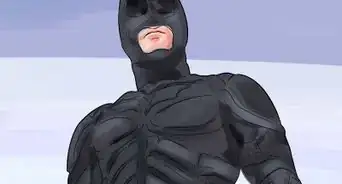
3Style your hair. Thor has longer hair, down to the shoulder. If you do not have long hair already, it is best to go purchase a wig (blonde for the movie Thor version). If you have long hair, simply apply a gel to your hair. Then take a comb and work it back and down. Thor's hair looks perfectly combed and lays flat against the shoulder and back area.


Community Q&A
-
QuestionWhat should I wear for Thor's shirt?
 Community AnswerWear a grey shirt (or a grey leather jacket if you can find one) and paint/sew/pin on silver dots/buttons.
 -
QuestionI have a slight confident issue wearing a wig, especially Thor's, any advice?Community AnswerYou can always go new-brand of Thor and shave your head to nearly a jar-head level. You could braid yarn to look like the traditional Thor braids from the Lee original design. You could also shop around and find a helmet beanie that has yarn already braided to look like the hair.
-
QuestionHow do I make Thor's StormBreaker?
 Community AnswerYou can try using cardboard and spray paint. Look at a picture online for reference.
Warnings
- Be careful when you are using scissors. Keep them away from children when you are not using them.⧼thumbs_response⧽
- Try not to get super glue on your hands. If you feel more comfortable, wear a pair of gloves when you apply the super glue.⧼thumbs_response⧽


References
- ↑ http://rebeccaautry.com/thor-hammer-diy/
- ↑ http://rebeccaautry.com/thor-hammer-diy/
- ↑ http://rebeccaautry.com/thor-hammer-diy/
- ↑ http://rebeccaautry.com/thor-hammer-diy/
- ↑ http://rebeccaautry.com/thor-hammer-diy/
- ↑ http://thewoodlandelf.com/thor-costume-tutorial-part-3/
- ↑ http://thewoodlandelf.com/thor-costume-tutorial-part-3/
- ↑ http://thewoodlandelf.com/thor-costume-tutorial-part-3/
- ↑ http://thewoodlandelf.com/thor-costume-tutorial-part-3/
- ↑ http://www.wisegeek.org/what-are-the-different-types-of-sewing-pins.htm
- ↑ http://www.craftsonsea.co.uk/paper-plate-thor-helmet-diy/
- ↑ http://www.craftsonsea.co.uk/paper-plate-thor-helmet-diy/
- ↑ http://www.craftsonsea.co.uk/paper-plate-thor-helmet-diy/
- ↑ http://www.craftsonsea.co.uk/paper-plate-thor-helmet-diy/
- ↑ http://www.craftsonsea.co.uk/paper-plate-thor-helmet-diy/
- ↑ http://www.craftsonsea.co.uk/paper-plate-thor-helmet-diy/
About This Article
To make a Thor costume, make Thor's hammer by taping a tissue box and an empty paper towel roll together with silver or gray duct tape. Next, cut Thor's cape out of red flannel material and attach circular medallions made out of black felt to the shoulders. Then, build Thor's helmet out of a paper plate, glue, and silver spray paint. Finally, buy a long, blonde wig and combine all of your pieces to complete your costume! To learn how to make Thor's helmet out of a paper plate, read on!