This article was co-authored by wikiHow Staff. Our trained team of editors and researchers validate articles for accuracy and comprehensiveness. wikiHow's Content Management Team carefully monitors the work from our editorial staff to ensure that each article is backed by trusted research and meets our high quality standards.
This article has been viewed 207,267 times.
Learn more...
Water wheels harness moving water to rotate and have been used by people for centuries to generate power to do things like saw wood and grind grain into flour. You can demonstrate the power and the mechanics of a water wheel by making your own! With just a few simple items and a little bit of crafting, you can form a working water wheel.
Steps
Using Plastic Spoons
-
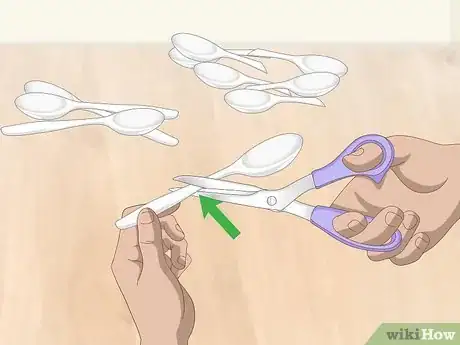
1Use scissors to cut 10 plastic spoons in half at an angle. The spoons will serve as the paddles that actually turn the wheel when water passes over them. Cut 10 spoons in half of the handle length and try to get them to be as even as possible. Make your cut at a slight angle so the spoons can be inserted into the styrofoam easier.[1]
- Plastic spoons can be hard to cut, so ask for help if you need it. Be careful cutting the plastic spoons as the pieces can fly off when you cut them.
-
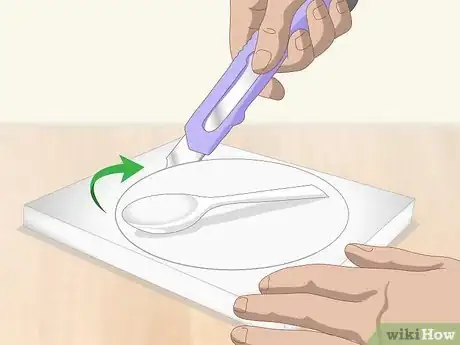
2Cut a circle with a diameter equal to the length of a spoon. Lay one of the spoons you cut down on the styrofoam and draw a circle around it so the diameter of the circle is about as wide as your spoons. Use a utility knife to cut the circle out of the styrofoam taking care not to let the knife slip and cut yourself.[2]
- Check the diameter around the circle to make sure it’s even.
- The sheet of styrofoam should be at least 2 inches (5.1 cm) thick.
- Place the styrofoam on a surface that you don’t mind cutting, like cardboard or a cutting block, in case the utility knife cuts through the styrofoam.
Advertisement -
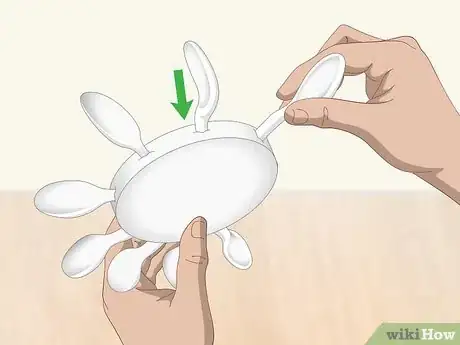
3Insert the spoons into the outside edge of the styrofoam. Push the cut edge of the spoons you cut into the styrofoam until about 1 inch (2.5 cm) of the handle and the bowl of the spoon are exposed. The bowl of the spoon should face the side of the styrofoam, not the front or back. Make sure the spoons are all facing the same direction and are evenly spaced out so they can catch the water that will turn the wheel.[3]
Tip: If your spoons keep slipping out of the styrofoam, place a little bit of glue into the slot created by the spoon and then insert the spoon to secure it in place.
-
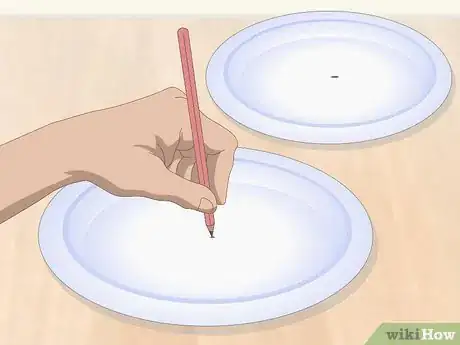
4Use a pencil to mark the center of 2 paper plates and your foam circle. It’s important that your skewer goes through the center of your wheel to ensure that it turns properly. Take a ruler and draw a vertical line through the center of the plate, then draw a horizontal line through the center of your plates and the foam circle. Mark the center of the plate and foam disc with a dot.[4]
- Use standard 9 in (23 cm) paper plates.
-
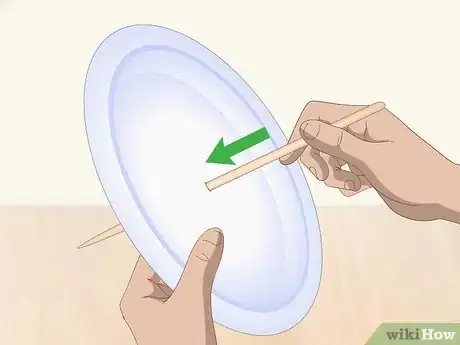
5Make a hole in the center with a wooden skewer. Once you’ve found your center points, use a skewer to make a hole by pushing it through the center of the plates and the foam. Push the skewer through them one at a time so it penetrates them easier. This will make the perfect size hole.[5]
- It may take some effort to push the skewer through the styrofoam and plates. But be careful not to place your hand over the center of the plates and styrofoam to avoid poking yourself with the skewer.
-
6Glue the plates to the sides of the foam disk. The 2 paper plates will serve to stabilize the foam disk and the spoons. Apply glue to the sides of the foam disk, around the area of the hole in the center, and attach the plates to the disk one at a time, lining up the holes in the center so the skewer will be able to slide through the entire piece.[6]
- Allow the glue to dry for at least 1 hour before you move on so the glue is completely set.
-
7Push the skewer through the center of the wheel. After the glue has dried, you can insert the wooden skewer. The skewer will serve as your dowel rod and will allow the wheel to turn when water passes over the spoons. Make sure the skewer is secure in the wheel because if it’s too loose, the wheel won’t turn.
- You can place a dab of glue at the hole where the skewer goes through to anchor it into the plate and styrofoam.[7]
-
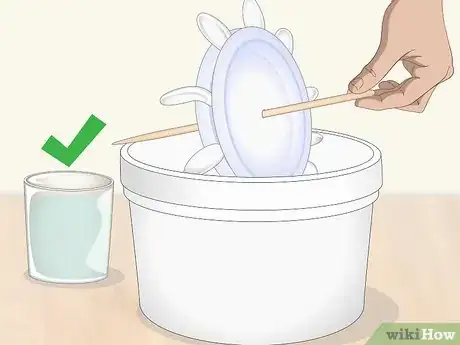
8Set your wheel on a bucket and fill a glass with water. With your wheel complete, place it on a bucket by resting the skewer on the mouth of the bucket. Place the wheel so it rests securely and won’t fall off or into the bucket when you pour water over it by having about 1 inch (2.5 cm) of the skewer hanging over the mouth of the bucket on each side. Fill a glass of water to use to test your wheel.[8]
-
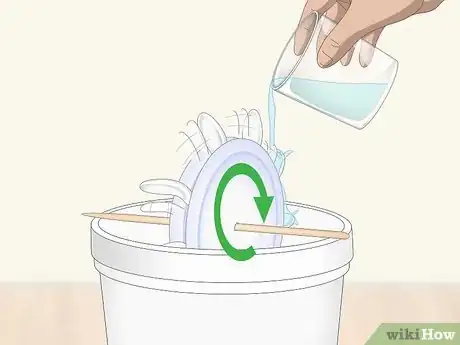
9Slowly pour the water onto the spoons to turn the wheel. Take your glass and bring it to the side of the wheel where the bowl of the spoons are facing up and slowly start to pour the water so that the spoons catch it. This will cause the wheel to turn and it should continue to spin as long as you keep pour water over it.[9]
- Play around with making the wheel spin faster or slower by pouring more or less water over the spoons to alter the speed.
Making a Water Wheel with Cups
-
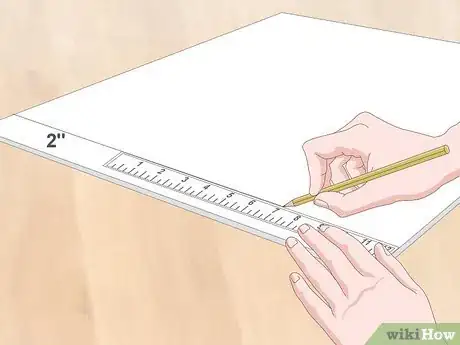
1Use a ruler to make a straight line 2 inches (5.1 cm) from the edge of the foam board. You’ll need a straight and narrow strip of foam board to form the paddles of your water wheel. Use a ruler to measure and to make a straight line down the length of the board to form a 2 in (5.1 cm) wide strip.[10]
- The foam board should be a minimum of 24 inches (61 cm) long and 3⁄16 inch (0.48 cm) thick.
-
2Cut the strip off of the board using a utility knife. After you’ve traced the straight line down the board, take a utility knife and use your ruler as a guide to cut the foam board where you measured your line. It may take more than one pass to cut all the way through the board. Run the blade of the knife through the line you cut until it penetrates the other side of the board.[11]
- You may want to place cardboard beneath the foam board or cut on a surface that you don’t mind cutting in case the knife cuts through the board.
-
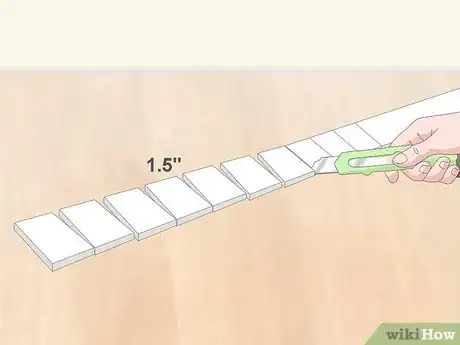
3Divide the strip into 10 sections measuring 1.5 inches (3.8 cm) to make your paddles. Take the strip you cut off and measure 1.5 in (3.8 cm) sections with your ruler, marking the sections clearly with a pencil. You may not use the entire strip, but you will need 10 even and uniform sections. Cut the sections out of the strip with a utility knife.[12]
-
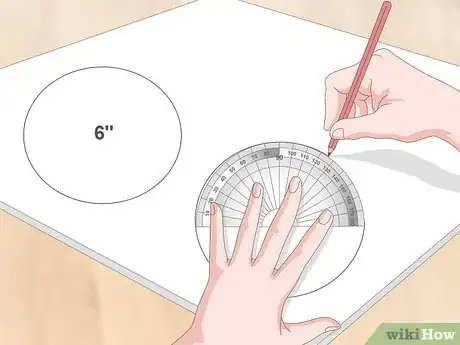
4Use a compass to measure 2 circles that are 6 inches (15 cm) in diameter. Place a protractor on your foam board and measure a circle that is 6 inches (15 cm) in diameter, then measure another circle of the same size in the foam board. Keep the point of the protractor in place as you swivel it around to form an even circle.[13]
-
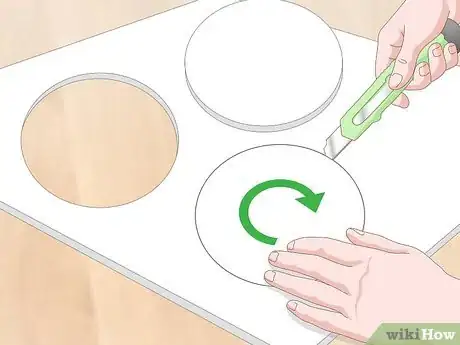
5Use your utility knife to cut out the circles. Take your time and make light cuts into the circle pattern. The light cuts will guide the blade of your knife to help you punch through the foam board. Follow the edge of the circular pieces carefully to keep the rounded shape of the circles and so that circles are of the same size and shape.[14]
-
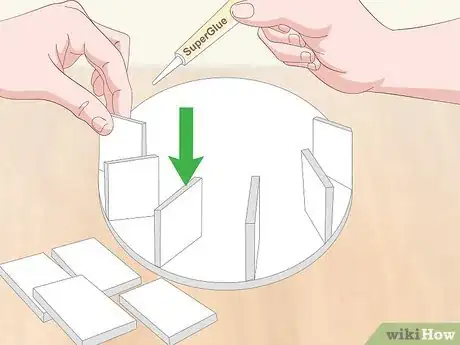
6Glue the paddles to one of the wheels at an angle. Take the 1.5 in (3.8 cm) by 2 in (5.1 cm) paddles that you cut out and glue them to the wheel with the shorter side down. Apply fast-drying super glue to the edge of the 1.5 in (3.8 cm) side of the paddles and press the glue side down to the wheel. Arrange the paddles slightly at an angle toward the center of the wheel.[15]
- Make sure all of the paddles are facing the same direction!
-
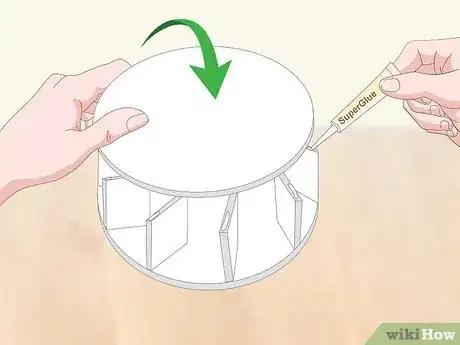
7Attach the other wheel to the paddles and allow the glue to dry. Once you’ve glued all of the paddles to one of the wheels, apply glue to the edge of the paddles that is face up, making sure you cover the edge evenly with glue. Then take the other foam board wheel and gently press it to the glue to attach it. Allow the glue to dry for at least 1 hour.[16]
- Check that the glue is dry by pressing against the sides to make sure they don’t wobble.
-
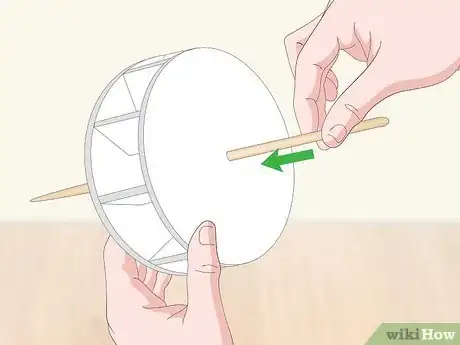
8Push a skewer through the center of the wheel. Once the wheel has completely dried, carefully press the sharp end of a skewer through the center of the wheel on one side and push it until it penetrates through the other side of the wheel. Be careful not to crush the wheel as you push the skewer.[17]
- It can help to rotate the skewer as you press to push it through the board.
Tip: If you’re having trouble getting the skewer to fit through, you can make a small cut with your utility knife to help the skewer pierce the foam board.
-
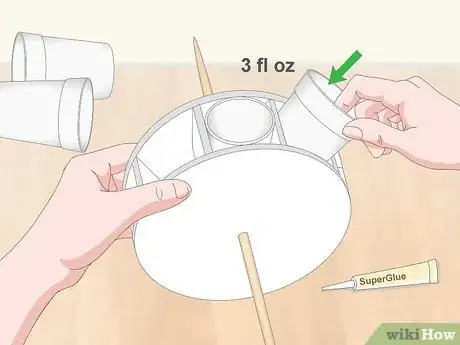
9Secure 3 fl oz (89 mL) drinking cups to the paddles with glue. Once the glue around the paddles has completely dried, take your small drinking cups and apply glue to the bottom of them. Then attach them to the acute angle of the paddles so they can catch the water when it’s poured over the wheel. Allow the glue to dry for 1 hour before moving on.[18]
-
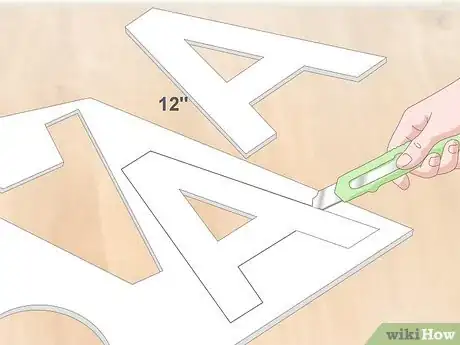
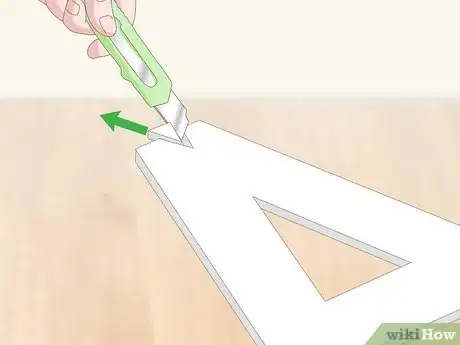
10Trace and cut out 2 “A” shaped frames 12 inches (30 cm) tall. To create the stand for your wheel, cut a 12 in (30 cm) tall frame in the shape of an A out of your foam board. Trace the shape first using a ruler and pencil for even and straight lines, then use your utility knife to cut out the shape.[19]
- Take the first “A” frame and use it to trace your second frame so they are the same size.
-
11Carve out a “V” shaped knock out of the top of the “A” frames. At the top of the “A,” trace a 1⁄2 inch (1.3 cm) “V” shape, then use your utility knife to cut out the shape. This will serve as a nock for you to rest the skewer on and allow your wheel to turn when water is poured over the cups.[20]
-
12Cut out 4 rectangular 4 in (10 cm) by 6 in (15 cm) pieces. To support the frame so the wheel can stand upright, you need to cut out rectangular pieces to serve as a stand for the frame. Measure 4 in (10 cm) by 6 in (15 cm) rectangles using your ruler and pencil to make sure the lines are straight and even.[21]
-
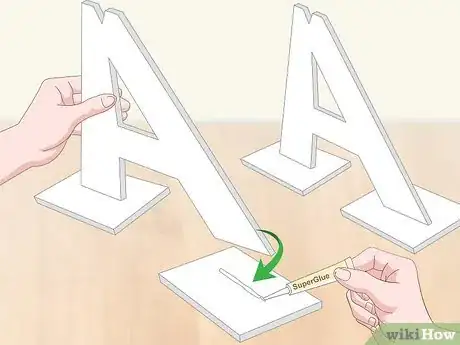
13Attach the legs to the “A” frames with glue to form a stand. Apply glue to the bottom legs of the frames and press each of them into the center of one of the rectangles. Hold them there for a moment to let the super glue adhere the 2 pieces before you do the next one.[22]
- Let the glue dry for another hour before you do anything else so the stand is sturdy and secure.
-
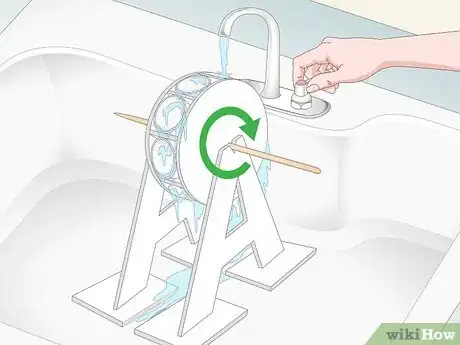
14Place your water wheel in a sink and turn on the faucet. Once all of the glue has dried, place the wheel on the stand by resting the skewer into the nocks you cut out of the top of the frame. Then place your water wheel into a sink, beneath the faucet. Slowly turn on the faucet and let the water land in the cups to turn the wheel.[23]
- Adjust the flow of the faucet to speed up or slow down the spinning wheel.
Community Q&A
-
QuestionWhat are the materials needed for creating the water wheel?
 Community Answer15 x 20 inch (38.1 x 50.8 cm) waxed corrugated cardboard or foam board, box cutters, protractor, pen or pencil, ruler, pins or a hot glue gun, wooden skewer, miniature bucket and string.
 -
QuestionWhat is a water wheel used for?
 Community AnswerIt's used for getting the energy of free-falling water and using that energy to power different things.
 -
QuestionCan primary kids use this?
 Community AnswerYes, but make sure they have adult supervision and help.
Things You’ll Need
Using Plastic Spoons
- Plastic spoons
- Utility knife
- Scissors
- Styrofoam
- Standard 9 in (23 cm) paper plates
- Fast-drying super glue
- Wooden skewers
- Ruler
- Pencil
- Bucket
Making a Water Wheel with Cups
- Protractor
- Foam board
- Utility knife
- Fast-drying super glue
- 3 fl oz (89 mL) drinking cups
- Ruler
- Pencil
References
- ↑ https://www.youtube.com/watch?v=rLEeia73qlY
- ↑ https://renewableteacher.wordpress.com/2009/12/10/model-hydroelectric-generator/
- ↑ https://renewableteacher.wordpress.com/2009/12/10/model-hydroelectric-generator/
- ↑ https://renewableteacher.wordpress.com/2009/12/10/model-hydroelectric-generator/
- ↑ https://renewableteacher.wordpress.com/2009/12/10/model-hydroelectric-generator/
- ↑ http://www.learningismessy.com/cooperative-learning/waterwheel-challenge/
- ↑ http://www.learningismessy.com/cooperative-learning/waterwheel-challenge/
- ↑ http://www.learningismessy.com/cooperative-learning/waterwheel-challenge/
- ↑ http://www.learningismessy.com/cooperative-learning/waterwheel-challenge/
- ↑ https://learning-center.homesciencetools.com/article/how-to-make-a-water-wheel-science-project/
- ↑ https://learning-center.homesciencetools.com/article/how-to-make-a-water-wheel-science-project/
- ↑ https://learning-center.homesciencetools.com/article/how-to-make-a-water-wheel-science-project/
- ↑ https://prod-media.coolaustralia.org/wp-content/uploads/2018/06/06194305/How-to-make-a-water-wheel.pdf
- ↑ https://prod-media.coolaustralia.org/wp-content/uploads/2018/06/06194305/How-to-make-a-water-wheel.pdf
- ↑ https://learning-center.homesciencetools.com/article/how-to-make-a-water-wheel-science-project/
- ↑ https://learning-center.homesciencetools.com/article/how-to-make-a-water-wheel-science-project/
- ↑ https://prod-media.coolaustralia.org/wp-content/uploads/2018/06/06194305/How-to-make-a-water-wheel.pdf
- ↑ https://prod-media.coolaustralia.org/wp-content/uploads/2018/06/06194305/How-to-make-a-water-wheel.pdf
- ↑ https://learning-center.homesciencetools.com/article/how-to-make-a-water-wheel-science-project/
- ↑ https://learning-center.homesciencetools.com/article/how-to-make-a-water-wheel-science-project/
- ↑ https://learning-center.homesciencetools.com/article/how-to-make-a-water-wheel-science-project/
- ↑ https://learning-center.homesciencetools.com/article/how-to-make-a-water-wheel-science-project/
- ↑ https://prod-media.coolaustralia.org/wp-content/uploads/2018/06/06194305/How-to-make-a-water-wheel.pdf
About This Article
To make a water wheel with plastic spoons, start by cutting 10 plastic spoons in half at an angle. Next, lay one of the cut spoons on a piece of styrofoam, draw a circle around it, and cut the circle out of the styrofoam. After that, push the edges of each cut spoon into the sides of styrofoam with 1 inch of the handle and the bowl of each spoon exposed. Then, make a hole in the center of 2 paper plates with a wooden skewer and glue the plates to the sides of the styrofoam. Push the skewer through the center of the wheel, place the wheel on a bucket, and slowly pour water onto the spoons to turn the wheel. For tips on making a water wheel with cups, read on!
