wikiHow is a “wiki,” similar to Wikipedia, which means that many of our articles are co-written by multiple authors. To create this article, 11 people, some anonymous, worked to edit and improve it over time.
There are 11 references cited in this article, which can be found at the bottom of the page.
This article has been viewed 112,447 times.
Learn more...
There is nothing like an outdoor shower on a hot day. Whether you just want to rinse off before entering the house or want to enjoy a nice shower under the stars, everyone can love an outdoor shower. Also, since they come in so many varieties and styles, they are easy to adapt and build as long as you plan ahead and study up on some basic plumbing.
Steps
Building a Working Showerhead
-
1Choose a location with easy access to a hose or water source for your shower. The most important part of an outdoor shower, of course, is the shower itself. While almost everyone wants an enclosure and/or floor to shower on. those looking for a simple rinse-off can simply install their outdoor shower head, run water to it, and call it a day. There are two ways to run water to your shower:
- Using a garden hose and an outdoor water source, such as a lake or garden hose spigot.
- Attaching your shower to the side of the house and tapping into the internal plumbing. Because this method is extremely difficult without experience and serious tools, this article will focus on the prior method.[1]
-
2Sketch out the rough design of your finished shower before getting to work. You need to know how all of your pieces -- showerhead, floor, and walls -- fit together before you get building. You do not, for example, want to build the shower head and then realize that you cannot fit a floor around it. Go online and check out some examples, or draft up your own. You can even buy kits of pre-cut wood and flooring that are made for outdoor showers online if you want a simpler project.[2]Advertisement
-
3Gather your supplies. Again, there are a lot of different ways that you could build your outdoor shower, but this common list of supplies will be needed for the vast majority of projects and designs. You should have:
- A garden hose that can reach your shower from the water source.
- Three pieces of 1/2" thick galvanized piping.
- Two pieces 36" long.
- One piece 8" long
- Appropriate garden hose to pipe adapter joints.
- 2 1/2" elbow joints
- A ball valve or gate faucet and adapter to fit into your piping.
- A rain-shower head.
- C-shaped hangers or plumbing ties hold your pipe upright.
- Plumbing tape.[3] [4]
-
4Attach your garden hose to your water source. Again, there are a few ways to pull this off. The most common way is to screw the hose into an outdoor spigot, allowing you to turn the water on and off with ease. You will then attach your hose to the end of the piping.
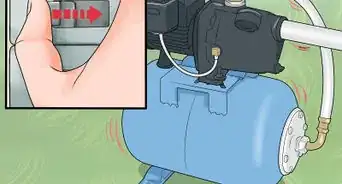
- If you want to use a lake or pond to power your shower, you'll need an inline utility pump and a car or marine battery to pull water from the lake to your shower. A 12V self-priming pump is your best bet.[5]
-
5Attach and build your piping into the shower plumbing. Use the joints to screw the piping together into one length, placing your ball valve/gate faucet in the center -- this will be your on/off switch. If you've never done plumbing before, don't worry too much about this project -- it is about as simple as it can get. Some tips include:
- Place two elbow joints at the ends, each facing different directions. One is for your shower head, the other for the garden hose.
- Be sure to seal each joint with nylon plumber's tape to prevent leakage, wrapping each joint 4-6 times.[6]
- Don't attach the hose or shower head just yet -- wait until you've finished the plumbing and attached the rods.[7]
-
6Construct and place your shower post. If you're building a free-standing shower that isn't attached to your house, you'll need a way to hold the shower up. The most common way to do this is with a post. Use pressure-treated wood, purchasing a post that is roughly 8 feet tall. It can be either square or rounded -- just make sure your get the appropriate brackets for your post. If in any doubt, talk to a specialist at your home improvement store about your specific project. Once you have your post:
- Dig a post hole at least 1-1/2 feet deep and three times as wide as your post.
- Firmly implant the post in the ground.
- Mix a 5lb bag of fast-setting concrete and pour it into the hole to set the post.
- Wait 24-hours for the concrete to set.[8]
-
7Attach your piping to the post once the concrete has dried. The most common way to do this is with c-shaped pipe hangers, and you should only need two of them. Adhere one near the top and one near the bottom to securely fasten the piping to your shower post. You could also use 4-6 pipe straps to hold the piping on.
- Make sure that your elbow joints point the right way before continuing -- you need the top one to face into the shower and the bottom one needs to turn enough that you can fit the garden hose onto it.
-
8Attach your garden hose to the bottom of the pipe. For a more attractive design, you can drill a 1/2 hole into the bottom of the post, even with the bottom elbow joint. You can then feed the 8" galvanized pipe through the post, allowing you to attach the garden hose behind the shower post instead of to the side.
- You'll likely need an adapter to fit the hose to your piping. This is called a "hose coupler."[9]
-
9Attach the showerhead and shower arm to the top of your pipe. Once the entire array is hooked up, it's time to attach the shower head. Attach the shower arm to the top of the pipe, angle it to your desired location, then screw in the shower head. Turn on the water at the faucet and give the entire thing a test.
-
10Consider alternate methods of holding up your shower. There are tons of great DIY shower ideas on the internet, and you should do some exploring to see if you can get away with a less conventional set-up for your outdoor shower. Some ideas include:
- Attaching the shower head to a wooden fence, tree, or other already created post.
- Attaching the head to an overhang or wall with a simple bracket or wooden board.
- Attach the head to something decorative, like an old surfboard, for a unique look.[10]


Building Floors and Walls
-
1Consider how much drainage you'll need when constructing the floor and walls. If you're only running cold water to your shower, chances are good you won't be spending hours getting wet. As such, drainage should not be a major concern. Still, you need some layer between your feet and the ground, otherwise you'll end up with dirty, muddy feet after every shower.
-
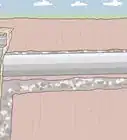
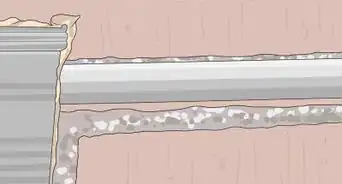
2Tramp down a thick layer of gravel for easy, cost-effective flooring. Gravel is by far the most common bottom for outdoor showers. It is easy to install, looks good, and naturally drains away water if you take shorter showers. You can buy gravel, river pebbles, or small stone mixes depending on your aesthetic desires. To effectively install a gravel floor:
- Smooth out the flooring the best you can.
- Lay down your stones around the shower. For a more professional look, use half-buried 2x4s to create a simple enclosure around your shower that will hold the gravel in.
- Use a tamper to press the gravel tightly together, leaving you with a smooth, regular floor.[11]
-
3Build a simple wood floor for a professional looking shower. You'll need one 8-foot 4x4" piece of wood and one 8-foot 1x4" piece, both pressure treated. You'll use the first piece to build a square base for your floor, and the second piece to put together the drainable flooring. For a cheap, pre-made alternative, consider using a wooden pallet.[12]
- Cut one of the 4x4's into 4 even pieces, then screw them together into a simple square frame.
- Cut a 1x4" into 7 individual pieces, each 26-1/2" long.
- Place your 7 pieces onto your board starting on the edge, each piece parallel to the next. Leave a 1/4" space between each board for water to drain through.
- Screw the floorboards into the wooden frame.[13]
-
4Use plywood or corrugated metal sheets with wooden posts for a simple, customizable wall. The easiest way to make a shower wall is to set up four more posts (identical to the one holding up your piping) in the ground, then nail plywood sheets to the posts as walls. You can then attach decorative shingles, paint or stain the plywood, or add a door/curtain instead of wood for one of the sides.[14]
-
5Purchase pre-built outdoor shower walls for a professional, easy finish. You can get a set of outdoor shower walls from a variety of places, and there are a lot of different sets out there that can make your life much easier. However, these sets can run up to $1,000, so it may be more cost-effective to build your own walls instead.[15]
-
6Use a curved shower curtain to build an easy wall around your shower. This strategy, of course, only works if your shower is attached to a wall or fence. That said, a simple curved shower rod can cover up the other 3 sides and leave you an easy, breezy outdoor shower experience.
-
7Stain and finish any wood so that it is waterproof. An outdoor shower will be up against the elements, and regular water will warp and ruin wood if you don't take precautions. Use an outdoor sealant and finisher to protect your shower for years to come.[16]


Warnings
- Test the sturdiness of your posts with gentle pressure before getting in the shower, especially if you've never set posts before.⧼thumbs_response⧽


References
- ↑ http://www.diynetwork.com/how-to/skills-and-know-how/plumbing/how-to-build-an-outdoor-shower
- ↑ http://www.nytimes.com/interactive/2014/08/14/garden/14Pragmatist-Interactive-copy.html
- ↑ http://www.sunset.com/home/outdoor-living/how-to-make-an-outdoor-shower
- ↑ http://www.bobvila.com/articles/2486-how-to-make-an-outdoor-shower/#.ViZ5rys4nEY
- ↑ http://brojects.tv/projects/ultimate-outdoor-shower/3/#step
- ↑ http://www.ebay.com/gds/How-to-Use-Plumbers-Tape-/10000000177771488/g.html
- ↑ http://www.sunset.com/home/outdoor-living/how-to-make-an-outdoor-shower
- ↑ http://www.nytimes.com/interactive/2014/08/14/garden/14Pragmatist-Interactive-copy.html
- ↑ http://www.bobvila.com/articles/2486-how-to-make-an-outdoor-shower/#.ViZ5rys4nEY
- ↑ http://www.apieceofrainbow.com/diy-outdoor-shower/
- ↑ http://www.nytimes.com/2014/08/14/garden/building-an-outdoor-shower.html?_r=0
- ↑ http://www.apieceofrainbow.com/diy-outdoor-shower/
- ↑ http://www.bobvila.com/articles/2486-how-to-make-an-outdoor-shower/#.ViZ5rys4nEY
- ↑ http://brojects.tv/projects/ultimate-outdoor-shower/4/#step
- ↑ http://www.nytimes.com/interactive/2014/08/14/garden/14Pragmatist-Interactive-copy.html
- ↑ http://www.bobvila.com/articles/2486-how-to-make-an-outdoor-shower/#.ViZ5rys4nEY
About This Article
To build an outdoor shower, start by attaching a garden hose to a water source, such as an outdoor spigot. Next, attach piping to the hose with a gate valve in the center. Then, secure a post in the ground with concrete, and attach your piping to it. Additionally, connect your shower head to the top of the piping. Finally, put down a layer of gravel for flooring, which will stop your feet getting dirty in the shower. For tips on how to build a wooden floor and walls for your shower, keep reading!