This article was co-authored by wikiHow Staff. Our trained team of editors and researchers validate articles for accuracy and comprehensiveness. wikiHow's Content Management Team carefully monitors the work from our editorial staff to ensure that each article is backed by trusted research and meets our high quality standards.
wikiHow marks an article as reader-approved once it receives enough positive feedback. In this case, 90% of readers who voted found the article helpful, earning it our reader-approved status.
This article has been viewed 67,780 times.
Learn more...
A worm habitat is a great place to keep your pet worms, and unlike a worm farm, it will allow your worms to thrive and live a long lifespan. Worm habitats are relatively simple to make, but will take a little bit of preparation. Once you've set it all up and have introduced the worms to their new home, they'll be wriggling around and munching dirt as if they never left the garden!
Steps
Setting Up the Container
-
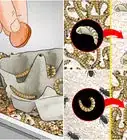
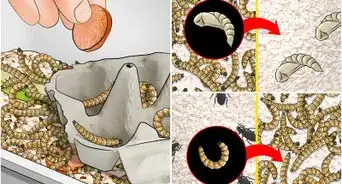
1Pick out a small plastic or glass container to keep the worms in. An aquarium, a bug container, a large glass jar or even a plastic bottle will do the trick—choose one that will comfortably house your worms, and deep enough that they will have room to burrow into the soil. If you will have just a few worms, a jar or bottle will be comfortable enough, but if you plan on having more than 3 you should consider a glass aquarium or plastic tank.
- Plastic or glass containers are the best options as they will contain the dirt effectively and keep moisture and heat inside the habitat.
- Don't use a cage or a container with openings on the sides, as it will be harder to keep the soil moist.
-
2Alternate 1 in (2.5 cm) layers of sand and soil until you fill the container. Start with a layer of sand on the bottom, then add soil on top of that, and keep alternating sand and soil until the container is full — the top layer should be soil. Leave at least 3 in (7.6 cm) free at the top so you have room to feed your worms.[1]
- Opt for potter's soil or nutrient-rich soil instead of dry dirt, as it is healthier for worms.
- Worms need dirt to burrow, and sand will keep moisture trapped inside the soil.
Advertisement -
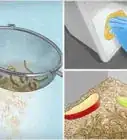
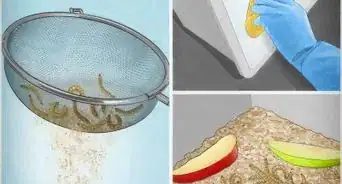
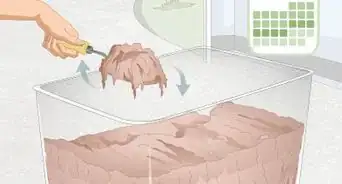
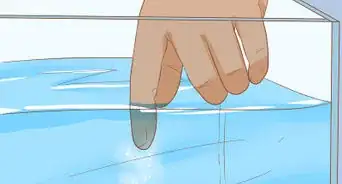
3Water the soil heavily, and spray the inside of the container with water. Soil needs to be moist for worms to take an interest in it. Add enough water to make the soil thoroughly moist, and then spray the top of the container with water to keep the container's atmosphere humid.
- Having a moist environment is essential, as worms need to keep their skin hydrated to thrive.
-
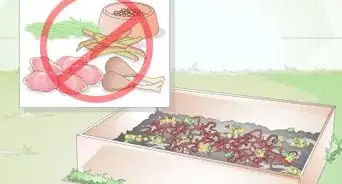
4Drop food, such as fruit peels and veggie scraps, on top of the soil. Worms are notorious for eating a huge variety of foods. Start off with fruit peels, vegetable scraps, tea bags, coffee grinds, and other food waste or leftovers, and over time you can give them more foods you would normally throw away.[2] Other great options include dry leaves, used napkins, and tea bags.
- Worms will eat just about anything you give them, but it is recommended to start with fruit and veggie scraps to enrich the soil with the worms' excrement.
- Avoid giving your worms anything non-organic, such as metal and plastic, greasy foods, and avoid giving your worms acidic fruits such as pineapple or orange flesh, and never give your worms feces. These can raise the pH of the soil, and can cause temperature issues due to rotting.[3]
-
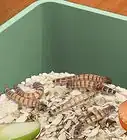
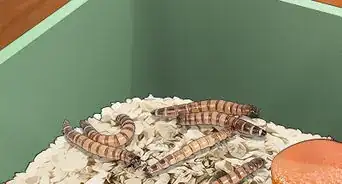
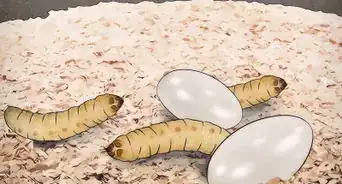
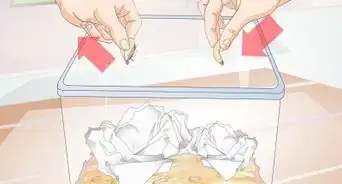
5Introduce the worms and cover the container with a porous lid. Gently drop the worms into the soil and watch them bury underneath the surface layer. Put the lid on the container, making sure that there are air holes for ventilation. Avoid using a cage or container with holes in the side, but it is essential that there is some ventilation on the top or your worms could suffocate with time.[4]
- Plastic and glass animal containers will usually come with a cover with holes on top. For habitats in bottles or jars, cut a few small holes in the top lid to provide fresh air.
-
6Store the habitat in a dark place away from sunlight. Worms hate sunlight and choose to live in dark and cool areas rather than bright and warm places. Keep the habitat in a closet, in a dark room, or in the basement to keep your worms happy and healthy. Only take it out to observe the worms or clean their habitat.
- If you don't have a reliably dark place to keep the worms, consider laying some paper or opaque plastic on the sides and top of the container. This will prevent you from easily looking at the worms, but it will keep light from getting into their habitat and keep the container cool.[5]
-
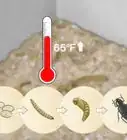
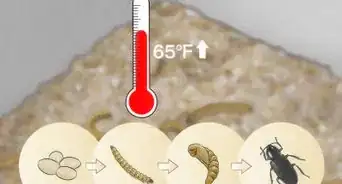
7Keep the temperature of the habitat anywhere from 60–70 °F (16–21 °C). Worms will go dormant under 50 °F (10 °C), and will stop being productive and active above 80 °F (27 °C).[6] Keep the temperature at a moderate 60–70 °F (16–21 °C) by storing the container in a temperature-controlled room and keep a thermometer attached to the enclosure to keep a watch on the heat levels.
- Do not give your worms manure, as it naturally gives off a lot of heat which can raise the temperature of the habitat.[7]
- You can raise the temperature of the habitat, if it gets too cold, by placing a porous piece of carpet over the top, which helps to keep heat in. Lower the temperature if it gets too hot by removing the top cover and gently mixing the soil around to allow air to ventilate.


Taking Care of Your Worms
-
1Feed the worms only when they have finished their previous foods. Worms are slow eaters, so don't be surprised if they keep munching on the food you give them for a few days at a time.[8] Offer a variety of different foods each time you feed them — if you gave them a lot of veggies in the last feeding, give them some dried leaves or used tea bags in the next one, for example.
- Worms like rotting food, but remove anything that gets moldy. Avoid giving your worms meat or greasy foods to reduce the risk of mold developing in the habitat.[9]
-
2Spray water in the habitat every few days to keep the soil moist. Worms require moist, dank environments to thrive. If the soil starts to look dry, spray some water inside the container or douse the soil again with water.
-
3Clean the container if it starts to smell sour or looks slimy. You won't have to clean the worm habitat very often, but if it starts to smell sour or if the soil starts to turn slimy rather than fluffy, replace the soil and clean the container thoroughly. The habitat should smell earthy and natural, not disgusting and rotting. Keep your worms in another small container with some soil in it, such as a tupperware or similar small container, while you clean out the worms' regular habitat.[10]
- Use a light bleach solution to wipe down the container after you empty the soil, but be sure to completely wipe away the bleach with a wet rag afterwards. Even a small amount of bleach can be harmful for your worms and can make the soil inhabitable.


Community Q&A
-
QuestionWhere can I buy stuff for a worm habitat?
 Community AnswerYou can buy the worms at Walmart or online. The aquarium or container can also be found at Walmart or PetSmart. The food and other stuff they eat you can get at home (banana peels, fruits, vegetables, tea bags, etc.).
 -
QuestionAre all worms brown or are they the color of what I feed them?
 IsabellaCommunity AnswerWorms are different colors, depending on what you feed them. Some are blue, pink, brown, black, or yellow and this is completely normal. You mostly find brown or pink worms because of the dirt they eat.
 -
QuestionWhat will rocks do for worms?
 Community AnswerRocks will provide hiding spaces.
Warnings
- Ensure that whatever container you use has plentiful ventilation for the worms. Worms need air to breathe just as we do, so the container must ensure this and not be sealed.⧼thumbs_response⧽
- Return the worms to the garden if they're not thriving, if you removed them from there in the first place. It is better to put the worms back in the garden than to cause them to suffer. With exotic worms, do not release them and instead consider returning them to the shop.⧼thumbs_response⧽
Things You'll Need
- Container
- Sand
- Soil
- Food scraps
- Lid with ventilation
- Water and water sprayer


References
- ↑ https://www.education.com/activity/article/make_a_worm_hotel_kinder/
- ↑ http://www.wormfarmfacts.com/Worm-Food.html
- ↑ http://working-worms.com/creating-the-right-environment-for-your-worms/
- ↑ http://working-worms.com/creating-the-right-environment-for-your-worms/
- ↑ https://www.education.com/activity/article/make_a_worm_hotel_kinder/
- ↑ http://working-worms.com/creating-the-right-environment-for-your-worms/#acceptabletemperature
- ↑ https://www.education.com/activity/article/make_a_worm_hotel_kinder/
- ↑ http://working-worms.com/creating-the-right-environment-for-your-worms/
- ↑ http://working-worms.com/creating-the-right-environment-for-your-worms/
About This Article

To make a worm habitat, start by getting a small plastic or glass container, like an aquarium, an empty bottle, or a jar. Then, alternate 1-inch layers of sand and soil in the container until it's nearly full. Next, water the soil so it's moist, and drop a few food scraps on top for the worms, like fruit peels or pieces of vegetables. Finally, place some worms inside the container, and cover the container with a porous lid. For tips on how to take care of your worms, scroll down!