This article was co-authored by Samuel Ramsey, PhD. Dr. Samuel Ramsey is an Entomologist and a researcher with the United States Department of Agriculture. Dr. Ramsey has extensive knowledge of symbiosis and specializes in insect disease spread, parasite behavior, mutualism development, biological control, invasive species ecology, pollinator health, and insect pest control. He holds a Bachelor’s degree in Entomology from Cornell University and a Ph.D. in Entomology from the University of Maryland. Dr. Ramsey’s research on bees has enabled researchers to develop targeted control techniques to restore honey bee populations worldwide. He also hosts a YouTube series called “Dr. Buggs.”
wikiHow marks an article as reader-approved once it receives enough positive feedback. This article received 42 testimonials and 91% of readers who voted found it helpful, earning it our reader-approved status.
This article has been viewed 619,778 times.
Mealworms are widely used as feeder insects for birds, chickens, fish, reptiles, rodents, and other pet animals. If you have multiple pets that feed on mealworms, it makes sense to start breeding your own. Setting up your own mealworm farm is less expensive than you might think, and you can have it up and running in very little time.
Steps
Setup
-
1Gather the supplies:[1]
- Dry oatmeal, or cornmeal.
- An organic source of moisture that is not likely to mold quickly. Carrots work best for this, but you can also use other fruits and vegetables such as sliced or chopped potatoes or apples.
- Three plastic containers with air-holes drilled in the tops.
- Several bits of cardboard in the form of egg cartons or used toilet paper rolls.
- Mealworms, also known as darkling beetle larva. You can start with anywhere from 500 to 1000.
-
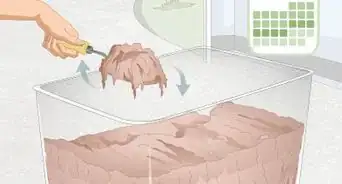
2Pour a one inch/2.5 centimeter (1.0 in) layer of oats/cornmeal into the bottom of each plastic container. This serves as bedding and food for the mealworms in their various stages of development.Advertisement
-
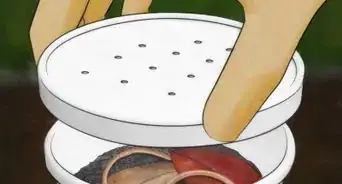
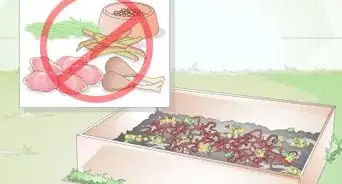
3Deposit some vegetable slices into each bin. You may use any kind of fruit or vegetable for this, such as celery, lettuce, potatoes, or apples. Carrot seems to take longer to develop mold than other fruits and vegetables.[2] If you decide to use other moisture sources, be sure to replace them often.
-
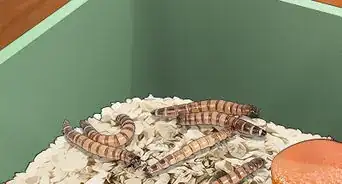
4Pour the live mealworms into one of the containers. Some mealworm farmers also like to add a few slices of bread, some ground up cereal, or dry dog food to the mix.
-
5Place a few scraps of cardboard material on top of the oats. These little creatures enjoy their darkness.
-
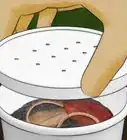
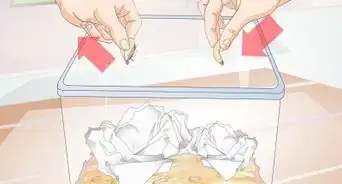
6Label the containers accordingly. One of them will be for mealworms (larva), one for pupa, and one for adult beetles.
-
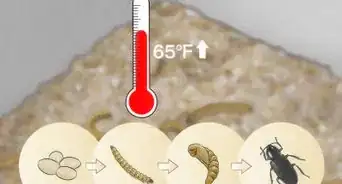
7Seal the containers and place them in a warm, dark area. Warmth speeds up the life cycle process, so your mealworms will pupate faster if they are kept warm.


Upkeep
-
1Maintain the containers periodically. Some farmers like to check things out daily, and some only do this once per week.[3]
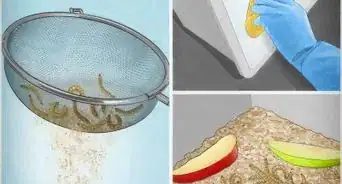
- Remove any rotted vegetable matter, dead insects, or clumps of mold from the oatmeal substrate.
- Add more vegetables and oatmeal as needed and move the bedding around to prevent mold.
- Keep an eye on the humidity levels in the habitat using a humidity meter. If the habitat gets too humid, the oatmeal will start to grow fungi, which makes the oatmeal less nutritious. Plus, fungi can attack the mealworms and kill them.
-
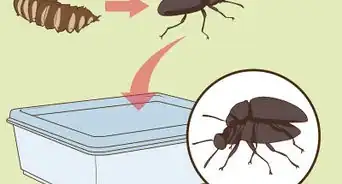
2Keep an eye out for pupa in the mealworm habitat. Depending on the temperature and how old the mealworms were when you purchased them, transformation into the pupal stage can take anywhere from a week to a couple of months.[4]
- Maturity is marked by gradual darkening of color in all stages of the life cycle.
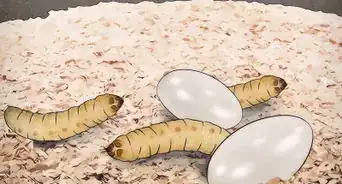
- Pupa start off extremely pale white and look more like little curled up beetles than segmented worms.
- You may notice that mealworms shed their skin (moult) several times before turning to pupa. This is normal.
-
3Separate the pupa as soon as you start to notice them. You can do this with tweezers if it happens to gross you out.
- Pupa do not move around very much and do not require any food. Moisture doesn't hurt, but pupa will not eat away at the moisture sources you place inside the container with them.
- It is important to keep pupa separate from larva and adults because they cannot defend themselves and run the risk of being eaten before they have a chance to hatch.
- The pupal stage lasts anywhere from one to several weeks depending on the temperature. You will know they are getting close to hatching as they begin to darken in color.
-
4Continue to check both containers regularly for advances in the life cycle. This becomes more important as you have more insects in the various stages of development.
-
5Remove adult beetles from the pupa container immediately. They will begin to feed on other pupa if they are not taken out swiftly.
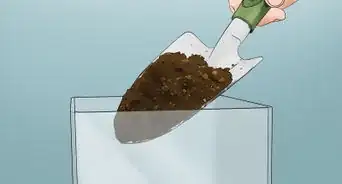
- Place the adult beetles into a separate container with the same setup as the mealworms. It never hurts to put a little extra oatmeal in there so they have more room to nest.
-
6Check the adult beetle container regularly for eggs. These will become more plentiful the more adults are in there. They can usually be found along the bottom of the container.
- It is not necessary to remove the eggs, but they serve as a signal that you will have more larva (mealworms) soon.
- Adult females will lay about 500 eggs at a time.
- Eggs will hatch within 4-19 days depending on the temperature.
-
7Move the mealworms out of the adult beetle habitat and into the mealworm container upon hatching. Since the females lay so many eggs at once, you will have a lot of work to do with each generation of hatchlings.
-
8Continue daily or weekly maintenance of the habitats. This includes replenishing food and moisture sources, keeping the insects separated according to their phases of life, removing dead insects, and moving the bedding around regularly.
- If you notice that you begin to produce more mealworms than you can feed to your pets, you can cook and eat some yourself, or humanely cull them by freezing some. Do not release them into the wild (mealworms are not native to North America). You may also feed some of the pupae to the adults, or place extra mealworms inside a bird feeder in your yard ;)


Community Q&A
-
QuestionI have plenty of beetles but my mealworms are dying. What is the problem?
 Community AnswerYou might have too little food for all of them. You have to remember that all of the mealworms have to share the food. Try to see about how many you have then put in enough to feed 3/4 of them if they each had there own. The mealworms do not have a big stomach, but eating is mandatory to live.
 -
QuestionDo I need to chop up the vegetables when feeding my mealworms?Community AnswerYes. The mealworms need to have small bits to nibble on. Otherwise, it's too hard for them to eat, the mealworms will not consume it before it rots.
-
QuestionWhat is the fine dust that settles in the worm's cage?
 Community AnswerProbably the remnants of the oatmeal. If it's dark-colored, it's either poop or dead skin.

References
About This Article

To raise mealworms, first line the bottom of a small plastic or glass container with 1-2 inches (2 ½-5 cm) of bran or oats. This will be the bedding and food for your mealworms. Make sure the container you use has a ventilated lid. Next, place some vegetables, like potatoes, carrots, or stalks of celery, in a shallow dish inside the container so your mealworms have food and water. Place at least 2 dozen mealworms in the container to start your colony. Keep the container in a warm area and replace the vegetables every couple of days. It will take around 3 weeks for the mealworms to pupate, then 2 more weeks for them to emerge as beetles. The mealworm beetles will lay eggs and eventually die, continuing the cycle. Add another layer of bran or oats whenever the bedding starts to get low. After 2-3 months, you can start using the established colony to feed pets like lizards, birds, and sugar gliders. Only feed your pets the mealworms, not the pupae or beetles, so you don’t disrupt the life cycle. To learn how to care for the mealworms while they're maturing into beetles, keep reading!