This article was co-authored by wikiHow Staff. Our trained team of editors and researchers validate articles for accuracy and comprehensiveness. wikiHow's Content Management Team carefully monitors the work from our editorial staff to ensure that each article is backed by trusted research and meets our high quality standards.
There are 7 references cited in this article, which can be found at the bottom of the page.
This article has been viewed 51,604 times.
Learn more...
Whether you’re experiencing a cold, snowy winter or simply defrosting your freezer, there are lots of reasons to want to melt ice relatively quickly. Normally, rock salt or a salt-based ice melt is the first choice for melting ice, especially in the winter. Luckily, if you’re looking for an alternative for melting winter ice or you’re trying to get rid of ice in your home, there are a number of other ways you can go about melting ice quickly.
Steps
Putting Rock Salt on Winter Ice
-
1Buy and apply your ice melt ahead of time, if possible. Ice melt, or rock salt, is most effective when it’s applied to a surface before ice actually begins to form on it. If you know a winter storm is about to hit or you’re expecting a lot of snow, put down a thin layer of ice melt first to melt the ice more quickly later.[1]
- Furthermore, if you buy your ice melt ahead of time, you won’t have to travel to the store in icy conditions in order to buy it!
- You can buy ice melt at most hardware stores and home improvement stores.
-
2Opt for an exothermic ice melt for the fastest results. Exothermic deicers release heat in order to melt ice, while endothermic deicers absorb heat from the sun in order to work. As a result, exothermic ice melts are able to melt ice much more quickly than endothermic ones and are also effective in any weather conditions.[2]
- Examples of exothermic deicers include calcium chloride and magnesium chloride. Most ice melts are mixes of multiple substances, so choose one that has a large proportion of one of these chlorides for best results.
- Oftentimes, the packaging for commercial ice melt will state whether its exothermic or endothermic.
Advertisement -
3Apply the ice melt in thin layers before, during, and after snowfalls. Don’t put too much ice melt down in a single layer, as this will actually make it less effective. Instead, spread out just enough ice melt onto your surface to have an even but thin distribution. Then, put a second layer down once the snow has begun to accumulate, then a third and final layer once the snow has stopped.[3]
- If you’re working with an exothermic deicer, be sure to cover your hands with safety gloves while handling the ice melt.
- Avoid creating piles of ice melt in any single location.
-
4Avoid applying the ice melt to roofs, brick, or other porous surfaces. Ice melt can generally be used on wooden and concrete surfaces, such as porches and driveways, without causing any damage. However, if ice melt is applied to a porous surface, such as brick, it will eventually lead to salt build-up in that material and structural damage down the line.[4]
- The best way to avoid long-term damage to porous surfaces from the use of ice melt is to quickly remove the salt once the ice has melted.
- If possible, apply a sealant to any concrete surface you intend to put ice melt on. Concrete is technically porous, so the ice melt could theoretically damage it (though this usually doesn’t happen).
Warning: Although some commercially available ice melts will be marketed as “Environmentally Safe,” this is a tad misleading, since they still contain salt that can seep into a porous surface.
-
5Be sure to remove the salt after the ice has melted. Once the weather is warm enough that water won’t freeze on concrete, use a hose to spray down the area where you applied the ice melt. Use warm water, if possible. After you’ve sprayed the area, scrub it with a hard-bristled scrub to loosen up any clinging salt crystals and spray it again to remove them.[5]
- Salt can damage grass and other flora, so avoid spraying the salt into any plants or soil, if possible.
- If the melted ice is relatively slushy, simply use a snow shovel to scoop it up and remove it to avoid making a mess.


Using Alternatives to Rock Salt
-
1Opt for water softener salt pellets if you have access to them. These are often sold at the same stores that carry rock salt, but at a lower price. Spread the pellets in thin layers onto a surface the same way you’d apply ice melt, applying a layer before, during, and after a snowfall.[6]
- For best results, go with small pellets rather than coarse ones. The coarse pellets will not be as efficient at melting ice.
-
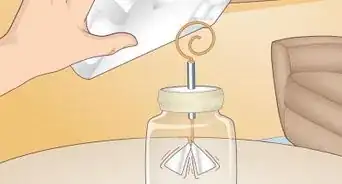
2Make a deicer out of dish soap, rubbing alcohol, and warm water. In a large bucket, mix 1⁄2 gallon (1,900 mL) of warm water, 2 teaspoons (9.9 mL) of dish soap, and 1 tablespoon (15 mL) of rubbing alcohol together. Then, fill a spray bottle with the mixture and spray it directly onto the ice in order to melt it.[7]
- Note that this mix can be harmful to grass and other plants, so avoid spraying it too close to your yard or other planted areas.
Warning: Exposure to large quantities of rubbing alcohol may cause eye or skin irritation, so avoid using this mixture to treat very large areas of ice.
-
3Use ashes to melt ice if you have an active fireplace in your home. Ashes will absorb the heat of the sun and thereby melt any ice around them. After burning a wood fire, use a trowel to scoop the ashes out of the fireplace and place them in a bucket. Then, use the trowel or your hands to evenly spread the ashes over the surface of the ice to melt it.[8]
- Note that because they rely on absorbing heat from the sun in order to be effective, ashes should only be used to melt ice outdoors.
-
4Go with sugar or table salt to melt ice in a small area. The chemicals in sugar and table salt react with water to lower its freezing point, thereby causing ice to melt. However, these are relatively expensive to use in bulk, so you should only apply a thin layer of either of these household products to a small area of ice.[9]
- For example, if you have ice on your car windshield or a small wooden porch swing, this would be a small enough area to warrant using sugar or table salt instead of ice melt.
-
5Mix water and vinegar for an inexpensive homemade ice melt. Pour 1 part water and 2 parts vinegar into a small spray bottle and mix them together. Spray this mixture directly onto the ice and continue spraying until you see the ice begin to melt.[10]
- This method isn’t always successful, so you should only use it as a last resort if no other option is viable.
- Because this method doesn’t melt ice as quickly as salt, you should only use it on small areas (e.g., a car window) where ice has accumulated.
Tip: If you happen to have leftover pickle juice in your house, you can also use that to melt ice. Since it contains salt and vinegar, it’s actually a bit more effective than a simple water and vinegar mixture!


Melting Ice in the Home
-
1Run the ice under hot water if it’s easy to move to the sink. If you’re trying to melt ice off of a lightweight object, running it under hot tap water is the easiest and least messy way to melt the ice quickly. The heat from the water will combine with the force of gravity to loosen and remove the ice as quickly as possible.[11]
- If possible, wear heat-resistant rubber gloves as you do this, in order to avoid burning your hands on the hot water.
- If you have a deep enough sink, you can also place the item in the sink under the faucet and simply allow the water to run.
-
2Use a hair dryer to melt ice in the refrigerator or freezer. Unplug the refrigerator or freezer and remove all the items from inside. Then, plug in your hair dryer, turn it on, and point it directly at the ice.[12]
- For best results, place a towel underneath the ice as you melt it in order to catch the water as it rolls down from the ice block.
Warning: Use extreme caution operating the hair dryer near the water that will be produced by the ice melting. Avoid touching the ice or the water with the hair dryer.
-
3Pour ordinary table salt on the ice if you’re melting ice cubes. This is a good science experiment you can conduct at home to teach children about chemistry, since the ice melts as a result of a chemical reaction between the salt and the ice. Be sure to place the ice cubes on a plate or in a bowl before you pour the salt on them.[13]


Things You'll Need
- Rock salt or ice melt
- Water softener pellets
- Ashes
- Vinegar
- Sugar
- Table salt
- Hair dryer


References
- ↑ https://www.consumerreports.org/exterior-maintenance-repairs/best-ice-melt-how-to-use-ice-melt/
- ↑ https://www.cleanlink.com/hs/article/Ice-Melt-Dos-and-Donts--5191
- ↑ https://www.cleanlink.com/hs/article/Ice-Melt-Dos-and-Donts--5191
- ↑ https://www.consumerreports.org/exterior-maintenance-repairs/best-ice-melt-how-to-use-ice-melt/
- ↑ https://www.consumerreports.org/exterior-maintenance-repairs/best-ice-melt-how-to-use-ice-melt/
- ↑ http://www.compoundingpennies.com/alternatives-to-rock-salt-melting-ice/
- ↑ http://www.compoundingpennies.com/alternatives-to-rock-salt-melting-ice/
- ↑ http://www.compoundingpennies.com/alternatives-to-rock-salt-melting-ice/
- ↑ https://www.ahs.com/home-matters/quick-tips/how-to-make-ice-melts-without-rock-salt/
About This Article