This article was co-authored by wikiHow Staff. Our trained team of editors and researchers validate articles for accuracy and comprehensiveness. wikiHow's Content Management Team carefully monitors the work from our editorial staff to ensure that each article is backed by trusted research and meets our high quality standards.
This article has been viewed 105,076 times.
Learn more...
Renovating or remodeling an older home often requires you to move a radiator out of the way of your project or to a new location. Not only are radiators heavy, but they also have attachment mechanisms that must be disconnected gently and precisely to prevent future problems. Before you take on this task, it is important to learn how to move a radiator properly so you do not damage it or yourself.
Steps
Taking It Out
-
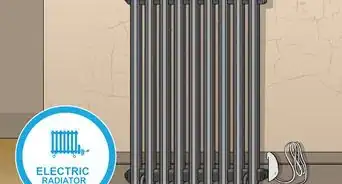
1Consider the new location first. Measure your radiator, and decide on a new location. Remember, you must account for the pipes, as well, so you should find a space where they have room to go under the floor or in the wall. Also, many times, radiators are placed in front of windows because they help warm up cold drafts coming in from outside.
- If you're unsure how much space you'll need, consult with the plumber who will do the piping work.
- You can also look at the positioning of your old radiator system to get an idea of how much space pipes will take up.
-
2Think about how the pipes will work. If you can, extending the old pipes will be the easiest bet. If you can't do that, you'll have to think about how much space new pipes will take up in the new spot.
- Once again, it's best to consult with the plumber if you're unsure.
Advertisement -
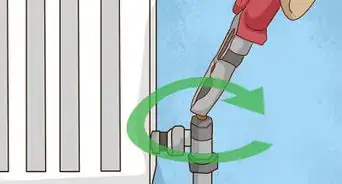
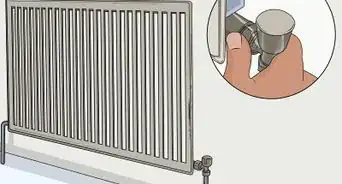
3Turn off the manual control valve. This valve is the one you use to adjust the temperature. It's often on the bottom right of the radiator, where the radiator meets the pipes.Turn the valve off by rotating it clockwise until it stops.[1]
- Use a dust cover if necessary. Some thermostatic valves don't have an off switch. You need a little cap to fit over them in place of the thermostatic device. You can find one at the hardware store if you don't have one.
-
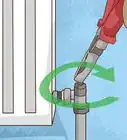
4Close the lockshield valve. The lockshield valve will have a plastic cover on top, and it's often on the bottom left of the radiator. Take the cover off. Use a spanner/wrench to turn the valve clockwise, counting turns as you go. You count turns so that you can open the valve the same amount when you move the radiator somewhere else.[2]
-
5Let it cool. Once you turn it off, let the radiator cool for a bit. You don't want the water in the heater to be too hot to work with.
-
6Check for water. Open the bleed valve a little bit to see if water comes out. You will need a radiator key to turn it. If water leaks out, water is still going through the radiator. Make sure the valves are closed as much of possible. If they are, you'll need to drain the radiator.
-
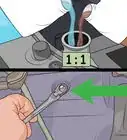
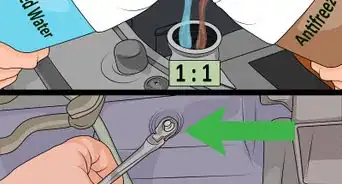
7Drain the water. You'll need two plumber's wrenches. You are pulling the radiator up from its risers at the bottom. Have something to catch the water ready. Hold the manual control valve with one wrench, while you use the other to unscrew the nut that holds them together.
-
8
-
9Close the bleed valve. Before moving the radiator, close the bleed valve. You don't want any random dirty water dripping across your home if any is left inside.[7]
-
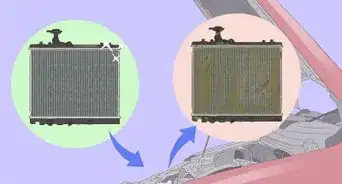
10Have a plumber rework the plumbing. Unless you're extremely confident in home improvement, it's best to have a plumber do the next part. You need to have pipes put in the new position. They can be extended from the old position, or you can have new ones put in, which of course will be more expensive.


Putting It in Its New Position
-
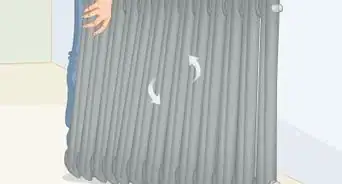
1Get some help to move it. Once again, radiators are very heavy. Many are made of cast iron. It's best to have a dolly and someone to help you move it where you want it to go.
-
2Wrap plumber's tape around the adapter screw threads. Go clockwise around the threads. Tear off any extra, and flatten down the end.[10]
-
3Set the radiator on its supporting brackets. In the new position, set your radiator into place. The valve lines need to line up with the valves on the radiator. Also, make sure you get it back on its wall brackets.[11]
-
4Tighten the nuts. Just as you loosened the nuts under the valves, it's now time to tighten them. Use a plumber's wrench to hold a valve, and turn the nut with another plumber's wrench until it's tightened.[12]
-
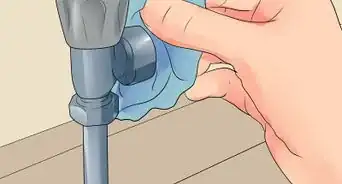
5Open the lockshield valve. Turn the lockshield valve counter-clockwise. Remember to do it the same amount of turns to open it as you you used to close it before.[13]
-
6Open the manual control valve. Again, turn counter-clockwise. Doing so will open the valve, releasing water or steam into your radiator.[14]
-
7Let out air. Open the bleed valve momentarily to let out any trapped air. Once the radiator has filled up again, you can close the valve again.[15]
-
8Check your work. Make sure none of the valves are leaking. If the are, turn them off and tighten the nuts some more.[16]


Community Q&A
-
QuestionHow can I make my radiator hotter?
 Community AnswerSave money on heating by winter proofing your radiator. It's time to turn up the heat in your home, but if your radiators aren't working properly it could mean cash out the window. Check if the radiator is working properly. Bleed your radiator. Massage the radiator valve. Contact an expert.
Warnings
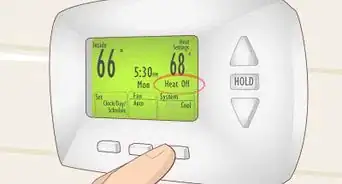
- If your radiator is connected to a central system, be sure to turn it off first.⧼thumbs_response⧽
- Do not hesitate to ask for professional help from a plumber or heating specialist for expert advise before attempting to move a radiator.⧼thumbs_response⧽
Things You'll Need
- Radiator
- Pipe wrenches
- Spanners
- Bolt cutters (if needed)
- Screwdriver (if needed)
- Moving dolly or cart

References
- ↑ http://www.helpwithdiy.com/plumbing/removing_a_radiator.html
- ↑ http://www.helpwithdiy.com/plumbing/removing_a_radiator.html
- ↑ http://www.helpwithdiy.com/plumbing/removing_a_radiator.html
- ↑ http://www.helpwithdiy.com/plumbing/removing_a_radiator.html
- ↑ http://www.helpwithdiy.com/plumbing/removing_a_radiator.html
- ↑ http://www.homebase.co.uk/en/static/how-to-replace-a-radiator
- ↑ http://www.homebase.co.uk/en/static/how-to-replace-a-radiator
- ↑ http://www.homebase.co.uk/en/static/how-to-replace-a-radiator
- ↑ http://www.homebase.co.uk/en/static/how-to-replace-a-radiator
- ↑ http://www.homebase.co.uk/en/static/how-to-replace-a-radiator
- ↑ http://www.helpwithdiy.com/plumbing/removing_a_radiator.html
- ↑ http://www.helpwithdiy.com/plumbing/removing_a_radiator.html
- ↑ http://www.helpwithdiy.com/plumbing/removing_a_radiator.html
- ↑ http://www.helpwithdiy.com/plumbing/removing_a_radiator.html
- ↑ http://www.helpwithdiy.com/plumbing/removing_a_radiator.html
- ↑ http://www.homebase.co.uk/en/static/how-to-replace-a-radiator
About This Article

Before moving a radiator, have a plumber extend the old pipes or rework the pipes in the location you plan to move the radiator to. You’ll also need to set up the supporting brackets in the new location and drain the water in your radiator before attempting to move it. Afterwards, get someone to help you move the radiator to the new location, then open the lockshield and manual control valves to release water into the radiator. Keep in mind that this is a general description, so make sure to consult your plumber for more detailed information. To learn more, like how to locate the lockshield and manual control valves on your radiator, read on.