This article was co-authored by wikiHow staff writer, Jack Lloyd. Jack Lloyd is a Technology Writer and Editor for wikiHow. He has over two years of experience writing and editing technology-related articles. He is technology enthusiast and an English teacher.
This article has been viewed 349,050 times.
Learn more...
This wikiHow teaches you how to disassemble the case of an Xbox 360 classic model. The disassembly process for an Xbox 360 classic model is different than the disassembly process for an Xbox 360 Slim or an Xbox 360 E. Keep in mind that disassembling your Xbox 360 console will void your warranty.
Steps
-
1Assemble the equipment you'll need. You will need the following items to open your Xbox 360:[1]
- Flathead screwdriver
- T12 Torx screwdriver
-
2Disconnect your Xbox 360 from all input and output sources. Your console should be completely free of any wires or attachments, including external storage, HDMI/audio cables, and the charging cable.
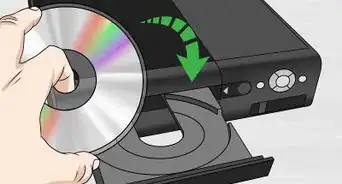
- If there is a disk in the console, eject it and place it somewhere safe before disconnecting your console.
Advertisement -
3Ground yourself before taking apart your Xbox 360. Static electricity can permanently damage circuitry, so make sure you practice proper grounding techniques like touching a metal surface before working.
-
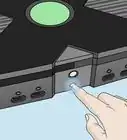
4Pry off the faceplate. Insert your finger into the USB port section, which is to the right of the power button, and pull the faceplate toward you. You can be relatively firm while doing this—the Xbox 360 doesn't have fragile, touch-sensitive electronics behind the faceplate like later models do.
-
5Release the end grilles. These are the grey lattices on the left and right ends of the Xbox 360 case. You can pry loose the grilles in one of two ways:
- Poke a large, bent paperclip through each of the holes in the top row of ventilation spaces on the Xbox 360's casing, prying up each time. This will unhook the clips holding the grille.
- Insert a flathead screwdriver into the space where the grille meets the console case, then work the screwdriver around the grille, prying up as you go. This is less time-consuming than the above method, but runs the risk of breaking the clips that hold the grille in place.
- If you have a hard drive on your Xbox 360, first remove it.
-
6Remove the end grilles. Simply pull the end grilles away from the Xbox 360's case and set them aside.
-
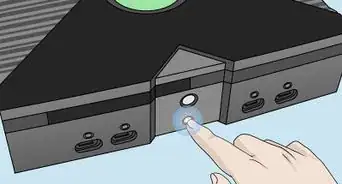
7Unclip the front of the case. There are four clips on the front of your Xbox 360 that hold the top half and the bottom half of the case together; pull the top of a clip toward you while holding the bottom of the clip to release them. These clips are in the following locations:
- One on either side of the disk tray
- One to the right of the power button
- One on the far-right side of the front of the Xbox 360
-
8Unclip the back of the case. Turn your Xbox 360 over so that the back is facing you. Place your hand inside the space on the right where the grille used to be and apply upward and downward pressure to the connected halves of the casing while inserting the flathead screwdriver into the small slots on the back.
- In total, there are seven small slots along the back of the console.
-
9Remove the bottom of the case. Flip the Xbox 360 so that its top is face-down, then pull the bottom of the case up and away from the Xbox 360. You should now be looking at the metal part of the Xbox 360's case.
-
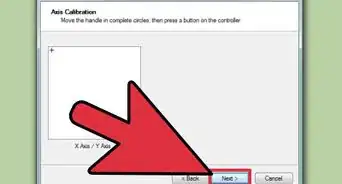
10Take out the screws holding the top of the case in place. Use your Torx screwdriver for this; if you see a screw that won't fit your screwdriver, don't try to unscrew it—it isn't necessary for disassembly. There are six total screws in the metal part of the case that you'll need to remove:
- Two on the right side
- Two on the left side
- One in each of the indented circles in the middle
- Make sure you place the screws in a plastic bag or a similarly safe place.
-
11Flip your console over again. The metal side should be face-down, and the front of the console (e.g., the power button side) should be facing you.
-
12Remove the eject button. It's on the left side of the console's front. Gently ease your flathead screwdriver under the green ribbon on the left side of the console's front face and pry. The eject button should pop right off.
-
13Lift the top of the case off of the Xbox 360. The case should pull right off, and you should now be looking at your Xbox 360's internal components.


Community Q&A
-
QuestionIs their an easier way to open it?
 AdabuGabenCommunity AnswerThe only safe way is to follow these instructions.
 -
QuestionHow do I remove the back?
 Community AnswerYou can't.
Warnings
- Opening your case will void your warranty. Do this at your own risk.⧼thumbs_response⧽


References
About This Article
1. Get 2 screwdrivers (flathead and Torx).
2. Disconnect all cords from the Xbox.
3. Ground yourself.
4. Pry off the faceplate with a finger.
5. Remove the end grilles with a flathead screwdriver.
6. Unclip the case's front with your fingers.
7. Unclip the back case with the flathead screwdriver.
8. Remove the bottom panel.
9. Remove all screws with the Torx screwdriver.
10. Press Eject.
11. Remove the top cover.