This article was co-authored by Caitlin Jaymes. Caitlin Jaymes is a Closet Organizer and Fashion Stylist based in Los Angeles, California. With a background in Fashion PR and Fashion Design, she specializes in creating wardrobes for her clients with pieces they already own. She has experience working with celebrities, editorial shoots, and men and women of all ages. Caitlin uses fashion and organization to help instill and influence confidence, ambition, and stress-free lifestyles for all her clients. She runs her business by two guiding principles: “fashion has no rules, only guidance on how to look and feel your best” and “life has too many stressors, don’t let clutter be one of them.” Caitlin’s work has been featured on HGTV, The Rachael Ray Show, VoyageLA, Liverpool Los Angeles, and the Brother Snapchat Channel.
There are 9 references cited in this article, which can be found at the bottom of the page.
wikiHow marks an article as reader-approved once it receives enough positive feedback. In this case, several readers have written to tell us that this article was helpful to them, earning it our reader-approved status.
This article has been viewed 22,987 times.
Genealogy is the study of one’s ancestry, and can be a fascinating and fulfilling way to learn more about yourself and where you come from. However, genealogical research often results in piles upon piles of documents, letters, photographs, and transcripts, and keeping them organized can be a challenge. Binders are an excellent way to keep documents orderly and accessible. Divide your documents into files according to which relative they pertain to, then group them by generation or order them alphabetically by surname.
Steps
Grouping Files by Generation
-
1Start with a list that includes yourself and any siblings and first cousins. This is the most recent generation. If you have any siblings, step- or half-siblings, or cousins, add them to your list. Even if you don’t have any records on them yet, it can be good to make a place for them in case you acquire anything, so that you don’t have to reorganize later.[1]
- If you are including a younger generation, such as your own children or nieces and nephews, create a separate list for them as well. Their documents will go first in the binder.
-
2Make a list of parents, aunts, and uncles. This is your parents’ generation. You might include your parents, their siblings, and even their cousins if you have records on them. It’s up to you who is included in this list, as long as they are of the same generation: relatives by marriage, ex-spouses of relatives, half- or step-siblings of relatives, etc.[2]Advertisement
-
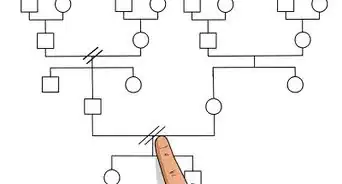
3Write down the names of any grandparents and their siblings. This list can include anyone of your grandparents’ generation who you have records of, including your grandparents’ siblings and cousins. You may want to write down any names you know regardless of whether you have records on them, for the purpose of making charts or family trees.[3]
- If you have records of anyone beyond your grandparents’ generation, make separate lists for them according to generation.
-
4Order each list by family, then age. The first members on each list should be those most closely related to you (siblings, parents, grandparents), and the rest should be organized by age. For instance, your parents’ generation would include your parents first, then your oldest aunt or uncle, then the next oldest, and so on.
-
5Place relatives by marriage next to their spouses. If you are including relatives by marriage in your research, put their file directly after that of their spouse for clarity. It’s best not to combine spouses in 1 file, as you may end up finding more information on either or both of them later on.[4]
- If 1 of your relatives has had multiple spouses, put their files directly after the relative they married, in chronological order. For instance, your uncle’s first wife would be placed after your uncle, followed by his second wife.
-
6Place generation groups in chronological order. You may want to sort your generations in ascending order, starting with the youngest generation and going backwards. You can also start with the oldest known generation, but you will have to reorganize if you eventually find records on an even older ancestor.
- You can give each generation a binder of their own if you wish, but you may find that some generations don’t fit in 1 binder, or that some aren’t big enough to fill a binder.
-
7Use colors or numbers to visually distinguish generation groups. Color-coding or adding a number to each file name can be a helpful way to see at a glance which generation is which. It can also be a good way to maintain generational order if you choose to reorganize using a different system later on.[5]
- For instance, if you have files on 3 generations, you could number the oldest generation 1, the next generation 2, and the youngest one 3. Every file name should then start with the number that indicates which generation it belongs to.
- If you think you may eventually add older or younger generations, color-coding may be a better system. For instance, making all the files for your grandparents’ generation green will make it easy to identify them at a glance.


Sorting Files by Surname
-
1Make a list of all the relatives you have records for. When organizing your files by surname, it’s not necessary to make space for any relatives you don’t have information on yet, since it will be easy to insert them later. Once you’ve sorted through the genealogical materials you have, make a list of all the relatives they pertain to.[6]
-
2Sort the relatives alphabetically by surname. Once you have a complete list of the relatives you are making files for, order them according to their surname. An easy way to do this is typing the names in a Word document, selecting the list and clicking the “Sort” button on the Home tab.[7]
- You may want to keep different surnames in different binders for clarity.
-
3Divide surname groups by location if they are especially large. If you have research on several branches of your family and they are spread out in several locations, it can be helpful to create subcategories of relatives that share a surname and a location. For instance, you might make 1 group for “the Colorado Hendersons” and 1 group for “the Ohio Hendersons.”[8]
- You can also keep each location group in a separate binder, but you may find that you don’t have enough information on each group to fill a whole binder.
-
4Order the members of each subgroup by first name. Once you have divided all your relatives’ files into surname groups and, if necessary, location subgroups, you can sort them alphabetically by their first name. That way, when you go to look up a particular family member, such as “Zachary Davidson,” you can go to “the Nebraska Davidsons” and look for “Zachary” under Z.[9]
-
5Note each relative’s relation to you on their file. If you are keeping track of a very large family, it can be helpful to give yourself a reminder as to how everyone fits into the family tree. Because a person’s surname doesn’t necessarily give you this information, you may want to note how they are related to you on their file or make a chart for each branch of the family.[10]


Storing Your Records Safely
-
1Use 3-ring binders with plastic pockets on the front and spine. These can usually be found in office supply or school supply stores. You can print or write out a cover page and a spine label to fit in the plastic pockets, which will help you identify what’s in the folder even when it’s on a shelf or in a box.[11]
- If you have any oversize documents (larger than 8.5 by 11 inches (22 cm × 28 cm)), you may want to purchase at least 1 larger binder to fit them in. Take measurements of your oversized documents to the store so you can be sure to buy the right size.
-
2Store your documents in archival-safe plastic sheet protectors. Even if you are using a photocopy, you should never hole-punch your documents or store them in binders without sheet protectors. Over time, they will become worn from being touched and exposed to light. Instead, buy 3-holed plastic sheet protectors that are labeled as archival-safe.[12]
- Mylar D, Polypropylene, Polyethylene, and Tyvek plastic are all considered archival-safe. If in doubt, however, choose something that is clearly marked as archival-safe on the product label.[13]
-
3Label each sheet protector with details about the document inside. Write down any important information about each document, such as who it’s about, what type of document it is, and when and where it came from, on an adhesive label. Then stick the label in a lower corner of the sheet protector, not on the document itself.[14]
-
4Make copies of photographs and original documents. Some items, such as photographs, certificates, newspaper clippings, and letters, should be photocopied with the originals stored separately. Exposure to light can damage documents over time, so it’s safest to leave these items in an archival-safe box and put the photocopies in your binders instead.[15]
-
5Store your binders at around 70℉ (21℃) and 50% humidity. Extreme temperatures and moisture can degrade paper and photographs over time. Avoid storing your binders in an attic or basement, which can often become very damp and hot, particularly in the summertime. Instead, keep them somewhere that stays relatively temperate and dry year-round.[16]
- Stack your binders upright and label them on the outside so you don't have to rummage through them as much.
-
6Scan any important documents and store them on a hard drive. To be safe, it’s best to have digital copies of your important files as well as physical ones. Save any lists or charts that you type up on the computer, and use your scanner to make digital files out of any other important items. Label these files clearly and save them to your computer’s hard drive, as well as a removable drive if possible.[17]
- It’s a good idea to write up a “key” as well with information about each digital file, and save it in the same location.


Warnings
- Avoid using paper clips, regular tape, and rubber cement on your documents, as they can damage them over time. If you choose to use tape, buy the photo-safe kind.[21]⧼thumbs_response⧽
Things You’ll Need
- 3-ring binders, ideally with plastic pockets on the front and spine
- Archival-safe plastic sheet protectors
- Adhesive labels
- Archival-safe boxes to store originals in
- Hard drive and/or removable drive
- Scanner (optional)


References
- ↑ https://www.familysearch.org/wiki/en/Organizing_Your_Information_(National_Institute)
- ↑ https://www.familysearch.org/wiki/en/Organizing_Your_Information_(National_Institute)
- ↑ https://www.familysearch.org/wiki/en/Organizing_Your_Information_(National_Institute)
- ↑ https://thefamilycurator.com/four-tried-and-true-systems-for-organizing-genealogy-researc/
- ↑ https://youtu.be/bXI8zq-V364
- ↑ https://www.familysearch.org/wiki/en/Organizing_Your_Information_(National_Institute)
- ↑ https://support.office.com/en-us/article/Sort-a-list-alphabetically-1F938032-2158-4BF3-BE0D-4536375055C6
- ↑ http://www.genealogy.com/articles/over/heard031402.html
- ↑ https://www.familysearch.org/wiki/en/Organizing_Your_Information_(National_Institute)
- ↑ https://www.americanancestors.org/education/learning-resources/read/getting-organized
- ↑ https://ancestralfindings.com/organizing-and-storage-tips-for-your-genealogy-research/
- ↑ https://ancestralfindings.com/organizing-and-storage-tips-for-your-genealogy-research/
- ↑ https://www.familysearch.org/wiki/en/Preserving_Photographs_%26_Documents
- ↑ https://ancestralfindings.com/organizing-and-storage-tips-for-your-genealogy-research/
- ↑ https://www.familysearch.org/wiki/en/Preserving_Photographs_%26_Documents
- ↑ https://www.familysearch.org/wiki/en/Preserving_Photographs_%26_Documents
- ↑ https://www.familysearch.org/wiki/en/Preserving_Photographs_%26_Documents
- ↑ https://youtu.be/LhfZcv1Eu_o
- ↑ https://thefamilycurator.com/four-tried-and-true-systems-for-organizing-genealogy-researc/
- ↑ https://www.americanancestors.org/education/learning-resources/read/getting-organized
- ↑ https://www.familysearch.org/wiki/en/Preserving_Photographs_%26_Documents
About This Article