This article was co-authored by Christel Ferguson. Christel Ferguson is the owner of Space to Love, a decluttering and organization service. Christel is certified in Advanced Feng Shui for Architecture, Interior Design & Landscape and has been a member of the Los Angeles chapter of the National Association of Productivity & Organizing Professionals (NAPO) for over five years.
There are 10 references cited in this article, which can be found at the bottom of the page.
This article has been viewed 20,369 times.
The classroom can easily become a place of chaos and disorder. You don’t have to resign yourself to a messy classroom, however. A well-organized classroom arranges areas, seats, and decorations based on what is most effective for your students. Set aside clear, easily-identifiable areas for specific purposes, and create a system so that you never lose your papers. Make sure that students don’t disrupt this carefully arranged room, however. Include them in cleaning and organizing the room.
Steps
Creating a Tidy Space
-
1Clear off your desk. The very first place you should start is your desk. A clean, well-organized desk sends an important message to students. Clear off any items from your desk that you are not immediately using.[1] Designate drawers for these items.
- If you always have many papers in your desk, put them in a filing cabinet instead.
- Personal pencils, pens, scissors, and other supplies not being used by students by students should be put in a drawer. Use small dividers or storage boxes to sort these in each drawer.
- If students leave papers on your desk, put out a box to collect all of these papers. Label it as your mailbox.
-
2Move student desks based on what type of activities you want to do. How you arrange the desks depends on what type of work you want students to do. You can move the desks before class each day or ask students to move their desks between lessons. Carefully consider the needs of your classroom.[2]
- For a class discussion, move the desks in a circle or horseshoe shape.
- For small group activities and discussions, move groups of 4-5 desks together.
- For working with partners, place 2 desks facing each other for each set of partners.
- If you are testing students or encouraging them to work individually, place the desks apart, with all desks facing the front of the room.
- If you are working with toddlers or elementary school students, leave plenty of floor space clear for activities.
- Some students may need extra space, either because of a physical or learning disability. Accommodate these students as best as you can.
Advertisement -
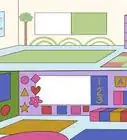
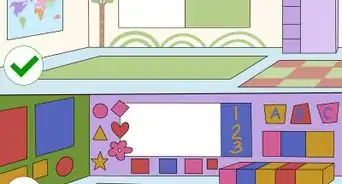
3Divide the room into designated areas for different activities. Whether you’re setting up stations for first graders or arranging a room for high schoolers, make sure that each area of the room has a consistent, easily identifiable purpose.[3]
- Elementary school students might have “stations,” such as an art station, a reading station, a math station, or an individual work station.
- Older students might not need these stations. Instead, label where the students should turn in work, leave their backpacks, pick up pencils or pens, or charge their laptops.
- Put up signs and labels for each part of class. For example, put a sign up over the bookshelves that says “Reading Area” or use a sign that says “Submit Assignments Here.”
-
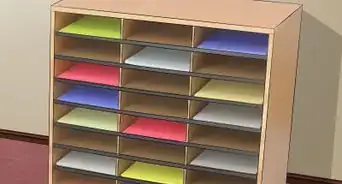
4Set up cubbies for younger students to store their things. Label each cubby with their name. Instruct students to leave their backpacks, coats, rainboots, and other things they may not need during class. Let the students know that if they need something from their backpack, they can get it during class.[4]
- Middle and high school students may not need cubbies in the classroom as they may have lockers. If they don’t have lockers, give them a space to hang up coats, umbrellas, or any other outdoor clothing, but let them keep their backpacks with them.
-
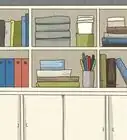
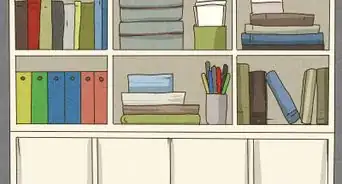
5Use labeled storage bins to hold supplies on shelves. Shelves can quickly become messy as books, supplies, and learning tools jumble together. Sort similar items together into storage bins. Label the bin with its purpose, and set the bins on the shelves. Remind students to put away their supplies in the proper bin.
- For example, you might have separate bins for scissors, paintbrushes, pencils, calculators, or different colors of paper. Store bins that contain dangerous items, like scissors, up high or behind your desk, especially if you teach younger children. Teach your students the proper way that these supplies should be distributed to avoid accidents.
- You can organize books like this as well. Organize bins by the subject, such as history or fiction, or with the reading levels of each book.
- You can get creative with what you use for storage bins, especially if you don't want to spend much money. Jars work great for pens, pencils, markers, and paintbrushes. Shoe boxes can hold CDs, blocks, or calculators. It's also a great idea to ask your administration for items that are available for your use. For example, there may be a teacher supply room that you can access or extra boxes available for use.
-
6Decorate the walls with educational and motivational resources. Wall space is a great way to help students understand what is going on in the classroom. Post assignments to a bulletin board, place the class rules or calendar up near the front, hang up motivational posters, or put up easy-to-read charts.[5]
- You may want to designate an area to display a sampling of student work! Try to represent as many of your students as possible, with the goal being all of them. If you teach older students with rotating classes, then you could try rotating their work. For example, create a schedule where each class' work is up for 1 week at a time.
- Choose the decorations based on the subject of your class. In a science classroom, put up the periodic table, a human anatomy chart, or instructions on how to use lab equipment. In a history class, put up portraits of famous figures or make a timeline of events.
- In a general purpose classroom, decorate the wall by station or theme. You might also display student work, such as art, charts, or poems made by the students.
- Some children may become easily distracted or overstimulated by too many decorations. Leave 1 wall blank in the classroom. Allow students to work by this wall if it helps them.[6]


Keeping Track of Papers
-
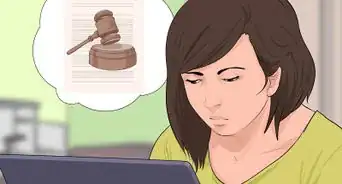
1Write down your schedule in a planner. Keep 1 planner for all of your teaching responsibilities. Write down the date of school events, deadlines for grading, or meetings with the administration. Make sure you note when forms, lesson plans, and other paperwork are due to the administration.[7]
- You can use a written planner or an app on your computer and phone, such as Google Calendar, Todoist, or Day Planner.
-
2Create a filing system for worksheets, handouts, lessons, and forms.[8] How you divide your files is up to you, but you should choose a system that works. Just make sure that you always file papers as you receive or make them. Some ways you can organize your papers include:
- By subject. Color code each folder depending on the subject, and keep all similar lesson plans, handouts, worksheets, and CDs together.
- By type of document. Keep your worksheets, handouts, lesson plans, or permission slips separate from one another.
- By date. Put all of your lessons for a certain day, week, or month together, regardless of subject.
-
3Color code your lesson plans for the day of the week. Assign 1 color to every day of the week. If you need to submit your plans to the administration, this makes it easy for them to differentiate the days. It also helps you know which lesson plan to grab for any 1 day.[9]
- If you really want to work ahead, color code all of your lesson plans for the month. Assign 1 color for every week. Every day of the week can be a slightly different shade of that color.
- Place your lesson plans in your filing cabinet or assign a drawer in your desk for them.
-
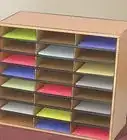
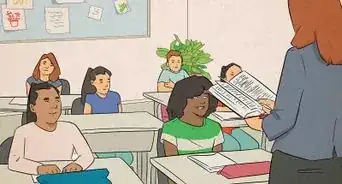
4Use mailboxes to pass out and collect papers, forms, and assignments. A mailbox system makes it easy for you to collect or return papers, missed work, permission slips, or other notes to students instead of handing them out in class. Place returned assignments in the mailboxes before class begins. Students can also use a mailbox to turn in their homework or daily work before leaving class.[10]
- Use small storage bins, shoe boxes, or file holders as mailboxes. For upper grades, a great option is small plastic storage drawers. You can find individual drawers that are a little larger than a piece of paper, or you can purchase a 3-drawer bin. They are easily stackable so that you can have a drawer for each class period.
- For lower grades, label each mailbox with the student's name or give each student a number for their mailbox. Place these boxes together somewhere convenient, such as near the cubbies or by your desk.
- For upper grades with rotating classes, create a separate mailbox for each class period.
- Tell your students that it is their responsibility to check their mailboxes every day. Give them a reminder once you have returned work.
- Keep a mailbox for yourself too. Place a box on your desk for students to submit work, forms, and papers.
- This also keeps papers all in one place for students so that they don’t lose them.
-
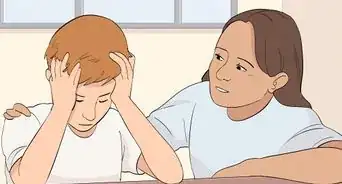
5Place work for absent students in a separate folder. If a student misses a day, it can be easy to forget to set aside their work. As soon as you notice that they are absent, put any handouts, homework, or worksheets in a folder with their name and the date. Give it to the student when they return or place it in their mailbox.[11]


Maintaining an Organized Room
-
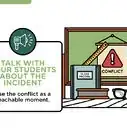
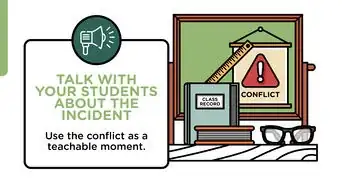
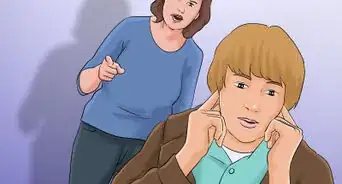
1Teach students the classroom routine on the first day of class. Involve students in the daily classroom management. Show them where all of the supplies are located. Instruct them on how to follow the class rules, and ask them to put away their things before they leave.[12]
- For example, you might say, “It is very important to put away your art supplies in the proper bin. If you’re not sure where it goes, ask me.”
- Emphasize to students that they should keep their desks and cubbies organized. Explain to them the importance of a clean work area. You might say, “It is easy to get work done if your desk is clean. Throw away any old papers. Remember, no gum in the classroom.”
-
2Use a sign out sheet for books and other materials. Classroom materials have a habit of walking off. To prevent this, ask students to check out materials like books, calculators, games, instruments, or lab equipment. Have them write down their name on a sheet, with the date they checked it out and the date they returned it.[13]
- This is especially necessary if the student needs to take the item home or wants to use it outside of the classroom.
- An easy way to keep track of things is label each item with a number. Ask the student to write the number of their item down on the sheet as well.
- Cheaper objects like pens and pencils might not be worth the effort to sign in and out. More expensive equipment, like cameras or costumes, should always be checked out, however.
-
3Write the daily schedule down on the board. Let students know exactly what to expect from class. Write down what lessons you will be doing as well as how long students have for each activity. This will help students learn time management while encouraging them to clean up and get supplies for the next lesson.[14]
- As an alternative, you can project the schedule onto your white board or screen, then verbally review it at the start of class.
- For example, you might write that you will be learning geometry from 11:00 to 12:00. This will help students understand that they need to have their calculators, pencils, and protractors ready.
- Break up lessons into smaller activities. For example, you might tell students that you will learn about triangles for 10 minutes, do a worksheet for 20 minutes, and go over the worksheet as a class.
- For older students in more specialized classes, let them know how the period will spent. For example, you might lecture for 20 minutes, then do a group discussion for 10 minutes before presenting the group’s results to the class for another 10 minutes.
-
4Clean up the classroom with students at the end of lessons and the day. Tell students when it is time to clean up and move onto the next activity. Let them know that they should put their old supplies away at the end of every lesson. At the end of the day, ask students to help you pick up trash, move desks back into place, or wipe down the desks.
- Use a signal to let students know when it is time to clean up. You might ring a bell, use an alarm on your phone, or start signing a song.


Expert Q&A
-
QuestionHow should I organize the papers in my classroom?
 Christel FergusonChristel Ferguson is the owner of Space to Love, a decluttering and organization service. Christel is certified in Advanced Feng Shui for Architecture, Interior Design & Landscape and has been a member of the Los Angeles chapter of the National Association of Productivity & Organizing Professionals (NAPO) for over five years.
Professional OrganizerMake a filing system so you sort similar documents together. For example, you may keep worksheets in one folder and grading sheets in another.


References
- ↑ Christel Ferguson. Professional Organizer. Expert Interview. 17 December 2018.
- ↑ https://busyteacher.org/6868-back-to-school-classroom-setup-organize-esl.html
- ↑ https://iris.peabody.vanderbilt.edu/module/di/cresource/q3/p10/
- ↑ https://www.responsiveclassroom.org/sites/default/files/ETKch1.pdf
- ↑ https://busyteacher.org/6868-back-to-school-classroom-setup-organize-esl.html
- ↑ https://iris.peabody.vanderbilt.edu/module/di/cresource/q3/p10/
- ↑ https://www.goodhousekeeping.com/home/organizing/a33707/organized-teacher-tips/
- ↑ Christel Ferguson. Professional Organizer. Expert Interview. 17 December 2018.
- ↑ https://www.opencolleges.edu.au/informed/features/20-ways-to-better-organize-your-classroom/
- ↑ https://www.opencolleges.edu.au/informed/features/20-ways-to-better-organize-your-classroom/
- ↑ http://www.ascd.org/publications/books/104135/chapters/Classroom-Management-and-Organization.aspx
- ↑ https://www.opencolleges.edu.au/informed/features/20-ways-to-better-organize-your-classroom/
- ↑ https://www.opencolleges.edu.au/informed/features/20-ways-to-better-organize-your-classroom/
- ↑ https://www.opencolleges.edu.au/informed/features/20-ways-to-better-organize-your-classroom/
About This Article