This article was co-authored by Jeff Huynh. Jeff Huynh is the owner of Moseybolt, a full service solution in home services, renovations, and repair in the Greater Seattle area. He has over five years of handyman experience. He has a BS in Business Administration from the San Francisco State University and his Certificate in Industrial Electronics Technology from North Seattle College.
This article has been viewed 33,568 times.
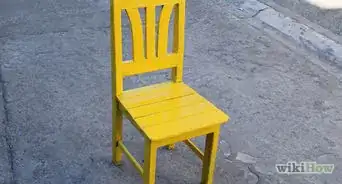
Inspired by rustic farmhouses and chic vintage pieces, the shabby chic style is a popular home decor trend. One way to accomplish it in your own home is with painted furniture. To paint a piece yourself, start by prepping the furniture by removing hardware and sanding it down. Then, if you want to distress it, try a technique that uses 2 different colors of paint. If you have wood furniture, consider whitewashing it for a worn look. Happy decorating!
Steps
Preparing the Furniture for Painting
-
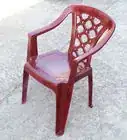
1Move the furniture to a well-ventilated area if possible. Take the furniture outside or to a room with plenty of windows that can be opened. This will prevent you from breathing in dangerous fumes while you’re painting.
- Have a friend help you move the furniture if it’s too large or heavy for you to move alone.
- If you can’t take it outside, put fans in the room where you’re painting to help circulate the air.
-
2Cover the area underneath the furniture with a drop cloth. Lay a drop cloth under the piece of furniture to protect the floor or ground beneath it from spills or splatters. You can buy a drop cloth at a hardware store or from an online retailer.[1]
- If you don’t have a drop cloth, use an old bed sheet, a plastic tarp, or a large trash bag.
Advertisement -
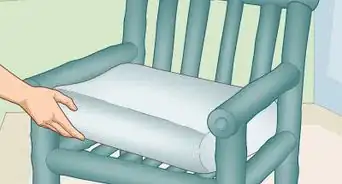
3Remove any drawers or hardware. If you’re painting something with drawers, like a dresser or end table, pull out the drawers and set them aside. Take off any hardware as well, like drawer pulls or knobs, using a screwdriver.[2]
- Take out the drawers even if you plan on painting them. You’ll paint those separately.
Tip: If you can’t remove the hardware, cover it with painter’s tape. Press the tape securely around all areas you don’t want painted so that the paint doesn’t seep underneath.
-
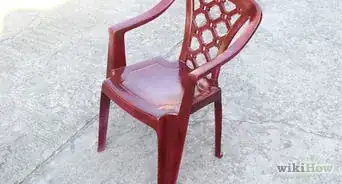
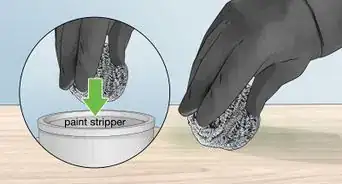
4Sand the furniture with a medium-grit sandpaper to get rid of any gloss. Choose a sandpaper that’s between 150 and 220 grit and run it all over the piece of furniture. Sanding the cabinets creates a rough surface that the paint can adhere to better.[3]
- Wear a mask and protective eyewear when sanding.
- Wipe the cabinets with a damp cloth after sanding, if necessary, to clean off any dust.
- You should still sand the furniture until it's smooth even if it doesn't have any finish on it.[4]
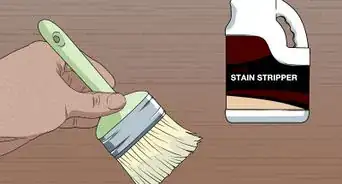
- Depending on the type of finish on the furniture, you may need to use chemical strippers.[5]


Creating Distressed Furniture with Paint
-
1Paint a thin layer of your darker color all over the furniture. Take the darkest of your 2 paint colors and use a paintbrush to apply a very thin layer onto the furniture. Brush the paint so thin that you can still see some of the cracks or crevices of the original furniture underneath.[6]
- Use either latex or oil-based furniture paint.
- If you removed any drawers from your piece that you want painted, too, paint those now.
Tip: If you aren't sure what type of paint to use, pick latex furniture paint if you want something easy to apply. For paint that lasts the longest and is very durable, choose oil-based.
-
2Let the paint dry for 24 hours.[7] Once you’ve covered the furniture in your base layer, leave it to dry overnight. It will dry fastest in a warm, dry area. After 24 hours, check that it’s no longer tacky to the touch.[8]
- If you don’t let it dry for long enough, your next layer will just smear the first layer instead of going on smoothly over top.
-
3Mix 2 parts of your lighter paint with 1 part water in a plastic container. Pour the paint and water into the container and use a wooden stir stick to blend them together. This dilutes the paint to make it more of a wash than a thick paint.[9]
- How much paint you need depends on the size of your furniture. For example, a tall bookcase will require more paint than a wall mirror.
- You can use a reusable plastic container, a paint bucket, or a paint tray to mix the paint and water.
-
4Paint the wash over the base layer with a foam brush. For this top coat, use a foam brush to apply the paint wash all over your piece of furniture. Keep the layer thin so it dries evenly and not streaky.[10]
- If you notice the paint bubbling when you brush it on, you used too much water. Add a little more paint to the mixture before continuing to apply it.
- You can use a foam roller instead of a foam brush if you’d prefer.
-
5Wipe some spots with a paper towel before the paint dries. In any areas that you want the furniture to look more worn, use a paper towel to wipe off some of the paint wash while it’s still wet. This allows the darker layer to show through, giving it a vintage vibe.[11]
- You can wipe off as much or as little of the top layer as you’d like. The more you wipe off, the more distressed it will look.
- If you remove too much, simply brush it back on and blend it into the rest of the wash.
-
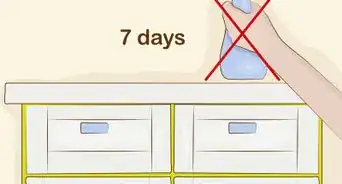
6Let the top layer dry for at least 24 hours. After you’ve wiped away any spots you want to, let the furniture sit overnight to dry. Check the paint can to find the exact drying time for your specific brand and type.[12]
- If you aren’t sure how long your paint takes to dry, it’s best to err on the side of caution and let it sit for longer rather than shorter than 24 hours.
-
7Sand the edges and corners of the furniture for an even more distressed look. Once your top layer of paint is completely dry, take a piece of fine-grit sandpaper, which is 180 to 220 grit, and run it over the edges and corners if you want more old-looking sections. Brush the sandpaper firmly over the areas you’re distressing to remove some or all of the paint in that spot.[13]
- You can sand any section of the furniture as well, like the top or the fronts of the drawers.
- If you don't have sandpaper, you can use steel wool.
- Once the distressed look is created, you can paint the furniture in any color you want to provide a vibrant look.


Whitewashing Wood Furniture
-
1Mix 2 parts white latex paint with 1 part water in a paint tray. Pour the white latex paint and the water into the tray, then blend them together with a wooden stir stick. Combine them until thoroughly mixed.[14]
- Latex paint works best for whitewashing because it’s water-based.
- You can use a paint bucket or plastic container instead of a paint tray if you’d like. However, the tray will be easiest for you to dip your roller in.
-
2Roll a thin layer of the paint wash onto your furniture. Once it’s mixed, dip a small foam roller into the wash and use it to apply a layer all over your piece. Roll long, even strokes so the paint wash goes on evenly and doesn’t clump up anywhere.[15]
- If there are any small spaces that your roller can’t fit into, use a foam brush to paint them.
- Paint any drawers that you removed from the furniture, too.
-
3Wipe a sponge against the grain to remove some of the paint while it's wet. Before the paint dries, take a sponge and wipe it over the entire piece of furniture to create that streaky look. Run the sponge in the opposite direction of the grain to lift the paint.[16]
- To determine the direction of the grain, look at which way the rings or fibers in the wood are pointing. That's called with the grain.
-
4Let the paint dry for at least 24 hours. After you've wiped it down, leave the furniture overnight to dry. If you want to know the exact drying time for your specific paint brand and type, look on the back of the can.[17]
- Once it dries, decide if you're satisfied with the results. If the whitewashing is too thin, go back and add another layer.
Tip: To make your whitewashing last longer and to protect it from chips, paint a polycrylic sealant over the furniture.


Expert Q&A
-
QuestionHow do I prepare the furniture before painting it?
 Jeff HuynhJeff Huynh is the owner of Moseybolt, a full service solution in home services, renovations, and repair in the Greater Seattle area. He has over five years of handyman experience. He has a BS in Business Administration from the San Francisco State University and his Certificate in Industrial Electronics Technology from North Seattle College.
Professional HandymanIf it's finished over with a clear coat and lacquered, you definitely want to remove that by sanding it down or using a chemical stripper. If it doesn't have a finish, you can just sand the wood down so it's smooth.
Things You’ll Need
Preparing the Furniture for Painting
- Drop cloth
- Medium-grit sandpaper
- Protective eyewear and mask
- Screwdriver (optional)
- Cloth (optional)
Creating Distressed Furniture with Paint
- Paintbrush
- Foam brush
- Plastic container
- Wooden stir stick
- Water
- 2 different colors of furniture paint
- Paper towels
- Fine-grit sandpaper (optional)
Whitewashing Wood Furniture
- Latex paint
- Paint tray
- Water
- Wooden stir stick
- Foam roller
- Sponge
You Might Also Like


This is a modal window.

This is a modal window.


References
- ↑ https://www.bhg.com/decorating/makeovers/furniture/how-to-paint-distressed-wood-furniture/
- ↑ https://www.architecturaldigest.com/story/how-to-distress-furniture-in-6-easy-steps
- ↑ https://www.bhg.com/decorating/makeovers/furniture/how-to-paint-distressed-wood-furniture/
- ↑ Jeff Huynh. Professional Handyman. Expert Interview. 30 April 2019.
- ↑ Jeff Huynh. Professional Handyman. Expert Interview. 30 April 2019.
- ↑ https://www.bhg.com/decorating/makeovers/furniture/how-to-paint-distressed-wood-furniture/
- ↑ Jeff Huynh. Professional Handyman. Expert Interview. 30 April 2019.
- ↑ https://www.bhg.com/decorating/makeovers/furniture/how-to-paint-distressed-wood-furniture/
- ↑ https://www.bhg.com/decorating/makeovers/furniture/how-to-paint-distressed-wood-furniture/
- ↑ https://www.bhg.com/decorating/makeovers/furniture/how-to-paint-distressed-wood-furniture/
- ↑ https://www.bhg.com/decorating/makeovers/furniture/how-to-paint-distressed-wood-furniture/
- ↑ https://www.bhg.com/decorating/makeovers/furniture/how-to-paint-distressed-wood-furniture/
- ↑ https://www.bhg.com/decorating/makeovers/furniture/how-to-paint-distressed-wood-furniture/
- ↑ https://www.countryliving.com/diy-crafts/how-to/a4668/whitewash-furniture/
- ↑ https://www.countryliving.com/diy-crafts/how-to/a4668/whitewash-furniture/
- ↑ https://www.countryliving.com/diy-crafts/how-to/a4668/whitewash-furniture/
- ↑ https://www.countryliving.com/diy-crafts/how-to/a4668/whitewash-furniture/