This article was co-authored by Jeff Baldwin. Jeff Baldwin is a Residential Painter and the Owner of Baldwin Custom Painting. With two decades of painting experience, Jeff specializes in high-end residential and small commercial painting projects. Dedicated to quality craftsmanship, Jeff and Baldwin Custom Painting provide bonded/insured, licensed, and lead-safe certified services in residential painting, light commercial painting, and wood refinishing.
There are 12 references cited in this article, which can be found at the bottom of the page.
This article has been viewed 7,980 times.
If you’re looking for a way to lighten up a room, then gloss paint may be the answer. It is a very durable type of reflective paint that goes well on cabinets, trim, and even some walls. However, it has to be applied with caution, since it doesn’t hide stains or even brush strokes very well. Gloss only works if you take time to clean and prepare the surface before painting. If you’re patient, you can add a beautiful sheen to any room by giving it a fresh coat of gloss.
Steps
Protecting and Cleaning the Surface
-
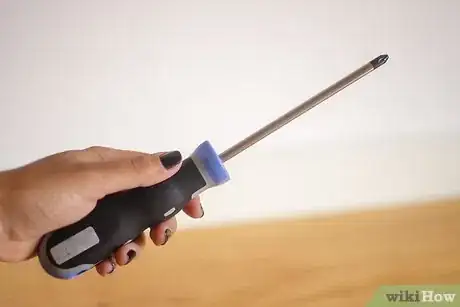
1Remove latches and other hardware around the painting area. Most types of hardware are removable with a flathead screwdriver. Rotate the mounting screws counterclockwise to take the hardware down. Label each piece and store everything together so you know where to return it when you finish painting.[1]
- For example, remove light fixtures and outlet covers when painting a wall. Take down window latches and door handles if they are in the way.
- Painting is easier when you don’t have to work around these obstacles or worry about them getting messed up.
-
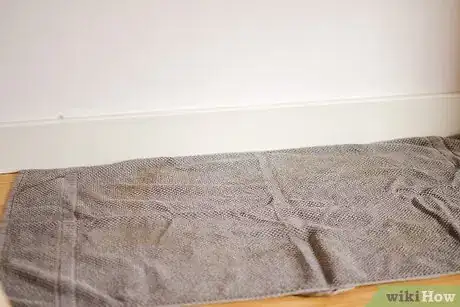
2Spread a tarp on the floor underneath the area you are painting. You can use a plastic tarp, a drop cloth, or another sort of cover to keep the floor clean. Spread it flat over the floor, then weight it down. One easy way to keep it from moving is by applying painter’s tape around its edges.[2]
- Masking tape is also safe to use on the tarp and to line painting surfaces, but it can dry out if left in place for too long. If you use masking tape, remove the tape as soon as possible.
- Drop cloths, along with everything else you may need to achieve a glossy finish, are available online and at most hardware stores.
Advertisement -
3Place tape around the edges of the surface you are painting. Spread the tape across adjacent surfaces, such as along walls or the ceiling. Lay the tape down carefully, then press it flat by running a putty knife along it. Make sure the tape is secure so that paint can’t leak underneath it.[3]
- Tape over anything you don’t want painted. For example, place tape alongside trim or baseboards so you don’t get any of the gloss on nearby walls.
-
4Wash the area with warm water and dish soap. Mix about 3 tablespoons (44 mL) of a mild soap into 1 US gal (3.8 L) of warm water. Dip a sponge in, then give the area a light but thorough scrubbing. Clear away dust, dirt, fingerprints, visible stains, and any other debris. If you run into a tough stain you can’t remove with soap and water, use a stronger cleaner.[4]
- For a stronger cleaner, mix 1⁄2 cup (120 mL) of ammonia, 1⁄2 cup (120 mL) vinegar, and ¼ a cup (45 g) of baking soda into the water instead of the soap.
- Eliminate stains as best you can so they don’t show up underneath the gloss later.
-
5Rinse the area with clean water, then dry it. Use a clean sponge or microfiber cloth dampened in a little bit of warm water. Scrub the entire surface gently to get rid of the soap and any remaining debris. When you’re done, wipe the wall clean with another fresh cloth.[5]
- Take a step back to examine the wall. Make sure it looks good before continuing!
Sanding the Surface
-
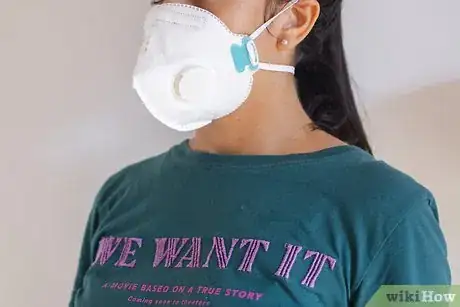
1Put on a dust mask before sanding and painting. No matter what surface you’re glossing, it has to be sanded first.[6] Sanding releases dust that is harmful to breathe in. Wear the mask until you have a chance to sweep up the dust. Then, continue wearing it to deal with paint fumes while painting in an enclosed space.[7]
- If you’re able to, open nearby doors and windows. Get some air circulation going in the room. It lets out some of the dust and also makes the paint dry faster.
- Keep other people and pets out of the room until you’re done.
-
2Use a paint scraper to remove any loose or chipped paint. Hold a paint scraper at about a 45-degree to the surface. While pushing it down firmly, move the scraper toward the damaged paint. Some of it will chip off, but keep scraping it until it’s all gone. Approach it from a few different angles to ensure you get all of it.[8]
- Loose paint can’t be saved, so it isn’t worth painting over. The damage will be visible underneath the gloss and cause it to peel off. Undamaged paint, on the other hand, is safe to cover.
- Remove loose plaster and drywall as well. These spots should also be repaired before you paint.
-
3Cover holes by spreading an appropriate filler with a putty knife. Use a joint compound to refinish drywall and plaster. For wood, select a wood filler instead. Scoop up a quarter-sized drop of the filler with your knife or a similar tool, then drag it down over the hole. Run the knife across the hole from a few different directions to level out the filler.[9]
- If you’re using a joint compound, apply it in several layers about 1⁄4 in (0.64 cm) thick. To deal with holes in plaster, staple a piece of fiberglass mesh over the bare spot to make the repair stronger.
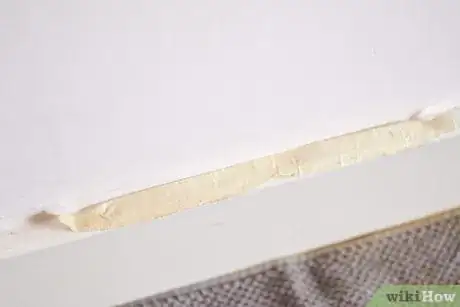
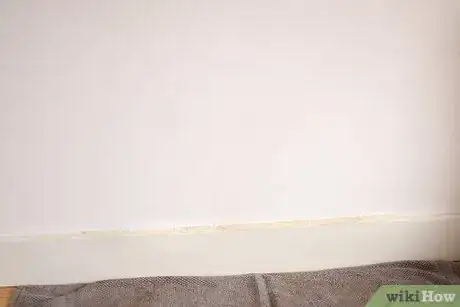
- For cracks, such as between a wall and trim, use a caulk gun to apply a paintable caulk.[10] Spread a bead along the crack, then flatten it with your finger.
-
4Sand down the entire surface with 220-grit sandpaper. Hold the sandpaper against the surface with a light amount of pressure. If you’re sanding wood, be sure to go along the grain to avoid scratching it. If you applied filler, sand it down until it’s level with the surrounding surface. Also, wear down any rough spots, such as bubbles or wrinkles on old paint.[11]
- Sanding not only blends in repaired areas, but also ensures that primer sticks. It’s a very crucial part of getting a good finish with gloss paint.
- If you’re planning on covering an existing coat of gloss, the new paint won’t stick unless you sand first.
-
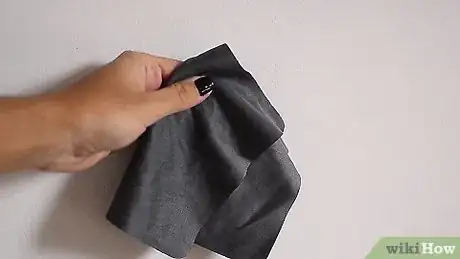
5Mop up any dust with a vacuum or tack cloth. Select a shop vacuum, since regular vacuums tend to clog as they collect sanding dust. Sweep up as much dust in the room as you can. Even though the surface may look clean, it most likely won’t be, so wipe it down with a sticky tack cloth afterward.[12]
- If you don’t have a tack cloth, use a regular microfiber cloth dampened in a little bit of warm water. Remember to dry off the surface before you begin painting it.
- Note that dust or other debris left on the surface will show up underneath glossy paint. It is always worth cleaning several times to make absolutely sure you end up with a great coat of gloss.[13]
Applying Primer
-
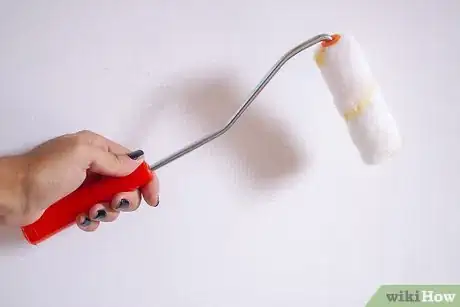
1Select a synthetic roller with a 3⁄8 in (0.95 cm) nap. Try using a foam roller to lay down paint quickly and evenly.[14] Glossy paint is a little finicky to work with, but you can spread the paint much more evenly with a roller than with a brush. For spots that are difficult to reach with a roller, such as window casings, switch to a quality synthetic brush with exploded bristles. A 2 in (5.1 cm) nylon brush works well, for instance.[15]
- Exploded bristles are found on high-end brushes. All it means is that the ends of the bristles are split so they hold more paint. That makes them a great option for avoiding visible brush strokes.
- Getting quality tools matters a lot with glossy paint. If you inadvertently leave brush strokes behind, for instance, they stay visible. Good tools make applying paint and primer much easier!
-
2Spread an oil-based primer across the surface. Open the primer and use a paint stirrer to mix it until it looks consistent. Then, pour some of it in a paint tray. Once your roller looks evenly coated, paint around the edges of the surface first.[16] Fill in the remaining space from one side to the other, taking time to smooth out any areas that look a little uneven.[17]
- If you’re painting a small area, such as window or door casing, the best strategy is usually to work from top to bottom. It will help you spot any drips and streaks before they have a chance to dry.
- Make sure your primer is compatible with glossy paint as well as the surface you’re painting. It is often listed on the paint can.
-
3Wait at least 8 hours for the primer to dry. The primer has to be completely dry to the touch before you can do anything else with it. Check the manufacturer’s recommendations for a more specific drying time. Keep in mind that the primer will take a little longer to dry in cool or humid conditions. After it finishes drying, wipe it clean with a tack cloth or damp microfiber cloth to eliminate any dust that has settled on it.[18]
- While you’re waiting, pack away your supplies. Refrigerator rollers and brushes in resealable bags like the kind you might use in your kitchen. Cover the can of primer with plastic wrap, followed by its lid, before moving it to a cool, dry place.
-
4Apply a second coat of primer to make the surface more consistent. Use your roller or brush to cover the entire surface again, making sure the new coating is smooth and even all over. Clear up drips, runs, or recognizable brush strokes right away. When you’re done, let the primer dry for another 8 hours.[19]
- A second coat is always ideal, but it’s necessary if you’re trying to mask dark paint or wood.
- You could also lightly sand the primer to ensure the gloss paint sticks to it. It usually isn’t necessary, but it can be helpful on occasion. Just make sure you clean up the dust afterward!
Using Gloss Paint
-
1Spread the gloss paint using a brush or roller. Open the gloss and stir it with a paint stirrer until it looks uniform. Pour it into a paint tray. Make sure your brush or roller is fully covered with an even coating of the paint. Then, begin by painting around the edges of the area before filling in the remaining space.[20]
- Gloss always turns out best when it is applied in several thin layers. As long as the layer is consistent all the way through, you will be okay.
- Use the same techniques from when you applied primer. If you’re painting wood casing, for instance, work from top to bottom, cleaning up drips and streaks as you go.
-
2Wait at least 4 to 6 hours for the paint to dry. The drying time can vary a lot depending on the type of gloss you are using, so be sure to check the manufacturer’s recommendation. If the weather is cool or humid, expect the paint to take longer to dry. Once it is dry to the touch, you can recoat it to make it look even better.[21]
-
3Add 1 to 2 additional coatings of paint if they are needed. You will usually have to finish the area with a second coat of paint to get it nice and glossy. Lightly load up your brush or roller again, painting around the edges before filling the inner portion. Take your time. Make sure each coat of paint looks smooth before allowing it to dry.[22]
- If you notice any uneven spots after the second coating dries, apply a third coating. Two coats is enough for most projects, but adding a third coat helps cover leftover brush strokes.
- You can also sand down any rough spots, such as visible brush strokes, between each coat of paint.
-
4Remove painter’s tape by sliding a utility knife underneath it. Hold the knife blade flat against the surface so you don’t scratch it. Slip it underneath one end of the tape. Then, move it underneath the length of the tape to separate it from the paint. Finish peeling it off by hand afterward.[23]
- The tape can peel off dried paint, ruining the finish you worked so hard to achieve. To avoid this, always run a utility knife underneath it before attempting to remove it.
- The tape is easier to remove when the paint is wet. To avoid having it stick, you can remove it while each coat of paint dries, then replace it afterward if needed.
Expert Q&A
-
QuestionHow can I ensure that the top coat of paint sticks on a water-based glossy surface?
 Jeff BaldwinJeff Baldwin is a Residential Painter and the Owner of Baldwin Custom Painting. With two decades of painting experience, Jeff specializes in high-end residential and small commercial painting projects. Dedicated to quality craftsmanship, Jeff and Baldwin Custom Painting provide bonded/insured, licensed, and lead-safe certified services in residential painting, light commercial painting, and wood refinishing.
Residential Painter You can sand the surface lightly or use a liquid de-glosser on a water-based glossy surface, then apply paint. You can also use a bonding primer to ensure the top coat of paint sticks to it.
 -
QuestionWhat should I do before painting on an oil-based glossy surface?
 Jeff BaldwinJeff Baldwin is a Residential Painter and the Owner of Baldwin Custom Painting. With two decades of painting experience, Jeff specializes in high-end residential and small commercial painting projects. Dedicated to quality craftsmanship, Jeff and Baldwin Custom Painting provide bonded/insured, licensed, and lead-safe certified services in residential painting, light commercial painting, and wood refinishing.
Residential Painter Sand, clean with de-glosser, put a prime coat, then apply your new water-based paint. If you are putting oil over gloss, it will stick without doing anything other than cleaning.
Warnings
- To avoid breathing in anything harmful, wear a dust mask at all times when sanding and painting. Sweep up dust and ventilate the room.⧼thumbs_response⧽
Things You’ll Need
- Gloss paint
- Oil-based primer
- 3⁄8 in (0.95 cm)-nap foam roller
- Synthetic paintbrush
- 220-grit sandpaper
- Tack cloth or microfiber cloth
- Dish soap or other cleaners
- Paint tray
- Dust mask
- Bucket
- Sponge
References
- ↑ https://www.homebuilding.co.uk/how-to-paint-gloss-properly/
- ↑ https://www.thisoldhouse.com/painting/21017299/how-to-prep-a-room-for-paint
- ↑ https://www.thisoldhouse.com/painting/21016712/how-to-paint-a-room
- ↑ https://www.bobvila.com/articles/how-to-prep-and-paint-a-wall/
- ↑ https://www.bobvila.com/articles/388-how-to-paint-a-room/
- ↑ Jeff Baldwin. Residential Painter. Expert Interview. 1 March 2021.
- ↑ https://www.thisoldhouse.com/painting/21016712/how-to-paint-a-room
- ↑ https://www.bobvila.com/articles/paint-stripping/
- ↑ https://www.bobvila.com/articles/how-to-patch-drywall/
- ↑ Jeff Baldwin. Residential Painter. Expert Interview. 1 March 2021.
- ↑ https://www.youtube.com/watch?v=PKct618AyTs&feature=youtu.be&t=244
- ↑ https://www.thisoldhouse.com/doors/21015143/paint-a-high-gloss-front-door
- ↑ Jeff Baldwin. Residential Painter. Expert Interview. 1 March 2021.
- ↑ Jeff Baldwin. Residential Painter. Expert Interview. 1 March 2021.
- ↑ https://www.youtube.com/watch?v=EKO1br_acUg&feature=youtu.be&t=24
- ↑ https://www.thisoldhouse.com/doors/21015143/paint-a-high-gloss-front-door
- ↑ Jeff Baldwin. Residential Painter. Expert Interview. 1 March 2021.
- ↑ https://www.homebuilding.co.uk/how-to-paint-gloss-properly/
- ↑ https://www.youtube.com/watch?v=9Qvs3gbANNc&feature=youtu.be&t=583
- ↑ https://www.thisoldhouse.com/doors/21015143/paint-a-high-gloss-front-door
- ↑ https://www.homebuilding.co.uk/how-to-paint-gloss-properly/
- ↑ https://www.homebuilding.co.uk/how-to-paint-gloss-properly/
- ↑ https://www.homebuilding.co.uk/how-to-paint-gloss-properly/
