This article was co-authored by Andre Kazimierski. Andre Kazimierski is a Painting Specialist and the Founder and CEO of Improovy, an on-demand house painting service startup. With more than 15 years of experience, Andre and the Improovy team use data and technology to streamline the home improvement process for homeowners and painting contractors. Andre started in the painting industry as a sophomore at Depaul University in Chicago, working with one of the nation’s largest painting companies to launch new cities and territories across the Midwest. Years later, he started 3rd Gen Painting and Remodeling and had a successful exit after growing the company to two different states.
There are 8 references cited in this article, which can be found at the bottom of the page.
This article has been viewed 20,339 times.
A few coats of fresh paint is all it takes to breathe new life into old, rusty lockers. While painting metal involves a few extra steps, it’s still simple and easy. First, prepare the lockers by cleaning them and, if necessary, removing rust. Scuff them up with sandpaper, since smooth surfaces don’t bond with paint very well. Oil-based spray paint labeled for metal surfaces is your best option for both the primer and top coats. After the final coat dries, wax the lockers to protect the paint and give them a nice shine.
Steps
Cleaning the Lockers
-
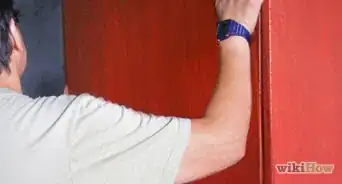
1Work on the lockers in a well-ventilated space. Cleaning, sanding, and painting the lockers will release particles and fumes that you won’t want inhale. Work on your project outdoors, in a work room with windows, or in a garage with the door open. You should also wear a dust mask and thick, waterproof gloves.[1]
-
2Put down a plastic sheet or drop cloth to protect the work area. Place the lockers on a plastic or cloth sheet to protect the floor. If you're worried about nearby walls or shelving, hang protective coverings over them.[2]
- Drop cloths or plastic will protect your floor and walls from paint splatter and cleaning chemicals.
Advertisement -
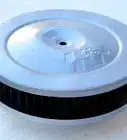
3Clean all surfaces with a solvent, such as acetone. Even if the lockers look relatively clean, you still need to remove traces of grease and dirt. Otherwise, the paint won’t adhere properly. Soak a scouring pad with acetone or another solvent cleaner, scrub the lockers thoroughly, then wipe them down with a clean, damp cloth.[3]
- Wear gloves when you use a solvent cleaner.
- You can also use an eco-friendly acetone alternative, such as Replacetone or Bio-Solv. Find a product online or at a home improvement store. You’ll just have to use a little more elbow grease if you go with an acetone alternative.
-
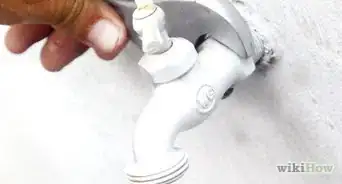
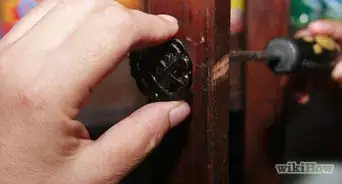
4Scrub the lockers with a rust remover, if necessary.[4] If the solvent cleaner doesn’t remove stubborn rust, purchase a liquid or spray rust remover online or at a hardware store. Apply it to rusty spots, scrub it with a wire brush or scrub pad, then wipe away residue with a damp scrap rag.[5]
- Apply a liquid rust remover with an old paint brush or spray on an aerosol product.


Sanding Metal Lockers
-
1Sand the lockers with fine-grit sandpaper.[6] Use 180 to 220-grit sandpaper to rough up all the surfaces you intend to paint. After sanding, the lockers should feel rough to the touch instead of glossy. You don't need to scrub away old paint entirely, so just sand until you've removed paint flakes and rust.[7]
- After using a solvent cleaner and rust remover, sanding the lockers might seem like overkill. However, you need to scuff up the surface so it’ll accept the primer.
- If you don’t have sandpaper, use fine steel wool or a heavy-duty nylon scouring pad.
-
2Wipe away residue after sanding the lockers. Sanding leaves behind powdery residue that will prevent paint from bonding with the surface. Use a clean, damp cloth to thoroughly wipe the lockers when you're finished sanding.[8]
-
3Dry the lockers before priming them. Wipe them again with a dry, lint-free cloth to quicken the drying process. Wait until they’re completely dry, or around 30 to 60 minutes, before applying the primer.[9]


Priming the Surface
-
1Use a self-etching spray paint primer labeled for metal. Find a primer labeled for metal online or at a hardware store.[10] If you can’t find a primer in the same color as your top coats, go with a basic white or gray.[11]
- Self-etching primer labeled for metal creates a foundation that will bond to later coats of paint.
-
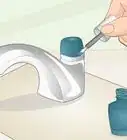
2Spray on the primer with smooth, slow strokes. Shake the can for 3 minutes then hold it around 10 inches (25 cm) from the locker’s surface. Hold the spray trigger and use short, even strokes to apply it.[12]
-
3Allow the primer to dry for 24 hours. Check your product’s instructions for specific drying times. Look for information about when to add coats of paint, not for when the coat will be dry to the touch.[13]
- The instructions might say it’ll be dry to the touch after 1 or 2 hours, but this doesn’t mean it’s ready for another coat of paint. Wait around 24 hours before applying the top coats for best results.
-
4Add a second coat of primer, if necessary. Read your product’s directions and use it as instructed. A single coat should do the trick, but you can apply another if it looks spotty or if the instructions recommend additional coats.[14]
- Be sure to let the first coat dry before adding another coat of primer. Check the instructions to find out when it'll be ready for another coat.


Applying Paint
-
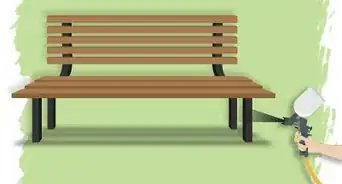
1Use spray paint for the top coats if you want a smooth finish. An oil-based spray paint labeled for metal surfaces won’t leave behind any brush or roller marks.[15] Spray paint is also easier and faster to apply.[16]
- If your project is more detailed, use a liquid oil-based paint and brushes or rollers. For instance, use liquid paint and brushes if you’re painting pictures or designs.
-
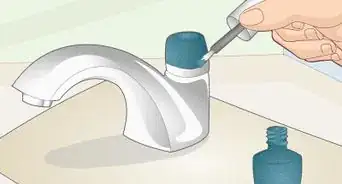
2Spray on an oil-based paint with short, even strokes.[17] If you’re using spray paint, shake the can for 3 minutes first. Hold it about 10 inches (25 cm) from the surface, and use slow, smooth strokes to apply a thin coat. Allow the coat to dry according to the instructions.[18]
- Don’t worry if coverage looks a little spotty after the first coat. Your coats need to be thin and even, or you might end up with drip marks.
-
3Add 1 to 2 more coats until you're satisfied with the coverage. Apply additional coats after letting the previous coat dry completely. It might take 2 to 3 total coats to reach your desired coverage and color saturation.[19]
-
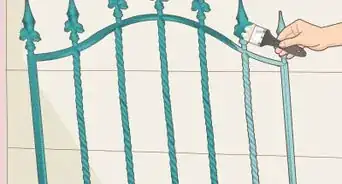
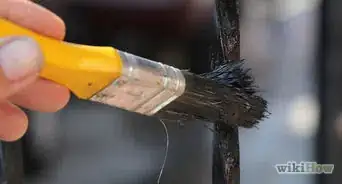
4Use a brush or roller if you're using liquid paint. If you’re using a liquid oil-based paint, use a roller to cover broad surfaces. Apply the paint to edges and nooks with a brush. Apply thin, even coats, and allow each coat to dry before applying more paint.[20]
-
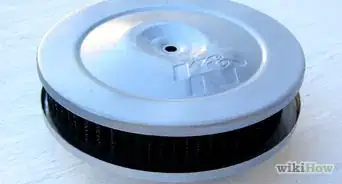
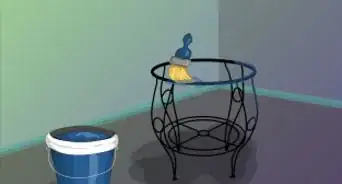
5Apply a layer of car wax when the final coat is dry, if desired. While it’s not absolutely necessary, wax will lend the lockers a lovely shine and protect the paint. Use a wax labeled for cars or metal surfaces, such as carnauba paste wax. Apply it with a clean, lint-free cloth, and use smooth, circular motions.[21]
- Work in small sections around 2 by 2 feet (61 by 61 cm) in area. Apply the wax, then let it sit for around 10 minutes, or as long as the instructions recommend.
- After letting the wax sit, buff it off with a clean microfiber cloth.


Things You’ll Need
- Protective mask and gloves
- Acetone or solvent cleaner
- Heavy-duty scouring pad
- Cloths and scrap rags
- Rust remover (if necessary)
- 180 to 220-grit sandpaper
- Spray paint primer labeled for metal surfaces
- Oil-based spray or liquid paint labeled for metal surfaces
- Carnauba paste wax, or other product labeled for metal
- Paint brush or roller (if you’re using liquid paint)
- Lint-free microfiber cloths


References
- ↑ https://www.bobvila.com/articles/how-to-paint-metal/#.WpMLH6inGCg
- ↑ https://www.bobvila.com/articles/how-to-paint-metal/#.WpMLH6inGCg
- ↑ https://www.popularmechanics.com/home/outdoor-projects/how-to/a24028/how-to-paint-bare-metal/
- ↑ Andre Kazimierski. Painting Specialist. Expert Interview. 26 January 2022.
- ↑ https://www.bobvila.com/articles/how-to-remove-rust/#.WpMRe6inGCg
- ↑ Andre Kazimierski. Painting Specialist. Expert Interview. 26 January 2022.
- ↑ https://www.familyhandyman.com/painting/restore-metal-before-painting/view-all/
- ↑ https://www.bobvila.com/articles/how-to-paint-metal/#.WpMLH6inGCg
- ↑ https://www.bobvila.com/articles/how-to-paint-metal/#.WpMLH6inGCg
- ↑ Andre Kazimierski. Painting Specialist. Expert Interview. 26 January 2022.
- ↑ https://www.popularmechanics.com/home/outdoor-projects/how-to/a24028/how-to-paint-bare-metal/
- ↑ https://www.popularmechanics.com/home/outdoor-projects/how-to/a24028/how-to-paint-bare-metal/
- ↑ https://www.bobvila.com/articles/how-to-paint-metal/#.WpMLH6inGCg
- ↑ https://www.popularmechanics.com/home/outdoor-projects/how-to/a24028/how-to-paint-bare-metal/
- ↑ Andre Kazimierski. Painting Specialist. Expert Interview. 26 January 2022.
- ↑ https://www.popularmechanics.com/home/outdoor-projects/how-to/a24028/how-to-paint-bare-metal/
- ↑ Andre Kazimierski. Painting Specialist. Expert Interview. 26 January 2022.
- ↑ https://www.popularmechanics.com/home/outdoor-projects/how-to/a24028/how-to-paint-bare-metal/
- ↑ https://www.popularmechanics.com/home/outdoor-projects/how-to/a24028/how-to-paint-bare-metal/
- ↑ https://www.popularmechanics.com/home/outdoor-projects/how-to/a24028/how-to-paint-bare-metal/
- ↑ https://www.bobvila.com/articles/how-to-paint-stainless-steel/#.WpHQvKinGCg
- ↑ https://www.bhg.com/decorating/home-accessories/decorate-with-lockers/
- ↑ https://www.americanboard.org/blog/8-ways-to-decorate-your-secondary-classroom/
About This Article