This article was co-authored by Archie Guerrero. Archie Guerrero is a Commercial and Residential Painting Specialist and the Operations Manager for DGP Painting in Austin, Texas. With a decade of experience, Archie specializes in interior and exterior painting and staining, cabinet refinishing, and wallpaper and popcorn removal. DGP Painting offers clients environmentally friendly paint materials and top-of-the-line paint products. DGP Painting has an A+ rating with the BBB and has been in Austin’s “Best of the Best.”
There are 12 references cited in this article, which can be found at the bottom of the page.
This article has been viewed 140,038 times.
Painting a deck can be a great way to add color to your outdoor area and cover up any imperfections in the wood. Paint can also be more durable than a stain, especially if your deck is high off the ground.[1] To paint your deck, start by washing it to remove dirt and debris. Scrape and sand the deck to prep it and paint it from top to bottom so the paint dries evenly, leaving you with a beautiful deck you can enjoy for years to come.
Steps
Washing the Deck
-
1Clear and sweep the deck. Remove any outdoor furniture, planters, or tools on the deck so it is empty. Put these items in a garden shed or the garage for temporary storage. Sweep the deck with a broom to remove surface dirt and debris.[2]
-
2Powerwash the deck. Rent a power washer at your local hardware store or buy one if you plan to use it for other home maintenance projects. You can ask the salesperson at the hardware store how to use the power washer safely or refer to the user's manual for guidance. Powerwash the entire deck from top to bottom so it is clean and free of dirt or debris.[3]
- If your deck only has mild dirt or debris, or you cannot find a power washer, hand wash the deck with a mild cleaner like dish soap, water, and a wire scrub brush. Apply the cleaner and gently scrub the the deck with the wet scrub brush, removing dirt and debris. Rub the deck in long, horizontal strokes to work the cleaner into the wood and then rinse off any remaining soap with water.
Advertisement -
3Apply a mold deterrent if you are worried about mold and mildew. If you notice your deck is prone to mold or mildew, or if your deck is low to the ground, spray a mold deterrent on the deck. Then, use a wire brush or a broom to scrub the deterrent into the deck. Rinse off any remaining deterrent once you have scrubbed it onto the deck with a hose or a bucket of water.[4]
- Look for mold deterrent for deck wood at your local hardware store or online.
-
4Let the deck dry overnight. Make sure the deck is completely dry before you scrape and sand it. If it is a very sunny day, it may dry within a few hours. To be safe, you may let it dry overnight.


Scraping and Sanding the Deck
-
1Use a paint scraper to remove any paint still on the deck. Run the paint scraper over any areas that have flaking or peeling paint.[5] Scrape off the paint to reveal the wood underneath. Press the scraper in and up on the paint to remove it, taking care not to scrape the wood underneath.[6]
- Look for a paint scraper at your local hardware store or online.
-
2Apply 80-100 grit sandpaper to smooth out the wood. Rub the sandpaper over any rough edges or spots on the wood once you remove the paint. Do not press too hard on the wood as you rub it with sandpaper, as you do not want to sand down the wood, just smooth it out to make applying the paint easier.[7] [8]
-
3Go over rough spots or sanding marks with 100-120 grit sandpaper. Do not press too hard on the wood as you sand it. Rubbing over any rough spots will ensure the wood is smooth and even for painting.
-
4Sweep the deck to ensure it is clean. Once you have scraped and sanded the deck, run a broom over it to sweep up any dust or debris. This will ensure the deck is clean and ready for painting.[9]
- You can also blow the deck clean with a leaf blower, if you have one on hand.
-
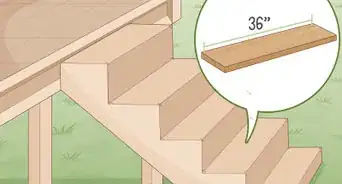
5Repair any loose, damaged boards or nails on the deck. Before you dive into painting, look over the deck for any boards that are loose and secure them with nails. Remove any damaged boards and replace them with new boards. Check for any rusty nails and replace them with new nails. Level out any nails that are sticking up or raised with a hammer so they sit flush with the wood.[10]
- You may apply rust resistant primer to the nail heads for added protection before you start painting, especially if the nails are prone to rust.
-
6Fill in any cracks in the wood. If you notice there are any holes or gaps in the wood, use high-quality, exterior-grade putty to fill them in. Put the putty in the cracks with your fingers and smooth the putty over with sandpaper. Make sure the putty sits flush to the wood so it blends in when you paint the deck.[11]
- If any of the boards are badly cracked or full of holes, you may need to replace them rather than patch them up.
-
7Apply stain remover to any areas with stains or rust. Check the wood for any water or rust stains. Use a high-quality stain remover made for wood to get these stains out as best you can. Apply the stain remover according to the directions on the label.[12]
- If you cannot get out stubborn stains on the wood, you may try using the paint to cover them up. Using a darker colored paint for the deck can help to cover up any unsightly stains on the wood.


Applying Paint to the Deck
-
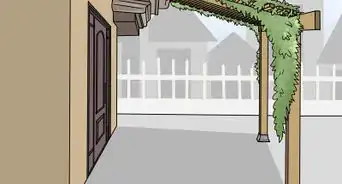
1Mask off the walls, railings, and windows near the deck with painter’s tape. Put painter’s tape around the edges of walls, railings, and windows so no paint gets on them.[13] Do not use masking tape or other types of tape, as they will not protect the area properly. Look for painter’s tape at your local hardware store or online.[14]
-
2Cover all walls and doors with plastic sheets. Hang plastic sheets over walls, doors, and windows to protect them from paint.[15] Secure them well with painter’s tape so they are not at risk of falling off while you are painting.[16]
- Look for plastic sheets for painting at your local hardware store.
- Make sure you also cover any plants or objects close to the deck with plastic sheets so they do not get splattered with paint.
-
3Wait for a time of day when the deck is in the shade. Avoid painting in direct sunlight, if possible, as you do not want the paint to dry too fast. If the paint dries too fast, it may appear uneven or patchy. Go for a paint time early in the morning or later in the afternoon when the deck is in the shade to avoid this issue.[17]
-
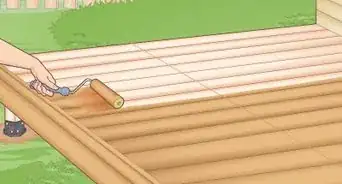
4Apply 1-2 coats of exterior stain to the deck and let it dry overnight. Make sure the stain is high-quality and mildew-resistant, as this will ensure the deck is protected. Use a paint roller to apply the stain quickly and easily, working on area at a time. Start on the area furthermost from the doorway to the deck and roll on the stain in smooth, even motions with the paint roller. Once you have applied the stain to the entire deck, let it dry overnight.[18]
- Use an exterior stain made for wood that is water-based, as this will help to seal the wood and prep it for the paint.
-
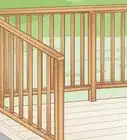
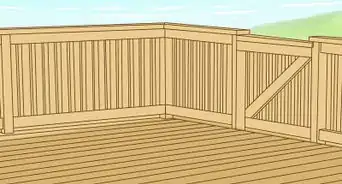
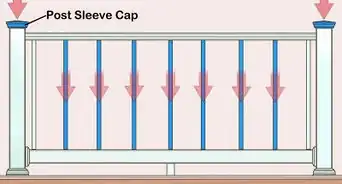
5Paint the deck from top to bottom, one section at a time. Use paint that is water-based and high-quality. If there is a wood ceiling or awning on your deck, paint this first. Then, paint the posts and railings. Paint the bottom of the deck last. Painting from top to bottom will allow each section to dry and make it easier for you to work in the space.[19]
-
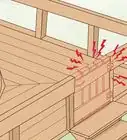
6Use a paint brush to cut into the edges or corners of the area. Start by using a paint brush to line the edges or corners of the area you are painting, such as the ceiling or railings on the deck. Use even strokes to cut the edges or corners so they are covered.[20]
- This will help to prevent paint drips or uneven edges or corners.
-
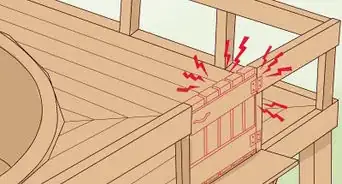
7Apply paint with a paint roller to the area. Use the paint roller to apply paint in a smooth motion, following the grain of the wood. Work from corner to corner, rolling the paint on to meet the corners or edges you have cut with the paintbrush. Apply a small amount of paint at a time, as you do not want the paint to clump or dry too thick.[21]
- Use a paint roller that is 3⁄4 inch (1.9 cm) thick if the surface of the wood is rough.
- Apply paint with a roller that is 3⁄8 inch (0.95 cm) or 1⁄8 inch (0.32 cm) thick if the wood surface is medium rough.
- Use a roller that is made of foam if the wood surface is smooth, with very little rise in the grain.
-
8Feather out the paint with a paintbrush for a smooth finish. While the paint is still wet, use a paintbrush to gently move the paint from side to side to smooth out any paint roller marks or clumps on the wood. Doing this will ensure the paint dries with a smooth finish.[22]
- Working one small section at a time will ensure you can feather out the wet paint before moving on to painting the next section.
-
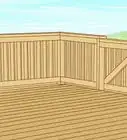
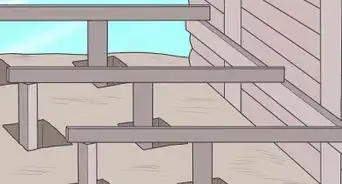
9Apply 1-3 coats of paint. Put the same number of coats on every part of the deck, from the ceiling to the posts, to the floor. Paint the floor of the deck a few boards at a time, making sure you have a clear path on and off the deck so you do not paint yourself into a corner. Applying 3 coats will ensure the paint is durable and make the paint easier to maintain.[23]
- Make sure you allow the paint to dry overnight between coats.
-
10Touch up any areas with a paintbrush once the paint has dried. Once the last coat of paint has dried overnight, use a paintbrush to lightly touch up any areas that are uneven or patchy. Make sure the deck color looks uniform and even.
- You can then enjoy your new deck for years to come, as the paint will help the wood stay dry and protect it from fading or damage.


Expert Q&A
-
QuestionShould I prime my deck before painting?
 Archie GuerreroArchie Guerrero is a Commercial and Residential Painting Specialist and the Operations Manager for DGP Painting in Austin, Texas. With a decade of experience, Archie specializes in interior and exterior painting and staining, cabinet refinishing, and wallpaper and popcorn removal. DGP Painting offers clients environmentally friendly paint materials and top-of-the-line paint products. DGP Painting has an A+ rating with the BBB and has been in Austin’s “Best of the Best.”
Commercial & Residential Painting SpecialistYes! Primer is designed to bond a surface to the paint. So, any surface that has never been painted needs to be primed before painting, even if your deck has been factory primed. -
QuestionHow do you paint a deck with peeling paint?Archie GuerreroArchie Guerrero is a Commercial and Residential Painting Specialist and the Operations Manager for DGP Painting in Austin, Texas. With a decade of experience, Archie specializes in interior and exterior painting and staining, cabinet refinishing, and wallpaper and popcorn removal. DGP Painting offers clients environmentally friendly paint materials and top-of-the-line paint products. DGP Painting has an A+ rating with the BBB and has been in Austin’s “Best of the Best.”
Commercial & Residential Painting SpecialistIf your deck is peeling, start by sanding the wood to bring back the original color. Then prime the deck and paint it. -
QuestionShould I power wash my deck before staining?Archie GuerreroArchie Guerrero is a Commercial and Residential Painting Specialist and the Operations Manager for DGP Painting in Austin, Texas. With a decade of experience, Archie specializes in interior and exterior painting and staining, cabinet refinishing, and wallpaper and popcorn removal. DGP Painting offers clients environmentally friendly paint materials and top-of-the-line paint products. DGP Painting has an A+ rating with the BBB and has been in Austin’s “Best of the Best.”
Commercial & Residential Painting SpecialistYou should pressure wash your deck before you do any work on it. This way, you’ll remove the dirt, mold, mildew, pollen, and other things that are just naturally in the air.
Things You’ll Need
- Broom
- Painter’s tape
- Plastic sheets
- Paint brush
- Paint roller
- Power washer
- Water and a scrub brush
- Mold deterrent
- Paint scraper
- 80-100 grit, 100-120 grit sandpaper
- Exterior-grade putty
- Stain remover
- Exterior stain
- Water-based paint


References
- ↑ https://www.bobvila.com/articles/how-to-paint-a-deck/#.WibaGbQ-eRs
- ↑ https://www.youtube.com/watch?v=JTKJH44t5wc&feature=youtu.be&t=63
- ↑ http://www.dummies.com/home-garden/exteriors/tips-for-painting-your-deck/
- ↑ https://www.fix.com/blog/staining-vs-painting-your-deck/
- ↑ Archie Guerrero. Commercial & Residential Painting Specialist. Expert Interview. 17 June 2021.
- ↑ https://www.youtube.com/watch?v=JTKJH44t5wc&feature=youtu.be&t=123
- ↑ Archie Guerrero. Commercial & Residential Painting Specialist. Expert Interview. 17 June 2021.
- ↑ https://www.youtube.com/watch?v=JTKJH44t5wc&feature=youtu.be&t=138
- ↑ https://www.youtube.com/watch?v=JTKJH44t5wc&feature=youtu.be&t=123
- ↑ https://www.fix.com/blog/staining-vs-painting-your-deck/
- ↑ http://www.dummies.com/home-garden/exteriors/tips-for-painting-your-deck/
- ↑ http://www.dummies.com/home-garden/exteriors/tips-for-painting-your-deck/
- ↑ Archie Guerrero. Commercial & Residential Painting Specialist. Expert Interview. 17 June 2021.
- ↑ https://www.youtube.com/watch?v=JTKJH44t5wc&feature=youtu.be&t=164
- ↑ Archie Guerrero. Commercial & Residential Painting Specialist. Expert Interview. 17 June 2021.
- ↑ https://www.youtube.com/watch?v=JTKJH44t5wc&feature=youtu.be&t=164
- ↑ https://www.youtube.com/watch?v=JTKJH44t5wc&feature=youtu.be&t=204
- ↑ https://www.youtube.com/watch?v=JTKJH44t5wc&feature=youtu.be&t=229
- ↑ https://www.youtube.com/watch?v=JTKJH44t5wc&feature=youtu.be&t=243
- ↑ https://www.fix.com/blog/staining-vs-painting-your-deck/
- ↑ https://www.fix.com/blog/staining-vs-painting-your-deck/
- ↑ https://www.youtube.com/watch?v=JTKJH44t5wc&feature=youtu.be&t=302
- ↑ https://www.fix.com/blog/staining-vs-painting-your-deck/
About This Article

Before painting your deck, wash it to remove any dirt, and smooth the wood with sandpaper. Next, apply 1-2 coats of exterior stain in the early morning or late afternoon, since painting in direct sunlight can cause the paint to dry unevenly. Once the stain has dried, apply 3 coats of water-based paint, making sure to let it dry in between coats. Finally, use a paintbrush to touch up any areas that are uneven or patchy. For tips on how to paint over rust or stains on your deck, read on!