This article was co-authored by Nevrize Aydogan. Nevrize Aydogan is a Professional Personal Trainer at Seattle Personal Fitness. With over 15 years of personal training experience, she specializes in nutrition, custom fitness plans, and increasing stamina and muscle tone. She has a Bachelor's degree in Physical Education from Ege University. Dedicated to building custom fitness plans to fit individual client needs, Nevrize is experienced and well versed in sports-based exercise and has also appeared on TV for fitness and exercise programming.
There are 7 references cited in this article, which can be found at the bottom of the page.
This article has been viewed 72,366 times.
The bent-over row is one of the most effective upper back exercises for stimulating muscle growth. Although the standard bent-over row mainly targets your forearms and upper back, variations can be used to include your biceps and lats as well. As with all weightlifting, exercising caution is just as important as exercising your body to limit your chance of injury.
Steps
Performing the Standard Row
-
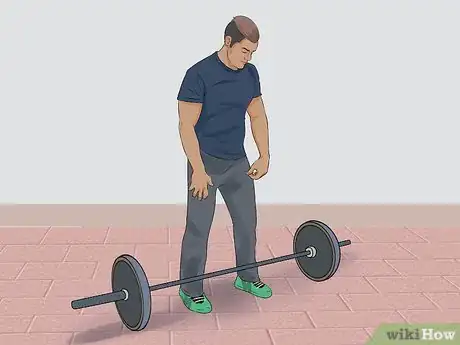
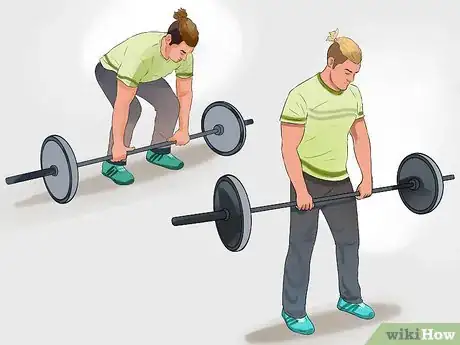
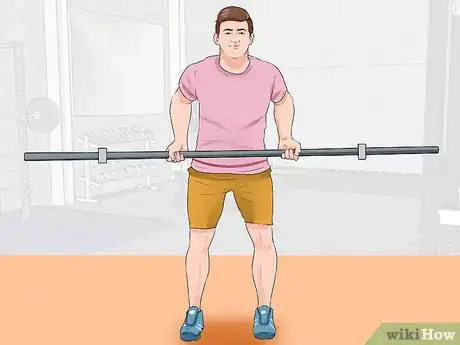
1Get into position. Set the barbell on the ground. Stand so that your shins (not your toes) are about 6 to 10 inches (15 to 25 cm) away from it. Set both feet directly below their corresponding shoulders.[1] Bend your knees a little bit.[2] [3] As you do, make sure your shins remain perpendicular to the floor. Now bend over from your waist until your upper torso is more or less parallel with the ground.
- Keep your chest up as you bend over, so that your back is as straight as it should be when standing upright with good posture.[4]
-
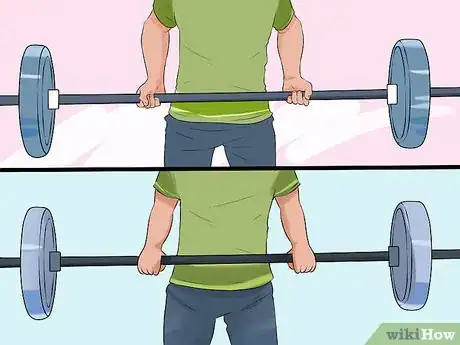
2Get ready to lift. Squat until your hands are able to reach the barbell.[5] Take hold of it with an overhand grip (also known as “pronated”), so that your palms face downward toward the floor or inward toward you.[6] Spread your hands apart so they are a just a tad wider than your shoulders. Now straighten your hips and knees, lifting with your legs, until they are back in your starting position.
- Keep your arms straight held straight down as you rise.
Advertisement -
3Execute a row. First, draw in a breath. Then, without moving your legs or upper body out of position, pull the barbell with your forearms toward your lower chest. Exhale as you do so. As you lift, bring your elbows up and behind your torso, rather than sticking them out to your sides like wings. When the barbell reaches your torso, use the muscles in your shoulder blades to finish drawing it up the rest of the way.[7]
-
4Finish your row. Continue holding the barbell to your chest for a second or two once you reach the top of your lift. Then draw in a breath and reverse the motion. Carefully lower the weight back to your starting position (not the floor) so your arms are fully extended.[8] [9] Don’t hand it over to gravity and let it drop. Use as much control over the lowering of the barbell as you used when raising it.
Adding Variations
-
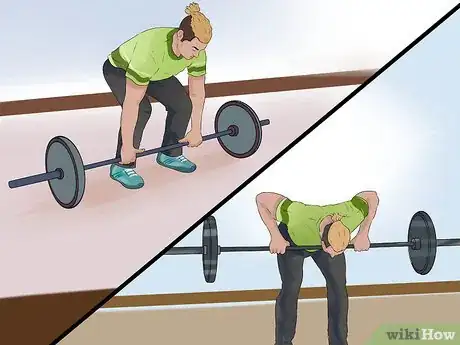
1Try a Pendlay row. Instead of holding the barbell just above the ground as your starting position, start with the barbell resting on the ground. Place your hands a few inches wider apart than you would with a standard row. Since your arms and back won’t be as active as they would be during the standard starting positioning, compensate with a more explosive lift. This will force the muscles along your spine to participate more than they do during a standard row.[10]
- Set the barbell back on the ground to finish each lift. If you continue to hold it in the air between lifts, you’re back to doing standard rows.
-
2Do a Yates row. Keeping your back straight, squat to take hold of the barbell. Grip it with an underhand grip (also called “supinated”) so that your palms are facing upward or outward, with your hands placed a little wider apart than shoulder-width. Extend your legs until you are standing upright with your arms held straight down toward the floor. Bend your knees a little. Then bend forward from your waist, but only until your upper torso is at a roughly 70 degree angle toward the floor.[11]
- Instead of rowing to your chest, lift the barbell to where your hips and lower torso form a crease
- This technique utilizes your biceps more than standard rows do.
-
3Switch your grip. Although the standard row is typically performed with an overhand grip, feel free to switch it up. Use an underhand grip instead to utilize more of your lats and biceps when executing standard or Pendlay rows. Also favor the underhand grip if you tend to feel sharp discomfort in your shoulders during overhand rows.[12]
Exercising Caution
-
1Use a hex bar instead of a standard barbell. A standard barbell is just a straight bar, while a hex bar is shaped like a hexagon, allowing you to step inside of the hex shape. If you are new to weightlifting, opt for the hex bar if possible. Stand directly between the hex bar’s weights to keep their combined weight aligned with your body. Treat yourself to an easier lift that feels less cumbersome than the standard barbell.[13]
-
2Strengthen your grip. Be aware that your grip on the barbell is just as important as the rest of your body’s ability to lift them. Expect the Pendlay and Yates rows to tire your hands out even more than standard rows.[14] Avoid the injuries that might come from losing your hold. Develop a more powerful grip with longer endurance by buying a pair of grippers. Squeeze them repeatedly, an equal number of times per hand, during your off time.[15]
- Remember: just because your back and arms crave more rows doesn’t mean your hands are fit enough to keep going.
-
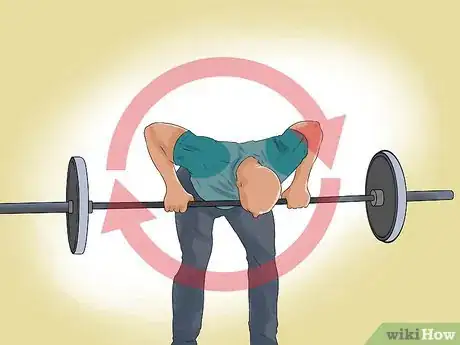
3Mind your back. Keep your spine and neck relaxed before, during, and after each row.[16] At the same time, pay close attention to your form so you don’t end up slouching.[17] As you perform each row, ignore your arms and concentrate instead on how your back is reacting. Do not attempt bentover rows if you are having any issues with your back.
-
4Find a trainer. Learn how to lift weights properly from a professional whose business is to know. Rely on their expertise to learn how to adopt the right stance, breathing, and lifting techniques. Although advice from your acquaintances may in fact be correct, take what they have to say with a grain of salt, since they may have adopted bad advice as wisdom from an unreliable source somewhere along the way.[18]
- Allow your trainer to help you devise a program with specific aims, especially if they determine that you need to concentrate on other exercises before you’re ready to do bent-over rows.
- If you decide against a trainer, always have a spotter on hand in case you have trouble or injure yourself.
-
5Start small. Don’t attempt to lift more than you’re able to. Use light weights in the beginning, or even just the barbell without any added weight at all. Concentrate first on adopting the proper form for bent-over rows (or any other lift) before worrying about how much weight you can lift.[19]
-
6Warm up first. Go for a walk, take a jog, or do some calisthenics for five to ten minutes.[20] Get the blood flowing so you are nice and limber for your lift. When you’re done, start your workout by using less weight than normal for each type of lift. Give your body a chance to warm up to it before challenging yourself with more weight.[21]
- Don’t forget to cool down afterwards. Spend another 5 to 10 minutes stretching after each workout.
-
7Get a physical. Before starting a new weight-lifting routine, visit your doctor. Ask for a physical and alert them to your plans. Find out if your body has any issues that may lead to injuries, or if your doctor advices easing into weight-lifting through any other form of exercise.
Expert Q&A
-
QuestionWhich grip is best for bent over rows?
 Nevrize AydoganNevrize Aydogan is a Professional Personal Trainer at Seattle Personal Fitness. With over 15 years of personal training experience, she specializes in nutrition, custom fitness plans, and increasing stamina and muscle tone. She has a Bachelor's degree in Physical Education from Ege University. Dedicated to building custom fitness plans to fit individual client needs, Nevrize is experienced and well versed in sports-based exercise and has also appeared on TV for fitness and exercise programming.
Professional Personal Trainer Always grasp the bar with a wide overhand grip. Remember to also slightly bend your knees and to keep your back straight.
References
- ↑ https://bretcontreras.com/how-to-bent-over-row/
- ↑ Nevrize Aydogan. Professional Personal Trainer. Expert Interview. 26 February 2021
- ↑ http://www.bodybuilding.com/exercises/detail/view/name/bent-over-barbell-row
- ↑ Nevrize Aydogan. Professional Personal Trainer. Expert Interview. 26 February 2021
- ↑ http://www.mensfitness.com/training/build-muscle/bentover-row
- ↑ http://www.bodybuilding.com/exercises/detail/view/name/bent-over-barbell-row
- ↑ http://www.bodybuilding.com/exercises/detail/view/name/bent-over-barbell-row
- ↑ Nevrize Aydogan. Professional Personal Trainer. Expert Interview. 26 February 2021
- ↑ http://www.bodybuilding.com/exercises/detail/view/name/bent-over-barbell-row
- ↑ https://bretcontreras.com/how-to-bent-over-row/
- ↑ https://bretcontreras.com/how-to-bent-over-row/
- ↑ http://www.mensfitness.com/training/build-muscle/bentover-row
- ↑ https://bretcontreras.com/how-to-bent-over-row/
- ↑ https://bretcontreras.com/how-to-bent-over-row/
- ↑ https://bretcontreras.com/how-to-increase-your-deadlift/
- ↑ https://bretcontreras.com/how-to-bent-over-row/
- ↑ http://www.bodybuilding.com/exercises/detail/view/name/bent-over-barbell-row
- ↑ http://familydoctor.org/familydoctor/en/prevention-wellness/exercise-fitness/sports-safety/weight-training-and-weight-lifting-safety.html
- ↑ http://www.health.harvard.edu/exercise-and-fitness/7-tips-for-a-safe-and-successful-strength-training-program
- ↑ http://www.health.harvard.edu/exercise-and-fitness/7-tips-for-a-safe-and-successful-strength-training-program
- ↑ http://familydoctor.org/familydoctor/en/prevention-wellness/exercise-fitness/sports-safety/weight-training-and-weight-lifting-safety.html








-Step-10-Version-5.webp)


