This article was co-authored by Karissa Sanford and by wikiHow staff writer, Jennifer Mueller, JD. Karissa Sanford is the Co-owner of Make Me Holey Body Piercing, a piercing studio based in the San Francisco Bay Area that specializes in safe and friendly body piercing. Karissa has over 10 years of piercing experience and is a member of the Association of Professional Piercers (APP).
There are 8 references cited in this article, which can be found at the bottom of the page.
wikiHow marks an article as reader-approved once it receives enough positive feedback. In this case, 89% of readers who voted found the article helpful, earning it our reader-approved status.
This article has been viewed 605,340 times.
Septum piercings are popular, and maybe you've decided you'd like one. Ideally, you should go to an experienced professional to get your septum pierced. This is the best way to ensure that your septum is pierced correctly and doesn't get infected. However, if you insist on doing it yourself, it's possible to do it with minimal complications or risk of infection provided you keep the piercing environment as sterile as possible.[1]
Things You Should Know
- Choose 14K gold or titanium jewelry to avoid infections. Sterilize your piercing station and tools, then swab both nostrils with an antiseptic.
- Position clamps on either side of the columella—the “sweet spot” between the tissue at the bottom of your nose and the hard cartilage further up.
- Push a needle straight through the clamps, then hook your jewelry to the needle and thread it through. Soak with sea salt twice a day.
Steps
Prepping Your Nose and Supplies
-
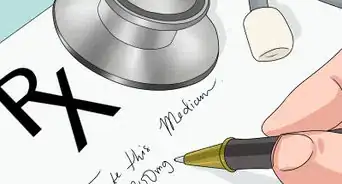
1Choose your jewelry for your initial piercing. Your first jewelry will be different from the jewelry you may decide to wear after the piercing has healed. Typically, a curved barbell or horseshoe barbell shape works best for a septum piercing, so you can flip it up into your nose if you need to hide it while the piercing is healing.
- Look for rings that are 14K gold or titanium to avoid skin irritation. If these are not available to you, surgical steel also works. After the piercing has healed, you can use jewelry made of other materials.
- Make sure the jewelry is sterilized and individually packaged. Do not take the jewelry out of its packaging or touch it with your bare hands. Always wear disposable gloves when handling your jewelry. Making sure that your jewelry is sterile and free of bacteria is extremely important to prevent infections later.
-
2Clean the space where you're going to do the piercing. You want to make sure you're doing your piercing in a clean room with a mirror so you can see what you're doing — a bathroom is ideal. Thoroughly clean the sink and counter and lay down paper towels to put your supplies on so they remain in a sterile environment.[2]
- If you are using your bathroom, don't use the bathroom until you've completed the piercing. If you do, you'll introduce bacteria into the room and have to clean everything all over again. If you have opened sterilized equipment, it will have to be thrown out since you likely don't have the means to sterilize it again.
- In bathrooms, close the lid of the toilet and empty the trash. If there's a cat litter box in the bathroom, move it to another area before you start.
Tip: If you have pets, make sure they do not have access to the piercing environment after you've cleaned it. They could introduce bacteria.
-
3Wear single-use gloves when touching your nose or supplies. Glove up before you start to ensure that you don't introduce any bacteria into the piercing environment. It's a good idea to initially put two sets of gloves on, so if you contaminate the top layer accidentally, you can remove it.
- Wash your hands and arms down to the elbows before putting on your gloves. Do not wear loose-fitting clothing that could brush up against your arms or hands.
-
4Lay out your supplies ahead of time. You can order disposable, sterilized piercing supplies online at major online retailers or on piercing specialty sites. Make sure the supplies have been sterilized in an autoclave and are individually packaged. Don't take anything out of the packaging until you're ready to use it.[3]
- Organize your supplies on the counter in the order you're going to use them to avoid having to touch anything more than once.
- You might also want to have a small bag or dish on hand to dispose of used supplies when you're done.
Warning: Do not touch anything that has been sterilized with your bare hands. If you do, it will no longer be sterilized and could introduce bacteria into the piercing, which could lead to infection.
-
5Trim any long nasal hairs with a surgical razor blade. To do this without cutting yourself, go slowly. Breathe deeply and trim on an exhale so you don't breathe in the hairs, which could cause you to sneeze. If you sneeze on the blade, it's been contaminated and you'll have to get a new one.
- Your trim doesn't need to be perfect, but you do want to make sure there aren't any nasal hairs that might impede or contaminate the piercing.
-
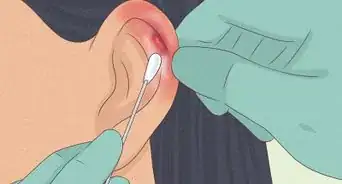
6Clean each nostril with an antiseptic. Dip a cotton swab into rubbing alcohol and swipe around the inside of one nostril. Then get another cotton swab and do the other nostril. Swab while you're exhaling to keep from breathing the fumes from the alcohol.
- Once you've cleaned each nostril, get another clean cotton swab and clean the outside of your nose and anywhere your fingers might be touching as you pierce your septum.
Tip: Swab any part of your face or nose with alcohol that your hands might touch while doing the piercing. If your hands touch any part of your face that hasn't been cleaned, your gloves are no longer sterile.
-
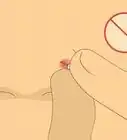
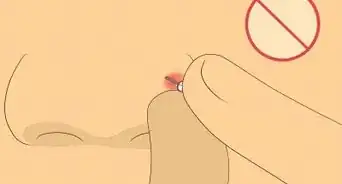
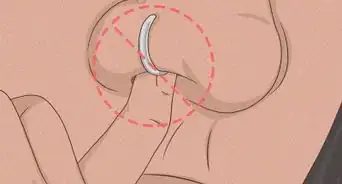
7Locate the columella in your nose. With your gloved fingers, gently pinch your septum until you find the "sweet spot." At the bottom of your nose, you'll feel a fleshy part. Further up in your nose, you'll feel the hard cartilage. Between these two is the columella. This is where you want to pierce. This will require sticking your fingers in your nose and feeling around, which might feel weird to you.
- It's easier to find the columella if you pull the fleshy part down a bit. However, not everyone has a columella. If you have a deviated septum or asymmetrical nose, you may not have an appropriate place for a septum piercing.
- If you don't find your columella, you run the risk of trying to pierce through cartilage or through the fatty tissue at the end of your nose. Either of these will hurt a lot. Feel for a spot where you feel almost nothing between your two fingers in either nostril. You shouldn't feel any pain, only perhaps a slight pressure, when you press your fingers together.
Warning: If you've gone to a professional piercer and they told you that your nose wasn't suitable for a septum piercing, do not try to pierce your own septum at home.
-
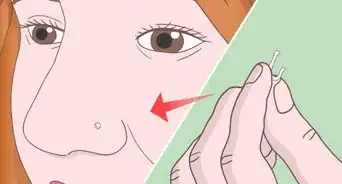
8Mark the spot to be pierced with a surgical marker. Once you've located your columella, take out your surgical pen or marker and make a dot on the spot. You only need a dot on the side where you're going to insert the needle, but you may want to make dots on both sides to make sure they line up.
- Draw a line across the bottom of your septum with your surgical marker, in line with the spot to be pierced. This will help you keep the piercing straight.[4]
Tip: If you can't get close enough to the bathroom mirror to see exactly what you're doing, you may have more luck with an adjustable mirror or magnifying makeup mirror.


Completing the Piercing
-
1Place your clamps on either side of the spot to be pierced. Open your clamps and position them so that the spot you marked for the piercing is in the center of the clamps. Make sure you can see the spot clearly. Try to keep the handles in line with the line you drew on your nose so you have a good reference for your needle.[5]
- Look in the mirror closely to line up your clamps. Keep in mind this will require you to get perhaps uncomfortably familiar with the inside of your nose.
-
2Tighten the clamps so they'll stay in place. Once you have your clamps in place, you can tighten them and lock them in place so you don't have to continue to hold them. However, you don't want to let go of them until you're sure they won't move. If they slip, they could mess up your piercing.[6]
- If the clamps feel too tight, you can always opt to hold them in place while you do your piercing. Just make sure you don't let go of them.
-
3Line up the needle and push it straight through. Take your needle out of the packaging and line the point up with the spot you drew on the "sweet spot" where you want to pierce. Look in the mirror to aim the needle straight through the spot rather than at an angle. Take a few deep breaths, and on an exhale, push the needle straight through.[7]
- Pull down to avoid poking the nostril on the other side.
- If you've aimed correctly, you likely won't feel much pain. You might feel a pinch. However, your eyes will probably water. Try to keep the fluid from your eyes from dropping onto your gloved fingers.
Tip: Septum piercings aren't typically very painful, but try not to think about the pain. If you think about the pain, you might hesitate. Breathe deeply and relax, thinking of a calming, happy place. Then push the needle through.
-
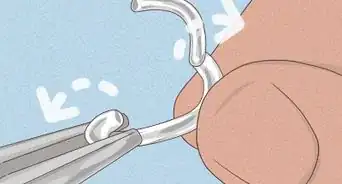
4Hook your sterilized jewelry to the end of the needle and pull it through. Your needle should form a bar evenly across the bottom of your nose. Put your jewelry into the end of your needle and thread it through the hole you just created.[8]
- Once you've pulled the needle out, secure your jewelry. If it has balls on the end, you'll need to screw those on. At this point, you've successfully pierced your septum!


Keeping the Piercing Clean
-
1Soak your piercing with sea salt and water twice a day. Mix 1⁄4 tsp (1.2 mL) with 8 fluid ounces (240 mL) of water. Dip a cotton swab in the mixture and rub it over the piercing site in both nostrils. If you have leftover mixture, cover it and save it for later use.[9]
- Make sure you cover the area so it goes into the piercing. Apply the mixture to your piercing on an exhale to avoid inhaling saltwater.
- Do not mix a stronger solution. It won't be any more effective and may dry out your skin.
- You can also flush out your piercing in the shower by cupping some hot water in your hands and blowing bubbles with it in your nose. Do that for about 15 seconds to flush your nose out really thoroughly.
-
2Use an aftercare spray to eliminate bacteria. Aftercare sprays are available online from major online retailers as well as from piercing specialty websites. Spraying the piercing location 2 to 3 times a day keeps bacteria from entering the piercing site while it's healing.[10]
- Use an aftercare spray in addition to the sea salt and water treatment.
-
3Wash your hands before you touch your piercing. Naturally, if you have a new piercing, you're probably going to want to play with it. However, because your hands are dirty, you risk introducing bacteria that could result in infection.[11]
- With some piercings, you're advised to rotate them daily. However, this is not advised with septum piercings. Don't rotate your jewelry. Leave it alone and don't touch it at all with unwashed hands.
- Try not to touch your piercing too much if you can help it. Make sure that your fingers are staying away from it, there's no makeup getting on it, and that your glasses aren't bumping into it. Your piercing needs to be left alone![12]
-
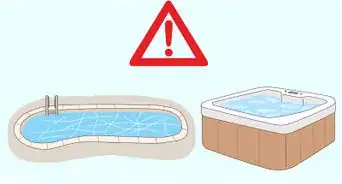
4Stay out of swimming pools and hot tubs for at least 2 weeks. While your septum piercing is healing, exposure to water from swimming pools and hot tubs can slow the healing process. The chlorine in the water dries out your skin, which can cause bleeds. The water can also introduce bacteria.[13]
- After 2 weeks, it's okay to take baths or sit in a hot tub. However, you should still avoid submerging your head. If you do, cover your piercing with a waterproof wound-sealant bandage. You can find these online or at drug stores.
-
5Wait at least 2 months before changing your jewelry. As your piercing starts to heal, you may decide that you want different jewelry than what you originally used. However, it typically takes at least 6 weeks for the piercing to heal properly. Even if you've had no pain or irritation, you're better off waiting at least 2 months to change your jewelry.[14]
- Use the time to shop for jewelry you might like for different moods. Once your piercing has healed, you can change your jewelry whenever you want.
-
6Seek professional help if you notice signs of infection. As long as you maintained sterile conditions while you pierced your septum and kept the piercing area clean afterward, your piercing should heal with no problems. However, if you notice a yellow or green discharge and particularly foul odor, you should probably go see a doctor.[15]
- Swelling and inflammation for a few days after the piercing is totally normal. However, if your symptoms don't improve or get worse, your piercing may be infected.
- If you start running a fever, seek medical attention immediately. You may need an antibiotic to clear the infection.
- Do not remove your jewelry if you suspect your piercing site is infected. The hole may close up and leave no way for the infection to drain.
Tip: If you're in doubt or hesitant to speak to a medical professional, an experienced licensed piercer will be able to tell you if your piercing is infected.


Community Q&A
-
QuestionCan I use a clear retainer to pierce my septum?
 wikiHow Staff EditorThis answer was written by one of our trained team of researchers who validated it for accuracy and comprehensiveness.
Staff AnswerwikiHow Staff EditorStaff AnswerYou can't use a retainer until the hole has already healed. You'll need metal jewelry. If you're worried about hiding your piercing, choose a piece of jewelry that can be easily flipped up into your nose and hidden, such as a horseshoe shape. -
QuestionI did the piercing perfectly fine, but the needle slipped out as I was putting in the horseshoe. Now I can't find the exit hole. How do I fix this?wikiHow Staff EditorThis answer was written by one of our trained team of researchers who validated it for accuracy and comprehensiveness.
Staff AnswerwikiHow Staff EditorStaff AnswerThe hole has likely closed up by now. You might use a piece of cork to catch the end of the needle the next time you attempt a piercing so it doesn't slip out. Otherwise, make sure to push the needle all the way through, leaving plenty of room so it won't slip out. -
QuestionPlease tell me how bad the pain of getting my septum pierced is?
 Community AnswerHonestly it's not painful at all. It just feels like a sharp pinch, then it's over.
Warnings
- Avoid getting a septum piercing during allergy season if you have allergies.⧼thumbs_response⧽
- While you're wearing gloves, do not touch your clothing, any part of your body, or any item that has not been sterilized. Otherwise, your gloves are contaminated and should be removed.⧼thumbs_response⧽
- Piercing your septum requires you to get intimately familiar with the inside of your nose. If you're not comfortable with this, you're probably better off going to a professional.⧼thumbs_response⧽
- Don't soak your piercing for too long—you don't necessarily want to keep a wound warm and wet for extended periods of time.⧼thumbs_response⧽
- Piercing yourself at home is dangerous and not recommended. Getting your piercing done by an experienced professional is always the best choice. Although it may be more expensive, you'll have far less risk of infection or other complications.⧼thumbs_response⧽
Things You'll Need
- Box of rubber gloves
- Cotton swabs
- Rubbing alcohol
- Sterilized jewelry
- Sterilized 14- or 16-gauge needle
- Sterilized surgical marker or pen
- Sterilized surgical razor blade
- Aftercare spray


References
- ↑ https://authoritytattoo.com/septum-piercing/
- ↑ https://youtu.be/K6YUOXodz8I?t=45
- ↑ https://youtu.be/K6YUOXodz8I?t=45
- ↑ https://youtu.be/K6YUOXodz8I?t=337
- ↑ https://youtu.be/K6YUOXodz8I?t=416
- ↑ https://youtu.be/K6YUOXodz8I?t=416
- ↑ https://youtu.be/K6YUOXodz8I?t=471
- ↑ https://youtu.be/K6YUOXodz8I?t=500
- ↑ https://safepiercing.org/aftercare/
- ↑ https://authoritytattoo.com/septum-piercing/
- ↑ https://authoritytattoo.com/septum-piercing/
- ↑ https://www.mayoclinic.org/healthy-lifestyle/adult-health/in-depth/piercings/art-20047317
- ↑ https://safepiercing.org/aftercare/
- ↑ https://authoritytattoo.com/septum-piercing/
- ↑ https://authoritytattoo.com/septum-piercing/
About This Article

It’s always safest to have a professional pierce your septum, but if you want to do it yourself, here’s how. Purchase sterile piercing jewelry made of a hypoallergenic material, such as 14k gold, titanium, or surgical steel. Clean your work surface carefully, wash your hands with soap and water, and put on sterile gloves. Use a sterile surgical razor blade to trim any long nose hair, then clean the inside of each nostril with a cotton swab dipped in rubbing alcohol. Gently pinch the inside of your nose between your nostrils to find the columella, which is the area of soft tissue just below the cartilage. This is where you will pierce. Make a dot with a surgical marker where you plan to insert the needle. Clamp the area with a sterilized piercing clamp so that the dot is visible through the holes in the clamp. Line a sterile, hollow piercing needle up with the hole in the clamp, take a deep breath, and push the needle through in one smooth movement. Put the open end of your septum ring into the back of the hollow needle, then slowly pull the needle out so that it threads the jewelry through the piercing. Secure your jewelry in place with its fastener. For information on how to keep your piercing clean by soaking it with sea salt and water, scroll down!