This article was co-authored by Katie Gohmann. Katherine Gohmann is a Professional Gardener in Texas. She has been a home gardener and professional gardener since 2008.
wikiHow marks an article as reader-approved once it receives enough positive feedback. In this case, 96% of readers who voted found the article helpful, earning it our reader-approved status.
This article has been viewed 218,890 times.
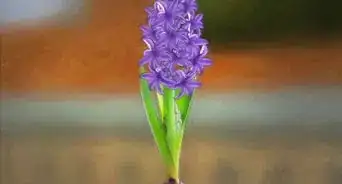
Hydrangeas are well known for their large, colorful blossoms, and can be found growing in many areas of the world. There are many species and varieties of hydrangeas, which produce blossoms in a wide array of colors and shapes. They are relatively easy to grow, as long as you plant them in the right conditions as described below.
Steps
Planting Hydrangeas
-
1Check your species' hardiness zone. One of the most popular hydrangea species, Hydrangea macrophylla, does best in hardiness zones 6–9, with minimum winter temperatures of -10 to +25ºF (-23 to -7ºC). A few species can tolerate zone 4 conditions (-30ºF/-34ºC), including H. arborescens and H. paniculata.[1]
-
2Know the safest times to plant. Hydrangeas may suffer when planted in hot temperatures or frost. Container-grown hydrangeas are best planted in the garden during spring or fall. Bare root hydrangeas without soil should be planted in early to mid-spring so they have time to adapt to their new location.Advertisement
-
3Choose a place in your yard that gets a mixture of sun and shade. Ideally, the hydrangea should get several hours of sun each day, but be protected from the hottest afternoon sun by a wall or other barrier. If this is not possible in your yard, select a location with bright partial shade throughout the day.[2]
-
4Allow enough space for it to grow substantially. Hydrangeas can grow to become 4' by 4' bushes (1.2m x 1.2m). Research your species and variety online if you want a more accurate idea of how large your hydrangeas will grow.
-
5Prepare rich, porous soil. Mix compost into your soil if it is low in nutrients. If your soil is dense or mostly clay, mix in pine bark or other mulch material in order to prevent water from forming pools around the plant.
-
6Loosen the roots. Roots can become tangled or clustered together, which makes it harder for them to grow out into the soil once they're planted. This can limit the amount of nutrients the plant absorbs. To loosen your roots, cut a few of the outside roots, then gently shake the roots apart. Once the inner roots are free, they will be able to spread out into the soil.[3]
-
7Plant the hydrangeas in a spacious hole carefully. Dig a hole about as deep as the root ball or potting container, and two or three times as wide. Carefully lift the hydrangea and place it in the hole. Be careful not to scrape or break the roots while moving the plant.
-
8Fill the hole halfway with soil, a little at a time. Press the soil gently together as you fill the hole to remove air pockets and provide support to hold up the plant. Stop when the hold is approximately halfway filled.
-
9Water the hole, let drain, then fill the rest of the hole with soil. Water the half-filled hole thoroughly, then leave it to drain for at least 15 minutes or until there is no standing water. Fill in the rest of the hole in the same way you were filling it before, pressing down small portions of soil at a time. Stop when the roots are covered. Do not bury any more than 1 inch (2.5 cm) of the trunk or stem.
-
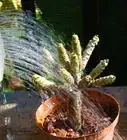
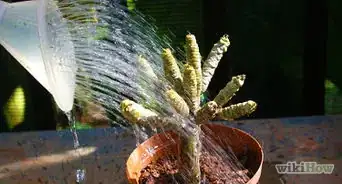
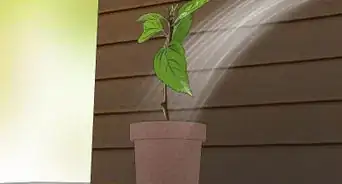
10Water the plant frequently for the first few days. Newly transplanted plants may not yet have roots functioning at full capacity, so it's important to water them well. Water once more when you're finished filling the hole, then water daily for the first few days after planting.
-
11Reduce the watering but keep the soil damp. Once the hydrangea is established in its new location, water whenever the soil is about to dry out. Make sure that you give it a deep watering each time, not just a sprinkling of water. The soil should be kept somewhat moist, but not soggy. Hydrangeas do not usually require additional care, and often grow or bloom without difficulty.
- If your hydrangeas wilt or dry out, construct a shade to block the sun during the afternoon. You can also try using mulch.
- If the winter forecast predicts unusually cold or prolonged frost, or if you are planting in a lower than recommended hardiness zone (see above), you may need to provide winter protection for your hydrangeas.


Adjusting Hydrangea Colors
-
1Check whether your species and variety produces different colors. Some varieties of hydrangea can bloom pink or blue depending on the soil's aluminum content and acidity. Most cultivated hydrangeas of this type belong to the species Hydrangea macrophylla, but some members of this species only produce white blooms, or favor the pink or blue side too heavily for easy adjustment. Ask the previous owner of the hydrangeas to identify your hydrangea variety if you are not aware of its name.
- The varieties named Enziandom, Kasteln, Merritt's Supreme, Red Star, and Rose Supreme all have the ability to be grown as pink or blue blossoms, although they vary in intensity.
-
2Test soil pH. Most garden supply stores sell a pH test kit for measuring the pH, or acidity, of your soil. Because acidity affects the hydrangea's ability to take in aluminum, which in turn affects the flower color, you can get a rough prediction of the flower color by measuring the soil pH. As a rule of thumb, a soil pH below 5.5 will likely result in blue flowers, and a soil pH of 7 and up will likely result in pink or red flowers. The effects of soil pH levels between 5.5 and 7 are difficult to predict. They may result in blue, pink, or purple flowers, or in a blotched blue and pink pattern.[4]
-
3Turn blooms blue. To encourage a blue color during the growing season, mix 1 tbsp (15 mL) aluminum sulfate into a gallon of water. This both adds aluminum to the soil and increases the acidity (lowering pH), making it easier for the plant to use the aluminum. Once every 10–14 days, Apply as much of this water as you would in a normal watering. Continue to measure the pH of the soil, and stop applying once it drops below 5.5 pH.
- Alternatively, you can also create blue blossoms by applying a fertilizer that is low in phosphorus and high in potassium. Look for a 25/5/30 fertilizer blend. You'll also want to avoid superphosphates and bone meal.[5]
-
4Encourage pink blooms. If the hydrangea is already blue, it is hard to make it pink due to the existing presence of aluminum causing a blue color. However, you can take precautions in advance to encourage pink blooms, or you can grow your plants in a pot. Avoid planting near driveways or walls, as some concrete mixes or mortars can leach aluminum into the soil.
- Apply a fertilizer that contains no aluminum, but high levels of phosphorus, which inhibits aluminum uptake. Look for a fertilizer that contains a 25-10-10 blend. Consider raising the pH by adding wood ash or crushed limestone to the soil, as this also makes aluminum uptake difficult. Avoid raising the pH higher than 6.4, or the plant may develop health problems.


Community Q&A
-
QuestionWill all day sun affect hydrangea growth?
 Community AnswerHydrangeas prefer some shade in the afternoons. If you try to grow them in all-day sun, make sure to use plenty of mulch to keep the soil from drying out. You can also set up a structure of some kind to give them shade.
 -
QuestionMy hydrangea hasn't flowered in a couple of years. What should I do?
 Community AnswerOne thing to do is ask friends who have hydrangeas for some of their flower heads. Sprinkle them around the base and inside of your bush; this suggestion was given to me when I asked that question to a nurseryman several years ago. Also note that some hydrangeas only bloom every other year.
 -
QuestionWill they bloom again next year and should they be covered?Community AnswerThey don't need to be covered, and hydrangeas are perennials, so they will come back each year, and grow more every year they come up.
Warnings
- Be cautious about planting hydrangeas under or near trees, as the large roots may not leave enough water and nutrients for the hydrangeas. Keep an eye on hydrangeas in these positions, and transplant them to a new area if they are struggling to grow or produce flowers.⧼thumbs_response⧽


References
- ↑ http://www.bhg.com/gardening/trees-shrubs-vines/shrubs/best-hydrangeas/
- ↑ http://www.almanac.com/plant/hydrangea
- ↑ http://homeguides.sfgate.com/large-hydrangea-roots-80215.html
- ↑ http://www.southernliving.com/home-garden/gardens/hydrangea-planting-tips
- ↑ http://hydrangeashydrangeas.com/colorchange.html
About This Article

Before you plant hydrangeas, find an area in your yard that gets a mix of sun and shade and that has rich, porous soil. You’ll also want to leave enough space for the bushes since they can grow to 4 feet by 4 feet. In the spring, dig a hole as deep as the root ball and 2-3 times as wide, and, once the bush is in place, fill the hole halfway with soil. After you water the hole and allow it to drain for 15 minutes, fill the rest of the hole with soil. For more tips from our Horticulturist reviewer, including how to figure out what zone is best for planting hydrangeas, keep reading!