X
This article was co-authored by Ashley Adams. Ashley Adams is a Licensed Cosmetologist and Hair Stylist in Illinois. She completed her Cosmetology education at John Amico School of Hair Design in 2016.
There are 7 references cited in this article, which can be found at the bottom of the page.
This article has been viewed 85,104 times.
If you want to add texture to the ends of your hair, point cutting is the technique you need. This technique cuts the hair with a vertical, rather than horizontal, motion. Point cutting removes bulk from the ends of the hair, blending layers together and creating movement.[1]
Steps
Section 2 of 3:
Short & Medium Hair
-
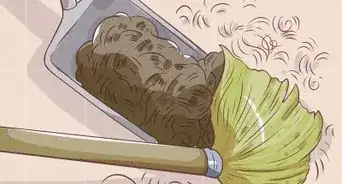
1Wet the hair and comb out any tangles. For the best results, wash and rinse the hair before you begin to cut it. While the hair is still wet, comb through it to release tangles and remove loose hair.
- Textured or tightly coiled hair should be dried and straightened before being point cut.
-
2Comb thin, 2 inch (5 cm) long sections of hair into your fingers. Hold the scissors in your dominant hand and the styling comb in your non-dominant hand. Comb the hair upward away from the head. When there is about 2 inches (5 cm) of hair in the comb, pinch the hair between your forefinger and middle finger.[3]
- Start at the crown of the head, then work around the head in a circle.
- If you hold a section of hair that is longer than 2 inches (5 cm) in your fingers, it will begin to flop over and you can’t point cut it effectively. If there is less than that much, you won’t be creating the desired texture.
-
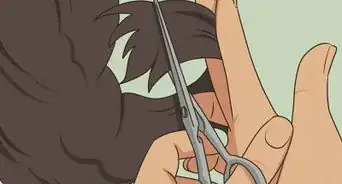
3Angle the scissors straight down. For a traditional cut, you’d hold the scissors parallel to your fingers. For a point cut, angle the scissors downward, perpendicular to your fingers. For the basic point cut, the scissors should be pointing straight down toward your fingers.[4]
- The idea behind the point cut is to create texture and remove bulk, rather than removing length. This is why the scissors are held straight up and down.
-
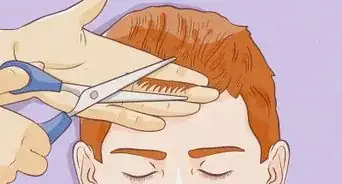
4Cut chunks from the hair you’re holding. Make an angled cut less than 1 inch (2.5 cm) deep into the hair you’re holding. Move the scissors sideways about ⅛ inch (0.3 cm) and cut into the hair again. Repeat this process as you move down the line of the hair. The final result will create a look of peaks and valleys in the hair.[5]
- For the standard point cut, don’t cut more than 1 inch (2.5 cm) of hair in this way or the hair will begin to look too jagged.
-
5Work from the bottom to the top. Begin point cutting at the nape of the neck, then work your way up to the sides. From there, move to the crown then the top of the head.
Advertisement
Section 3 of 3:
Long Hair
-
1Hold the scissors at a lower angle. Create a deeper texture in the hair by lowering the handle end of the scissors. The farther you lower the scissors from their vertical position, the more hair you’ll cut. Do not not lower the scissors past a 45 degree angle, or you are not really performing a point cut anymore.[6]
- Holding the scissors at 45 degrees will give you a choppy, layered look.
-
2Cut the hair deeper than 1 inch (2.5 cm). Point cutting should usually not take off more than 1 inch (2.5 cm) of hair. However, if you want to create an exaggerated effect, cut deeper into the hair when you have it pinched between your fingers. Cut between 1 and 2 inches (2.5 cm to 5 cm), but don’t cut more than 2 inches with this technique.
- Always make sure the person whose hair you are cutting is aware that you are going to be taking off more hair.
-
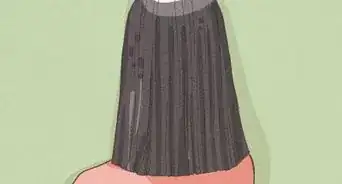
3Cut the lowest layer of layered hair. With the hair hanging straight down, gather a 2 inch (5 cm) section between and below your fingers. Rather than pulling the hair up, as in the technique for short hair, hold the hair so it hangs toward the floor. Point the scissors upward toward the hair and perform the point cut as before.[7]
- Cutting the lowest layer of hair in this way keeps the bottom layer from looking like a straight line.
Advertisement
References
- ↑ http://www.londonschoolofbarbering.com/point-cutting/
- ↑ https://www.terrifictresses.com/advice/how-to-point-cut-your-own-hair/
- ↑ http://www.hairfinder.com/hair/hairpointingslithering.htm
- ↑ https://intothegloss.com/2015/07/haircut-terms-to-know/
- ↑ https://www.youtube.com/watch?v=P6ReT7nKZhE&feature=youtu.be&t=8s
- ↑ https://bellatory.com/hair/How-to-texturize-hair
- ↑ http://www.manrepeller.com/2016/08/how-to-cut-your-own-hair.html
About This Article
Advertisement


-Step-18-Version-2.webp)
