This article was co-authored by Chai Saechao and by wikiHow staff writer, Hunter Rising. Chai Saechao is the Founder and Owner of Plant Therapy, an indoor-plant store founded in 2018 based in San Francisco, California. As a self-described plant doctor, he believes in the therapeutic power of plants, hoping to keep sharing his love of plants with anyone willing to listen and learn.
There are 16 references cited in this article, which can be found at the bottom of the page.
This article has been viewed 30,693 times.
Want to grow more of your favorite cactus plant? You're in luck, because propagating most species is as easy as taking a cutting!
Steps
Taking Healthy Cuttings
-
1Wait until nighttime temperatures stay above 60 °F (16 °C) to take cuttings. Wait until the spring and summer months to propagate your cacti, or else the roots may not establish. Check the temperatures daily, and only start taking cuttings when the temperatures are consistently 60 °F (16 °C) or over throughout the night.[1]
- If you plan on keeping the cacti indoors, then you can propagate your cacti any time as long as you keep the heat above 60 °F (16 °C).
-
2Wear gardening gloves to protect yourself from the spines. Since most cacti species have sharp spines, look for thick gardening gloves from a yard care or garden supply store. Put the gloves on any time you handle the cactus or cutting to keep yourself from getting injured.[2]
- You may also want to wear long-sleeved clothing if you’re taking cuttings from larger cacti so you don’t hurt yourself if you bump your arm against it.
Variation: If you don’t have any gardening gloves, you may also use a pair of tongs to hold onto the cactus.
Advertisement -
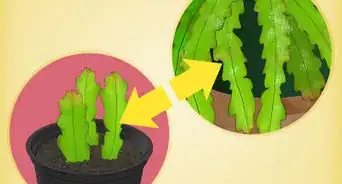
3Select a stem, pad, or offshoot that doesn’t have any damage or disease. You can choose any piece of the cactus for your cutting no matter the size. Look at the piece of cactus to see if it has any scarring, discoloration, or damage on the plant. Try to find a piece that’s still green and healthy, or else the cutting won’t root as effectively.[3]
- You can take cuttings from any part of the cactus, but they may root better if you use growth from the last year.
-
4Cut off the piece of cactus at a 45-degree angle with a serrated knife. If the cactus has pads, offshoots, or pups, make a straight cut through the joint where it connects to another part of the plant. For cacti that grow in tall columns, make your cut at a 45-degree angle through the middle of the stem. If you have globe-shaped cacti, make a flat cut at ground level for your cutting.[4] =
- If you’re taking cuttings from multiple cacti, disinfect your knife with a solution that’s 1 part bleach and 9 parts water to prevent the spread of bacteria.[5]
-
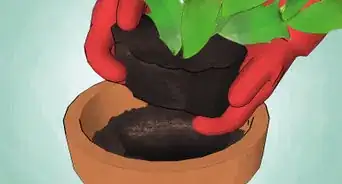
5Leave the cutting in a dry, shaded area until it forms a callus on the bottom. Lay the cutting sideways in a tray so the cut portion is exposed to the air. Leave the cutting alone and let the bottom dry out, which may take 1 day to several weeks. Feel the bottom of the cutting to make sure it’s dry to the touch before you plant it.[6]
- If you plant a fresh cutting without letting it dry out first, then it’s more susceptible to developing rot and dying.


Rooting Cuttings
-
1Fill a pot with equal parts perlite and compost. Use a pot that has drainage holes and is about half the height of the cutting. Mix together your perlite and compost until it’s thoroughly combined so the medium has proper drainage. Transfer the growing medium into the pot so there’s about 1⁄2 inch (1.3 cm) between the surface and the top edge of the container.[7]
- You can buy perlite and compost from a gardening center or outdoor care store.
- Avoid using a standard potting mix for your cactus since it will retain too much moisture and could cause the cutting to rot.
- You can also use a commercial cactus potting mix instead of mixing your own medium.
-
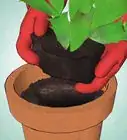
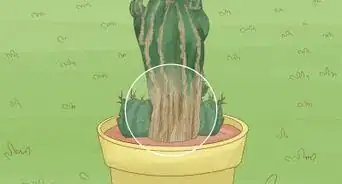
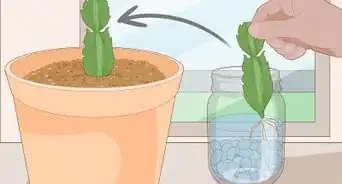
2Push the bottom third of the cutting into the growing medium. Poke a hole in the growing medium with your finger that’s large enough for the bottom of your cutting. Take the cutting and set the callused end in the growing medium so about a third of it is buried. Fill in the growing medium around the cutting so it doesn’t shift or fall over.[8]
- If you notice the cutting leaning or tipping over, you may need to bury it deeper.
Tip: You may dip the bottom of the cutting in a powdered rooting hormone to promote better growth, but cacti tend to grow well without it. You can buy rooting hormone from your local gardening center.[9]
-
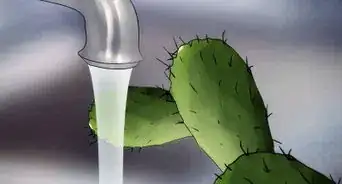
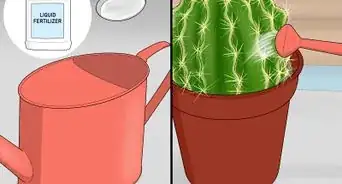
3Water the growing medium thoroughly. Fill a watering can with clean, cool water and pour it over the growing medium. Allow the water to completely drain from the holes in the bottom of the pot so the growing medium feels moist, but not waterlogged. Avoid adding more water to the pot if you notice it pooling on the surface of the growing medium, since it may be too damp.[10]
- Cacti don’t need a lot of water, and too much will cause the roots to rot and kill the plant.
-
4Keep the pot in an area that gets 6 hours of sunlight throughout the day. Put the pot in a brightly-lit area, such as a patio, greenhouse, or south-facing window sill. Leave the pot undisturbed while the cutting takes root in the growing medium.[11]
- Some cacti grow better in partially shaded areas, so check the requirements for the species you’re growing.
-
5Mist the soil with water when it dries out on the surface. Feel the surface of the soil to see if it’s dry to the touch. If it still feels damp, leave it alone until it dries out. Then use a spray bottle filled with clean water and wet the soil until it’s slightly wet so the cutting can continue establishing a root system.[12]
- If possible, use purified or distilled water since water from your tap may contain chemicals that could affect the plant’s growth.
-
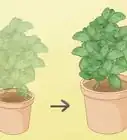
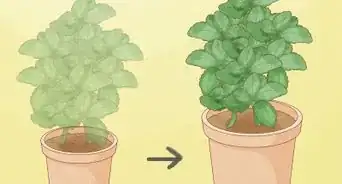
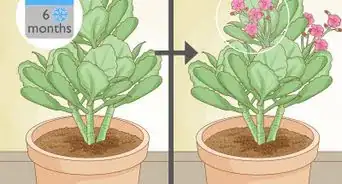
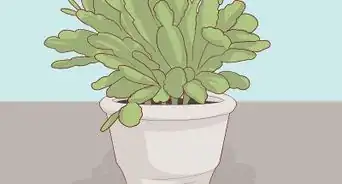
6Check for new growth within 4–6 weeks. Pay attention to the size of your cutting and check if there are any new growths sprouting from it. If there are, then the cactus has developed roots and you can care for it regularly. If the plant still hasn’t produced growths, then continue keeping the cactus in light for 6 hours each day and misting the soil when it dries out.[13]
- The time it takes for your cactus to root depends on the species you’re growing.


Germinating Cacti Seeds
-
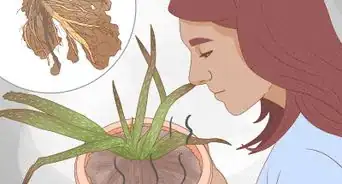
1Collect fresh seeds from the fruit or seed pods on the cactus. Look for the grey seed pods or colorful fruit on the top of the cactus growths and wait until they’re fully ripe. Pinch off the seed pods or fruit and pull them apart to reveal the seeds inside. Collect as many seeds as you can on a sheet of paper towel and dry them off.[14]
- If the seed pods or fruit are hard to reach, use a pair of tongs to pull them off of the cactus.
- If you don’t want to collect fresh seeds from a cactus, you can also buy a cactus seed mix from your local gardening store.
-
2Fill a planting tray with equal parts perlite and peat moss. Choose a planting tray that’s about 4 inches (10 cm) deep and has drainage holes so the growing medium doesn’t get waterlogged. Mix together perlite and peat moss until they’re thoroughly combined to help improve the drainage. Scoop your growing medium into the tray and spread it evenly. Leave about 1⁄2 inch (1.3 cm) between the surface of the growing medium and the lip of the tray.[15]
- You can buy planting trays from your local gardening supply store.
Tip: You can sterilize the growing medium by putting in your oven at 350 °F (177 °C) for 30 minutes to prevent the seeds from getting weak, though most commercial growing mediums are already sterilized.
-
3Spread the seeds evenly in the tray and cover them with 1⁄4 in (0.64 cm) of sand. Use all of the seeds in the tray for the best chances of them germinating. Sprinkle the seeds on top of the perlite and peat moss mixture so they’re spread out evenly. Then add a 1⁄4 in (0.64 cm) layer of coarse gardening sand to protect the seeds.[16]
- You can buy gardening sand from your local outdoor care store.
-
4Put a piece of plastic wrap over the tray. Rip off a sheet of plastic wrap that’s about 2 inches (5.1 cm) wider and longer than the growing tray. Cover the tray with the plastic wrap so 1 inch (2.5 cm) extends past each side. Press the plastic wrap tightly against the tray so it stays in place.[17]
- The plastic wrap helps keep the growing medium humid so the seeds are more likely to germinate.
-
5Set the tray inside a container filled halfway with water. Choose a waterproof container that’s about 2 inches (5.1 cm) longer on each side than the planting tray and has the same depth. Put the tray in the middle of the container, and begin adding water to the container. When the water reaches halfway up the sides of the tray, stop filling it.[18]
- The water will absorb through the drainage holes in the bottom of the tray to provide the seeds with moisture.
- Don’t overfill the container, or else the seeds could get waterlogged or wash out of the growing medium.
-
6Keep the tray in an area with 6 hours of indirect sunlight that stays over 65 °F (18 °C). Carefully carry the tray and set it in a spot that gets sunlight throughout the day, such as a patio or south-facing window sill.[19] Make sure the temperatures stay over 65 °F (18 °C), or else the seeds may not grow properly. Leave the tray alone while the seeds germinate.[20]
- You do not need to add more water to the container while the seeds germinate.
- Water droplets may form on the plastic wrap, but they will not negatively affect the seeds.
-
7Remove the plastic wrap when you see seedlings. Check the tray weekly to see if cactus seedlings sprout from the growing medium, which usually takes about 2–3 weeks. Once you notice the seedlings form, take off the plastic wrap to reduce the humidity so they don’t develop rot. Keep the seedlings in the tray while they grow.[21]
- If the growing medium feels dry to the touch and the container is out of water, lightly mist the medium with water.


Grafting Cacti
-
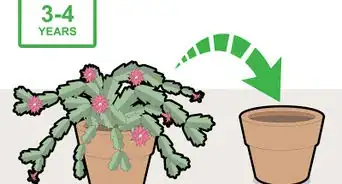
1Remove the top off of a potted cactus so the stalk is 2–3 in (5.1–7.6 cm) tall. Choose a healthy cactus that doesn’t have any diseases or blemishes. Hold the cactus with a pair of tongs and carefully slice horizontally through the stalk with a serrated knife. Be sure to leave at least 2–3 inches (5.1–7.6 cm) of the stalk, or else you may stunt its growth later on.[22]
- You can also hold the cactus with a pair of gardening gloves for better control.
-
2Cut a 1–2 in (2.5–5.1 cm) off the top of a different cactus to use as a scion. Select the cactus you want to propagate and find a healthy section that doesn’t have any disease or damage. Hold the blade of a serrated knife horizontally at least 1 inch (2.5 cm) down from the top of the cactus and slice through the stalk. The piece you just cut will be the scion, or the part of the cactus that you’re grafting onto another stalk.[23]
- You can graft any type of cacti to another.
- If you’re grafting multiple cacti, disinfect the knife blade with a 10% bleach solution when you switch plants so you don’t spread any diseases.
-
3Set the scion on top of the cut stalk so the rings on the inside line up. Look at the cut portion of the scion to find a light green ring in the center. Locate the ring on the cut stalk in the pot as well. Place the cut scion on the stalk and position the interior rings so they overlap. Press the scion down with light pressure so it firmly sticks to the stalk.[24]
- The rings inside the cacti are called the vascular cambium and allow water and nutrients to travel throughout the plants.
- If you don’t line up the rings on the cacti, the graft will not successfully grow.
-
4Secure the scion to the stalk and pot with pieces of twine. Cut 2 pieces of twine that are long enough to wrap around the top of the scion and underneath the bottom of the pot. Tie one of the pieces of twine around the scion so it presses tightly against the stalk, but not so tight that it cuts through it. Then position the second piece of twine perpendicular to the first one so the scion doesn’t slide around.[25]
- Be careful that the scion doesn’t move or shift while you’re tying it, or else the rings may not line up anymore.
-
5Keep the grafted cactus in a south-facing window with 6 hours of sun. Place the cactus pot on a window sill so it gets indirect sunlight throughout the day. If you don’t have a south-facing window, you can also keep the cactus in a shady area in your yard or on a patio. Be careful not to disturb the cactus after grafting the pieces together since it could affect how well it heals.[26]
- Keep the cactus indoors if there’s any risk for frost or snow since it could cause the cactus to die.
-
6Water the cactus when the soil feels dry. Stick your finger in the soil to see if it feels dry 1–2 in (2.5–5.1 cm) below the surface. If it still feels damp, leave the pot alone. If it’s dry, fill a watering can with fresh, clean water and pour it directly into the soil. Avoid letting the water pool on the surface since you could cause the cactus to rot.[27]
- Cacti are prone to overwatering and may not survive if the soil stays damp.
-
7Remove the twine after 1 month. Be careful as you untie the twine since the cactus may still be fragile and could easily get damaged. Take off both pieces and continue caring for the cactus as normal now that the pieces have joined together.[28]


Expert Q&A
-
QuestionWhere should I put a cactus outdoors?
 Chai SaechaoChai Saechao is the Founder and Owner of Plant Therapy, an indoor-plant store founded in 2018 based in San Francisco, California. As a self-described plant doctor, he believes in the therapeutic power of plants, hoping to keep sharing his love of plants with anyone willing to listen and learn.
Plant SpecialistCacti and succulents tend to do well outside in the shade. So basically any area that gets plenty of indirect sunlight is going to be okay. I don't recommend putting them on a balcony though, since they can easily be knocked over and they'll get too much sun.
Warnings
- Be careful when handling cacti since you could get injured by the spines. Always wear gardening gloves or use a pair of tongs to hold onto the cactus.[30]⧼thumbs_response⧽
- Avoid planting cuttings while they’re still moist on the bottom since they’re more likely to develop rot and kill the plant.[31]⧼thumbs_response⧽
Things You’ll Need
Taking Healthy Cuttings
- Gardening gloves
- Serrated knife
Rooting Cuttings
- Pot with drainage holes
- Perlite
- Compost
- Watering can
- Spray bottle
Germinating Cacti Seeds
- Gardening gloves
- Planting tray
- Perlite
- Peat moss
- Gardening sand
- Plastic wrap
- Waterproof container
Grafting Cacti
- Tongs
- Serrated knife
- Twine
- Watering can


References
- ↑ https://extension.arizona.edu/sites/extension.arizona.edu/files/pubs/az1483.pdf
- ↑ https://extension.arizona.edu/sites/extension.arizona.edu/files/pubs/az1483.pdf
- ↑ https://ucanr.edu/sites/mgslo/newsletters/Propagating_and_Caring_for_Cactus28082.htm
- ↑ https://ucanr.edu/sites/mgslo/newsletters/Propagating_and_Caring_for_Cactus28082.htm
- ↑ https://extension.arizona.edu/sites/extension.arizona.edu/files/pubs/az1483.pdf
- ↑ https://hgic.clemson.edu/factsheet/thanksgiving-christmas-cacti/
- ↑ https://aggie-horticulture.tamu.edu/databases/cactus/growingcactus/
- ↑ https://extension.arizona.edu/sites/extension.arizona.edu/files/pubs/az1483.pdf
- ↑ https://extension.arizona.edu/sites/extension.arizona.edu/files/pubs/az1483.pdf
- ↑ https://hgic.clemson.edu/factsheet/thanksgiving-christmas-cacti/
- ↑ https://hortnews.extension.iastate.edu/faq/how-can-i-propagate-christmas-cactus
- ↑ https://extension.arizona.edu/sites/extension.arizona.edu/files/pubs/az1483.pdf
- ↑ https://hortnews.extension.iastate.edu/faq/how-can-i-propagate-christmas-cactus
- ↑ https://youtu.be/Eq2a12nblsw?t=104
- ↑ https://aggie-horticulture.tamu.edu/databases/cactus/growingcactus/
- ↑ https://extension.arizona.edu/sites/extension.arizona.edu/files/pubs/az1483.pdf
- ↑ https://aggie-horticulture.tamu.edu/databases/cactus/growingcactus/
- ↑ https://extension.arizona.edu/sites/extension.arizona.edu/files/pubs/az1483.pdf
- ↑ Chai Saechao. Plant Specialist. Expert Interview. 20 February 2019.
- ↑ https://extension.arizona.edu/sites/extension.arizona.edu/files/pubs/az1483.pdf
- ↑ https://aggie-horticulture.tamu.edu/databases/cactus/growingcactus/
- ↑ https://www.sublimesucculents.com/how-to-graft-cacti/
- ↑ https://www.sundaygardener.net/how-to-graft-cacti/
- ↑ https://www.sundaygardener.net/how-to-graft-cacti/
- ↑ https://www.sublimesucculents.com/how-to-graft-cacti/
- ↑ https://worldofsucculents.com/what-are-grafted-cacti/
- ↑ https://worldofsucculents.com/what-are-grafted-cacti/
- ↑ https://www.sundaygardener.net/how-to-graft-cacti/
- ↑ https://extension.umn.edu/houseplants/cacti-and-succulents#growing-from-cuttings-1421917
- ↑ https://extension.arizona.edu/sites/extension.arizona.edu/files/pubs/az1483.pdf
- ↑ https://ucanr.edu/sites/mgslo/newsletters/Propagating_and_Caring_for_Cactus28082.htm
About This Article