This article was co-authored by Lauren Kurtz. Lauren Kurtz is a Naturalist and Horticultural Specialist. Lauren has worked for Aurora, Colorado managing the Water-Wise Garden at Aurora Municipal Center for the Water Conservation Department. She earned a BA in Environmental and Sustainability Studies from Western Michigan University in 2014.
There are 11 references cited in this article, which can be found at the bottom of the page.
wikiHow marks an article as reader-approved once it receives enough positive feedback. In this case, 97% of readers who voted found the article helpful, earning it our reader-approved status.
This article has been viewed 67,561 times.
Pruning basil plants is a quick and simple process, and it's helpful in order to keep the plant healthy, the leaves large, and flavorful once prepared. Pruning works because it forces the plant to produce more stems and leaves, instead of flowers and seeds. It might seem odd to cut a plant that is growing nice and tall, but this is a necessary step to grow a full, bushy basil plant. Take special care to grow them from seedlings, and trim them regularly to produce healthy basil plants that are ready to prepare and eat!
Steps
Trimming the Basil Plant
-
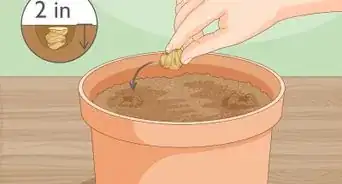
1Wait until your basil is 6 inches (15 cm) tall or has 6 sets of leaves. The last thing you want to do is prune your plant too early. Your basil plant needs to be at least 6 inches (15 cm) tall before you start pruning. This will ensure that there are 5-6 sets of leaves coming from the stem of the plant.[1]
- Having at least 5-6 sets of leaves is important, because you want to have 1-2 sets of leaves left when you cut it. These leaves are essential for converting sunlight into energy for your basil plant.
-
2Locate the central stem. A basil plant is made up of a one tall, main stem with sets of small leaves growing out of each side. The central stem will be the thickest one in the middle. Cutting the main stem will yield two new stems growing from it. [2]
- Be gentle when handling your plant. Basil is very sensitive and can bruise easily.
Advertisement -
3Cut the central stem 1⁄2 inch (1.3 cm) above the fifth set of leaves. Once you've located the central stem, start counting the set of leaves from the top of the stem and move your way down the plant until you reach the fifth set of true leaves. Make an angled cut about 1⁄4 inch (0.64 cm) to 1⁄2 inch (1.3 cm) above the spot where two leaves are growing.[3]
- Make sure there are at least 1 or 2 sets of leaves left at the bottom of your stem. These leaves are necessary for the continued growth of your basil plant.
- Always use scissors or gardening shears to cut the stem. Never use your fingers, as this may injure the plant.[4]
-
4Cut flower blossoms as soon as they start to form. If you see flowers start to bloom from your basil plant, clip them off immediately. Flower growth is a sign that your basil plant has switched from growth mode to reproductive mode. This is great if you want to plant more basil seeds, but if you want your current basil plants to get thicker and continue growing, you'll need to cut those flowers off with gardening clippers.[5]
- To prevent blooming from reoccurring immediately, move down the stem a few sets of leaves before cutting.
-
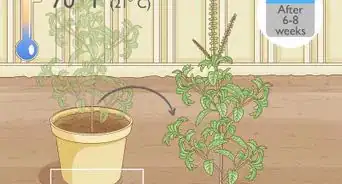
5Repeat pruning every 1-2 weeks. Make sure you prune your basil plant throughout the summer season. This will ensure optimal growth and more basil for you to cook! Wait at least 1-2 weeks before trimming again, to avoid cutting too much of the stems.[6]


Maintaining and Harvesting Basil Plants
-
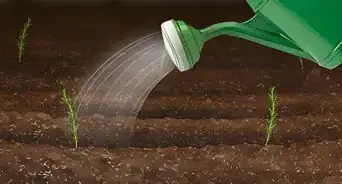
1Keep soil moist by watering at the base of the plant twice a week. Basil needs to be watered about twice a week, depending on the humidity. You'll know it's time to water your plants when the top of the soil looks dry. Use a watering can or spray bottle to moisten the soil so the roots can absorb the water. Make sure the soil is moist, but not soggy.
- If you live in a dry, hot region, place mulch around the basil plants to keep the soil moist.
-
2Fertilize basil plants with liquid plant food every 2-4 weeks. Basil should be fertilized on a regular basis with organic fertilizer. Mix the water-soluble liquid with water according to the manufacturer's instructions, and apply it at the same time you water your plants. During the first 2 months of the growing period, fertilize every 2 weeks. Throughout the summer, it's best to fertilize once a month.[7]
-
3Protect basil plants from frost by moving or covering. Basil plants are very sensitive to cold weather and can die if exposed to frost. If a late cold spell occurs, move your basil plant indoors or cover it with a frost blanket or plastic covering.[8]
- When you cover the plants, make sure the material isn't touching or rubbing against the leaves. Use sticks to keep the covering out of the way, or a covering made for plants that will just hover over it.
- Basil plants will sulk and turn yellow in temperatures under 50 °F (10 °C).
-
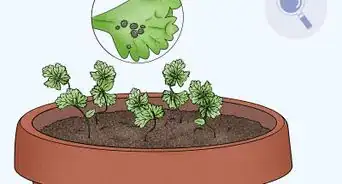
4Pinch and remove the flower heads as soon as they appear. If you plan on harvesting your basil plant, make sure to keep an eye on it daily. If you see any flowers start to appear, remove them immediately. Depending on the type of basil, the flower buds will be green, yellow, or purple, and have tiny, triangular petals. Remove them by cutting them with scissors, or pinch them off with your fingers. Their removal is crucial for the continued growth of the basil leaves.[9]
-
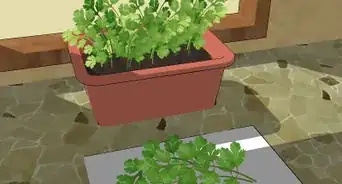
5Harvest basil leaves by cutting 1⁄4 inch (0.64 cm) above a node. When you're ready to harvest the basil for food preparation, use scissors or garden shears to cut above a node of the plant. You'll recognize the node by the tiny set of leaves that come out of the stem.[10]
- Continue to trim at each node until you have as much basil as you need.
-
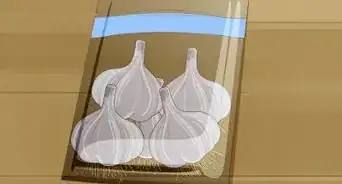
6Store and preserve the basil leaves by freezing them. After you cut the preferred amount of basil, you can store them in the freezer, which will prevent them from losing their flavor. All you need to do is pack them in an airtight container or plastic bag before putting them in the freezer. When you're ready to cook, just take out the amount you need and prepare them.[11]
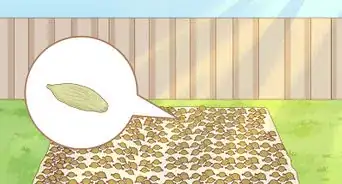
- You can also store the basil by air-drying it. For this method, remove the leaves from the stem and place them in a shady area. After about 3-4 days your basil should be dry. Although this method works to store your basil, it may not preserve all of its flavor.[12]
- You can also use a food dehydrator to dry your basil leaves.


Things You'll Need
- Basil plant
- Scissors or gardening shears
- Watering can or spray
- Fertilizer


References
- ↑ https://youtu.be/dQmcaTJ76Mo?t=97
- ↑ https://youtu.be/dQmcaTJ76Mo?t=61
- ↑ https://youtu.be/dQmcaTJ76Mo?t=116
- ↑ http://www.gettystewart.com/how-to-cut-basil/
- ↑ https://youtu.be/dQmcaTJ76Mo?t=222
- ↑ https://youtu.be/dQmcaTJ76Mo?t=178
- ↑ https://youtu.be/W51DNfRLP8Q?t=101
- ↑ https://youtu.be/W51DNfRLP8Q?t=74
- ↑ https://www.almanac.com/plant/basil
About This Article