This article was co-authored by wikiHow Staff. Our trained team of editors and researchers validate articles for accuracy and comprehensiveness. wikiHow's Content Management Team carefully monitors the work from our editorial staff to ensure that each article is backed by trusted research and meets our high quality standards.
There are 8 references cited in this article, which can be found at the bottom of the page.
wikiHow marks an article as reader-approved once it receives enough positive feedback. In this case, 99% of readers who voted found the article helpful, earning it our reader-approved status.
This article has been viewed 41,920 times.
Learn more...
Redcurrants are a type of shrub that produce beautiful, red berries. They are relatively easy to care for, and the efforts are quite rewarding. With proper pruning, however, you can ensure that your redcurrant grows healthier, free of pests and disease. The key thing to remember is to prune the bush in the winter so that the middle is hollow.
Steps
Doing Basic Pruning to Encourage Growth
-
1Get a pair of good-quality pruning loppers and secateurs. You'll be using the loppers for thicker stems, and the secateurs for thinner. Both tools need to be sharp so that they leave behind a nice, clean cut. If they tear through the stems, the wound won't heal as quickly or as neatly.
- You can use these methods to prune white currants and gooseberries as well.
- These methods will not work on blackcurrants. Blackcurrants have different pruning needs than redcurrants.[1]
-
2Clear out the middle of the bush in late winter or early spring. Use your loppers to remove any crisscrossing stems in the center of the bush so that it is hollow in the middle, sort of like a cage or goblet. This will allow more air and light to reach the middle of the bush, which means that you'll get more growth and less disease.[2]Advertisement
-
3Remove any stems that are older than 3 years. Ideally, you should have a combination of both old and new stems, ranging between 1 and 3 years. Once a stem hits 4 years, however, you should prune it off.[5]
- Unlike blackcurrants, redcurrants grow best on older stems. Once the stem hits 4 years though, it won’t produce many berries, if at all.
- Older stems are darker and thicker, while younger ones are thinner and paler.[6]
-
4Leave 1 to 3 buds on each stem that you cut off. Make sure that the last bud is on the outside of the plant. This way, it will develop into an outward facing stem.[7]
- You are essentially cutting about a third of the stem off.
-
5Cut new shoots and stems down to 5 leaves in mid-summer. Between winter and summer, the bush will grow a lot, so you will need to prune it again. Since berries like to grow on older stems, focus on pruning off the newer ones instead.[8]
- Keeping the older stems will allow them to continue to grow berries.
- Trimming the newer stems will help encourage growth and give you a bushier plant.
- Try to finish on an outward-facing leaf rather than an inward-facing leaf.
-
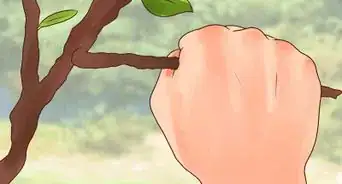
6Snip away any suckers, especially on newly-planted bushes. Suckers are thin, vertical stems shoots that grow from the roots. They are not connected to the base of the bush. They will show up in the summer, after the growing season; this is when you should prune them.[9]
- As the name implies, suckers suck water and nutrients that could otherwise go to the plant. Removing them means that your plant will get more water and nutrients.


Preventing Pests and Disease
-
1Remove any dead or diseased stems as soon as you see them. Dead or diseased stems will be darker in color than healthy, living stems. They may appear splotchy or wrinkled. If you cut them down, the wood inside might be dry, instead of damp. Note where the damage ends, then cut a few inches/centimeters below that.
- After cutting the stem off, take a look at the exposed wood. If it still looks dead or diseased, trim it further. You may have to remove it entirely in extreme cases.
- Remember to clean your shears after each cut that you make. This may seem like a lot of extra work, but you don't want to transfer the infection to healthy wood.
-
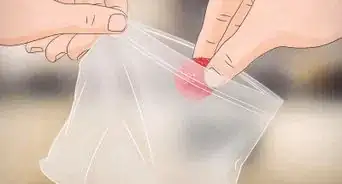
2Destroy any diseased or infested stems to prevent contamination. Don't discard these stems by tossing them into the trash or compost bin. If there are any pests on these stems, they’ll continue to thrive. Diseases may also spread into compost and contaminate it. Burn the stems, if possible.[10]
- If you can’t burn the stems, treat with an fungicide or pesticide that’s intended for the disease.
-
3Clean your tools with rubbing alcohol or bleach after you use them. Spray your shears with rubbing alcohol, then wipe them down. If you don't have any on hand, use a solution of 1 part bleach and 10 parts water instead.
- If you trimmed off a dead or diseased stem, then you need to clean the shears after each cut that you make. If you don't do this, you risk transferring the infection.
- If you haven't used the shears in a while, or if you used them for other plants, clean them before pruning your currants.
-
4Keep the foliage sparse at the bottom of the bush to control pests. Redcurrants are especially susceptible to sawfly caterpillars. Keeping the base of the bush free of leaves will help deter these pests.[11]
- Leaves grow on thin stems, so a pair of pruning shears or secateurs should be large enough to cut through them.
-
5Make sure that the stems don't touch the ground once laden with berries. You will have to think ahead and use your best judgement for this. Take a stem that’s close to the ground, and gently pull downward on it to stimulate the weight of the berries. If the stem reaches the ground, cut it shorter.[12]
- This won't really encourage new harvest, but it will have prevent your harvest from touching the soil and rotting.
- Another reason you don't want the stems to hang too close to the ground is because they might get tangled up in weeds.


Things You'll Need
- Pruning loppers
- Pruning secateurs
- Gardening gloves

References
- ↑ https://www.youtube.com/watch?v=RtLcTLawpHo
- ↑ https://www.growveg.com/guides/how-to-winter-prune-gooseberries-and-currant-bushes/
- ↑ http://www.omafra.gov.on.ca/english/crops/facts/98-095.htm
- ↑ https://www.growveg.com/guides/how-to-winter-prune-gooseberries-and-currant-bushes/
- ↑ https://www.growveg.com/guides/how-to-winter-prune-gooseberries-and-currant-bushes/
- ↑ https://www.youtube.com/watch?v=RtLcTLawpHo&feature=youtu.be&t=30s
- ↑ https://gardening.which.co.uk/hc/en-gb/articles/115003802305-How-to-prune-gooseberries-white-currants-and-red-currants
- ↑ https://gardening.which.co.uk/hc/en-gb/articles/115003802305-How-to-prune-gooseberries-white-currants-and-red-currants
- ↑ http://www.bbc.co.uk/gardening/basics/techniques/growfruitandveg_growingcurrants1.shtml
- ↑ http://www.omafra.gov.on.ca/english/crops/facts/98-095.htm
- ↑ https://www.quickcrop.co.uk/blog/how-to-grow-blackcurrants-redcurrants/
- ↑ https://www.growveg.com/guides/how-to-winter-prune-gooseberries-and-currant-bushes/
- ↑ http://www.bbc.co.uk/gardening/basics/techniques/growfruitandveg_growingcurrants1.shtml
- ↑ https://www.rhs.org.uk/advice/grow-your-own/fruit/redcurrants
About This Article