This article was co-authored by Lauren Kurtz. Lauren Kurtz is a Naturalist and Horticultural Specialist. Lauren has worked for Aurora, Colorado managing the Water-Wise Garden at Aurora Municipal Center for the Water Conservation Department. She earned a BA in Environmental and Sustainability Studies from Western Michigan University in 2014.
wikiHow marks an article as reader-approved once it receives enough positive feedback. In this case, 97% of readers who voted found the article helpful, earning it our reader-approved status.
This article has been viewed 71,156 times.
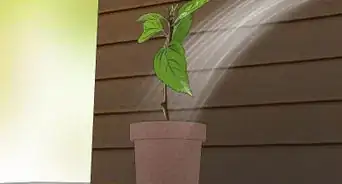
Wisteria is a popular climbing vine that produces beautiful purple flowers. It requires pruning twice a year: once in the winter, and once in the summer. The first pruning clears the vine of any unruly shoots that might block sunlight from reaching the blooms. The second pruning tidies the vine up and helps encourage more blooms. Knowing how to prune wisteria correctly will help your vine produce more blooms the following season.
Steps
Pruning in Winter
-
1Plan your wisteria’s first pruning of the year around late winter. This is the best time to prune your wisteria because the leaves and flowers have not grown back yet after falling off during the fall. This means that the branches are bare and easier to reach.[1]
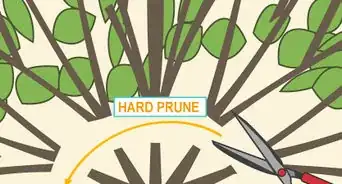
- If you are hard pruning an old, neglected wisteria, don't do everything all at once. Space the process out over the span of a few years.
-
2Get a pair of hand pruners, gloves, and a step ladder. You will need the hand pruners to do the actual pruning, and a step ladder to reach the vines. A pair of gloves will help protect your hands against scratches.
- If you are hard pruning an old, neglected wisteria, switch to a pair of loppers or a pruning saw.
Advertisement -
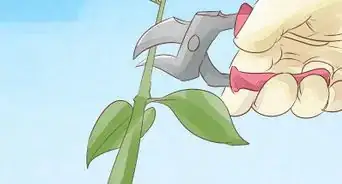
3Cut the long shoots down until they have 2 to 3 buds each. This will help tidy the vine up and ensure that the blooms get enough sunlight.[2] Make sure that you prune wisteria to 2 to 3 buds on the inner side of the shoot. You do not need to leave any buds on the outside of the shoot.[3]
- The inner side of the shoot is the side that is facing away from you. The outer side of the shoot is the side that is facing you.
- Be sure to cut off the whip-like water shoots as well. The only things you want left on the vine are the flower buds.
- If you are hard pruning an old, neglected wisteria, focus on the old, hard branches. Cut them back to where a new shoot begins.
-
4Be careful not to bump the flower buds. The flower buds are very fragile, and if you accidentally bump against them, they may fall off. If these buds fall off, then your wisteria will have fewer blooms.
-
5Decide whether you want to tie or trim the thin shoots. The vine will have developed lots of thin shoots during summer. If you want to train the vine to cover more area on your wall or pergola, you will have to tie the vines into place with wire. If the shoots are all tangled up, it would be better to cut them down to 1 inch (2.5 cm) instead.
- To tie the shoots, hold them against your desired support, then loosely wrap a piece of thin wire around both the vine and the support. Twist the wire together, then trim the excess wire off.
- Cutting the thin shoots down will help encourage bigger blooms the following year.


Pruning in Summer
-
1Get out your tools and prepare to prune again in late summer. As soon as the wisteria is done flowering, it is time to get out your tools again. This includes your hand pruners, ladder, and gloves. If you are doing hard pruning on an old wisteria, get out the loppers or pruning saw.[4]
-
2Cut the shoots down to 6 inches (15 cm) each. This will help tame the vine, and encourage it to produce more blooms the following year.[5] Try to leave 5 to 6 leaves on each shoot. This way, you will have enough leaves left behind for a visually-appealing appearance, but not so many leaves that the vine wastes energy on them.[6]
-
3Trim away shoots that aren't necessary for the vine’s support. Wisteria is a vine, which means that it grows on a pergola or wire support. Some of the shoots help keep the vine attached to the pergola or wire support. Other shoots stick out randomly and lead to an unruly appearance. It is these shoots that you should cut away.[7]
- It would be a good idea to cut back any root suckers as well, especially for grafted vines. Root suckers are thin vines or branches without any flowers or leaves on them.
-
4Trim the new growth back every 2 weeks until summer is over. This will help maintain a tidy appearance and encourage more blooms.[8] How far you trim depends on how long and unruly the shoots get. About 1 to 2 leaf joints would be ideal, however.
-
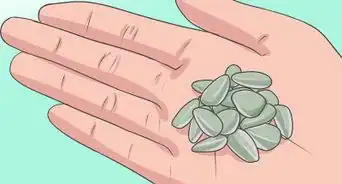
5Decide whether or not you want to leave the seedpods on. Some people like the way the seedpods look, while others prefer to cut them away. If you decide to leave the seedpods on, be aware that they will burst once temperatures rise.[9]


Warnings
- Do not cut into the main branch of the vine. This is the hard, woody part.⧼thumbs_response⧽
- If you have wisteria near your gate or fence, you have to prune it regularly.⧼thumbs_response⧽
- Do not use fertilizer that has a high-nitrogen content, otherwise you will get too many leaves and not enough blooms.[13]⧼thumbs_response⧽
- Be careful with Chinese wisteria (Wisteria sinensis) and Japanese wisteria (Wisteria floribunda) if you live in North America. These non-native species are invasive.[14]⧼thumbs_response⧽
Things You'll Need
- Gloves
- Hand pruners
- Ladder
- Tying wire (optional, for training)
- Loppers or pruning saw (optional, for hard pruning)


References
- ↑ http://www.finegardening.com/pruning-and-training-wisteria
- ↑ https://www.rhs.org.uk/advice/profile?pid=242
- ↑ https://www.gardenseeker.com/pruning/pruning_wisteria.htm
- ↑ http://www.finegardening.com/pruning-and-training-wisteria
- ↑ http://www.finegardening.com/pruning-and-training-wisteria
- ↑ https://www.rhs.org.uk/advice/profile?pid=242
- ↑ http://www.finegardening.com/pruning-and-training-wisteria
- ↑ https://www.almanac.com/plant/wisteria
- ↑ http://www.finegardening.com/pruning-and-training-wisteria
About This Article

To prune wisteria, start in late winter when the branches are bare and easy to reach. Use pruning shears to cut the long shoots down until only 2 to 3 buds are left on each one, then snip off the whip-like water shoots. Avoid pruning again until late summer, right after the wisteria finishes flowering. Cut the shoots down to 6 inches, leaving 5 to 6 leaves on each shoot, and get rid of any root suckers you see. Trim the new growth back every 2 weeks until summer ends and you're all set until winter! For more tips from our Horticulturist reviewer, including when to leave the seedpods in, read on!