This article was co-authored by David Wilkins. David Wilkins is a Professional Body Piercer and the Owner of The Axiom Body Piercing Studio in Des Moines, Iowa. David has been working in the industry since 1994 and is knowledgeable about all aspects of the body piercing industry. He runs an educational YouTube channel specializing in sharing expert body piercings and tattoo information. He completed his apprenticeship in body piercing in Omaha, Nebraska.
There are 10 references cited in this article, which can be found at the bottom of the page.
This article has been viewed 124,976 times.
Pierced ears can close up partially or completely for several reasons. You may have removed your earrings too soon, gone too long without wearing earrings, or experienced an infection from the initial piercing. It is possible to re-pierce your ears on your own, but you should seek the help of a professional if possible. Improper piercing can lead to infection and other problems. If you do decide to re-pierce your ears, you should prepare your ears, carefully re-pierce them with a needle, and then take proper care of them in the following months.
Steps
Going to a Professional Piercer
-
1Search for a reputable piercing center. There are plenty of options out there for re-piercing your ears, but it is best to do some research before making a choice. Malls are often the cheapest option, but usually not the best choice. This is because the piercers are not always trained well, and piercing guns are used. Instead, go to a piercing center or tattoo parlor that does piercings.[1]
- Piercing guns aren’t good for piercings because the impact can be too much on the ear, and they can’t truly be sterilized.
- Ask family and friends for recommendations. You can also search online for reputable centers.
-
2Visit the piercing location to talk with the piercer. Ask the piercer about their experience and training. The piercer should be APP qualified, and it’s a bonus if they have a First Aid/CPR certification. See what equipment they use and how they sterilize their tools. While you’re there, take note of the cleanliness of the location.[2]
- You can also ask to look at the piercer’s portfolio.
- If you can see others having their ear pierced, watch how the procedure is done.
Advertisement -
3Make an appointment if necessary. Some locations may be able to take you as a walk-in right away, but you might have to make an appointment if there isn’t availability. If that’s the case, make an appointment for a time that is suitable for you. Make a note of the appointment in your calendar so that you don’t forget.[3]
-
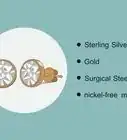
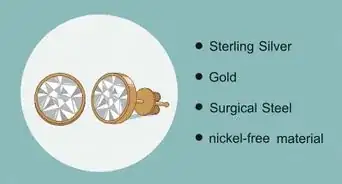
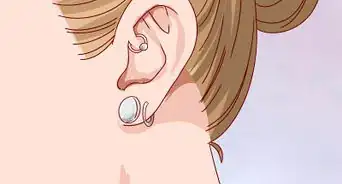
4Choose earrings for your reopened piercing. Typically, you will purchase earrings from the location. Look for a pair of studs that are made out of hypoallergenic metal—14KT gold is ideal. Make sure the earrings you choose have been fully-encapsulated in a package and haven’t been exposed to air before being removed for piercing.[4]
- Medical Grade Stainless Steel and 24KT gold plating are other options for metal.
- Go for Medical Grade Titanium if you have an allergy to nickel.
-
5Ask your piercer for aftercare advice. There is some basic aftercare advice to follow, but your piercer will typically give you instructions of their own. Tell your piercer if you have specific concerns about ear sensitivity or if you were prone to infections in the past. Your piercer will be able to give you instructions and advice that is personalized for you.[5]


Re-Piercing Your Own Ears
-
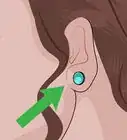
1Try to open the hole again without re-piercing it. Check your initial piercing to see if you can open the holes without the use of a needle. If the holes seem to be partially opened, try to work your earrings through your ears. First, cover the earrings in a layer of Vaseline. Then, stand in front of a mirror and gently try to twist them into the holes. If this doesn’t work, you can move on to re-piercing your ears.[6]
- Rubbing your ears before trying to insert the earrings can help to open up the holes. Don’t rub hard enough to cause injury, though.
- Make sure to wash your hands and disinfect the earrings before attempting this.
-
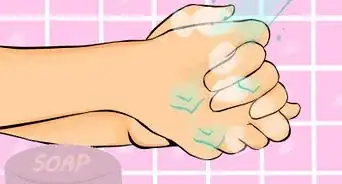
2Wash your hands. Unwashed hands can transfer bacteria that causes infection. Wash your hands with an antibacterial soap in warm water. Then, dry your hands with a clean towel. Finish the cleaning process with a hand sanitizer to be as germ-free as possible.[7]
-
3Disinfect the needle and earrings. Any type of thin needle or pin will work to re-pierce your ears. You will, however, have to disinfect the needle whether it is new or has been used before. Soak a cotton ball in rubbing alcohol, and rub the entire needle with that cotton ball. Then, take a new cotton ball, soak it in the rubbing alcohol, and disinfect the entire surface of the earrings.[8]
- A new needle that has never been used before is ideal.
- A needle that hasn’t been disinfected will likely cause infection.
-
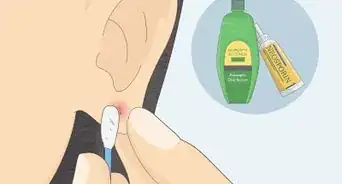
4Use a skin numbing gel on your ears. It is commonly thought that ice will numb the pain during a piercing, but this is not true. The ice will cause extra texture and abrasions, which makes the piercing more difficult. Instead, use a skin numbing gel on your ears. Layer on the gel 30 to 60 minutes before piercing your ears.[9]
- You can find a skin numbing gel online or at a pharmacy.
- If you don’t have a skin numbing gel, you can use a tooth pain gel.
-
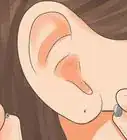
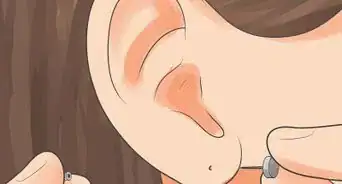
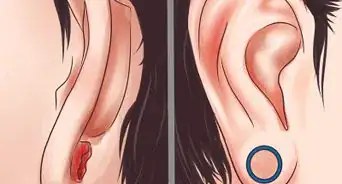
5Find the location of the initial piercing. You may have already done this when you checked out the condition of the initial piercings. If not, look in the mirror and find the exact locations of the initial piercings. The piercings may have closed up to the point that they can’t be located. If that’s the case, locate where you would like the new piercings to be. Use a marker to indicate where you will need to do the piercing.[10]
- You can also use a marker to indicate the piercing spot even if the initial piercing locations can be seen.
- Use a mirror to make sure the piercings will be symmetrical.
-
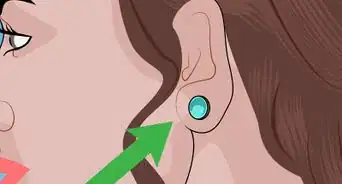
6Place a potato behind your ears. You will need to use a potato that has been washed. The potato will protect your neck and reduce the force of the needle during the piercing. When you are ready, hold the potato with your free hand behind the first ear that you plan to pierce.[11]
- If you don’t have a potato, you can use a similar food or an object like a Nerf Ball.
-
7Slide the needle through your ear slowly. First, hold the needle to the exact location where you plan to pierce. Then, begin to slide the needle through your first ear. Hold the needle at an angle and wiggle it slightly to help it slide through your ear. Continue until the needle has gone all the way through your ear.[12]
-
8Hold an ice cube over the piercing. Remove the potato and replace it with a large ice cube. Hold the ice cube to the back of your ear for five minutes. It will help reduce the pain. The needle should still be in your ear during this time.[13]
-
9Thread the earring through the hole. After you’ve removed the ice from your ear, pick up an earring. Slowly begin to pull the needle out of your ear. As you do this, thread the earring through the hole. Push it through the hole until the post of the earring has gone all the way through. Secure the back of the earring so that it does not come off.[14]
- It is better to use studs for earrings when you re-pierce your ears. They are lighter, less likely to fall out, and will not get in the way since you have to wear them 24/7 for the first few months.
-
10Repeat on the other ear. Inspect the first ear to make sure that the re-piercing was successful. You will probably experience some discomfort, but you shouldn’t be experiencing a lot of bleeding or pain. If you feel that the first piercing was okay, repeat the process with the second ear.[15]


Caring for Your Ears
-
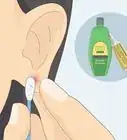
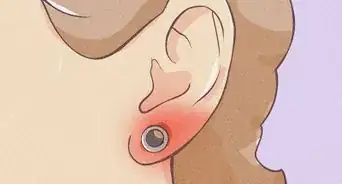
1Clean your ears twice a day. You will need to clean your ears at least twice a day after the re-piercing. Ideally, you should use a saline solution that is specifically made to clean pierced ears. If you don’t have a saline solution, you can use rubbing alcohol. Apply the solution to a cotton ball or swab and rub it over the front and back of the piercing.[16]
- Your re-piercing will likely be unsuccessful if you don’t take care of your ears after it has been done.
- A saline solution is usually given to you by a professional after a piercing. You can ask a professional if it’s possible to purchase the solution without having a piercing done.
- Rubbing alcohol may sting a little bit when applied to the piercing.
-
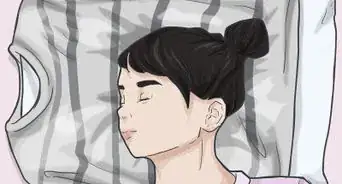
2Leave your earrings in for 6 to 8 weeks. A common reason for piercings closing up is because the earrings have been taken out too soon. Leave your earrings in for at least 6 to 8 weeks. After that, you can choose to wear another pair of earrings.[17]
- You can leave in the earrings for longer than 6 to 8 weeks.
-
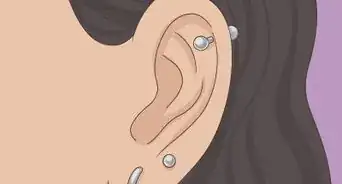
3Don’t leave your earrings out for too long. Make sure to immediately put in another pair of earrings after you’ve removed the first pair. New holes will close quickly without earrings to keep them open. Consistently wear earrings for about a year after the re-piercing.[18]
-
4Cover your pierced ears when you shower or swim. Protecting your ears from water, shampoo, and conditioner will help to prevent infection. Use a shower cap when you are taking a shower for the first few months. When you do need to shampoo and condition your hair, do your best not to get product on your ears, and thoroughly rinse the product out of your hair. If you go swimming, use a swimming cap.[19]
- You should also try to avoid using hair products, like gel and hairspray, for the first 6 to 8 weeks after re-piercing your ears.
- Make sure to only go swimming after the piercing is completely healed.


Expert Q&A
-
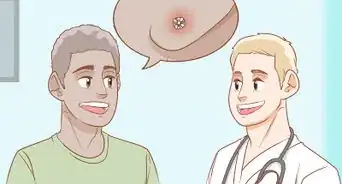
QuestionWhat should a healed piercing look like?
 David WilkinsDavid Wilkins is a Professional Body Piercer and the Owner of The Axiom Body Piercing Studio in Des Moines, Iowa. David has been working in the industry since 1994 and is knowledgeable about all aspects of the body piercing industry. He runs an educational YouTube channel specializing in sharing expert body piercings and tattoo information. He completed his apprenticeship in body piercing in Omaha, Nebraska.
Professional Body PiercerThe body will stop producing limp discharge, which is what hardens across on the jewelry. The crusties, which they're often referred to, will slow down or completely end. Also, the piercing holes will begin to grow, meaning that once that tissue connects in the center, the holes kind of pull inward. It'll have more of a rounded edge to it in much the same way that every orifice on your body has a rounded edge.
Warnings
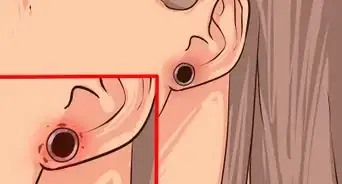
- Go see a doctor immediately if you experience infection or pain after re-piercing your ears.[22]⧼thumbs_response⧽
Things You’ll Need
- Antibacterial soap
- Skin numbing gel
- Cotton balls
- Rubbing alcohol
- Needle
- Earrings
- Potato
- Ice cube
- Disinfectant (saline solution)
- Shower cap

Expert Interview
Thanks for reading our article! If you'd like to learn more about ear piercing, check out our in-depth interview with David Wilkins.
References
- ↑ http://www.goodhousekeeping.com/beauty/anti-aging/a35208/piercing-guns-bad-dangers/
- ↑ http://www.goodhousekeeping.com/beauty/anti-aging/a35208/piercing-guns-bad-dangers/
- ↑ http://www.goodhousekeeping.com/beauty/anti-aging/a35208/piercing-guns-bad-dangers/
- ↑ http://www.goodhousekeeping.com/beauty/anti-aging/a35208/piercing-guns-bad-dangers/
- ↑ http://invernesscorp.com/5-things-to-know-before-getting-your-ears-pierced/
- ↑ http://www.drnumb.com/blog/8-ways-open-partially-closed-ear-piercing-hole/
- ↑ http://www.drnumb.com/blog/8-ways-open-partially-closed-ear-piercing-hole/
- ↑ http://www.drnumb.com/blog/8-ways-open-partially-closed-ear-piercing-hole/
- ↑ http://www.parents.com/health/ear-infection/ear-piercing-for-kids/
- ↑ http://www.drnumb.com/blog/8-ways-open-partially-closed-ear-piercing-hole/
- ↑ https://www.racked.com/2016/5/10/11602034/ear-piercings-history-culture-claires
- ↑ https://www.youtube.com/watch?v=vShu9sK11N4&feature=youtu.be&t=20s
- ↑ http://www.drnumb.com/blog/8-ways-open-partially-closed-ear-piercing-hole/
- ↑ https://www.youtube.com/watch?v=vShu9sK11N4&feature=youtu.be&t=40s
- ↑ https://www.youtube.com/watch?v=vShu9sK11N4&feature=youtu.be&t=46s
- ↑ http://info.jewelersmutual.com/the-jewelry-box/6-ear-piercing-care-mistakes-youre-probably-making
- ↑ http://info.jewelersmutual.com/the-jewelry-box/6-ear-piercing-care-mistakes-youre-probably-making
- ↑ http://info.jewelersmutual.com/the-jewelry-box/6-ear-piercing-care-mistakes-youre-probably-making
- ↑ http://info.jewelersmutual.com/the-jewelry-box/6-ear-piercing-care-mistakes-youre-probably-making
- ↑ http://info.jewelersmutual.com/the-jewelry-box/6-ear-piercing-care-mistakes-youre-probably-making
- ↑ http://info.jewelersmutual.com/the-jewelry-box/6-ear-piercing-care-mistakes-youre-probably-making
- ↑ http://info.jewelersmutual.com/the-jewelry-box/6-ear-piercing-care-mistakes-youre-probably-making
About This Article