This article was co-authored by wikiHow staff writer, Hannah Madden. Hannah Madden is a writer, editor, and artist currently living in Portland, Oregon. In 2018, she graduated from Portland State University with a B.S. in Environmental Studies. Hannah enjoys writing articles about conservation, sustainability, and eco-friendly products. When she isn’t writing, you can find Hannah working on hand embroidery projects and listening to music.
There are 13 references cited in this article, which can be found at the bottom of the page.
The wikiHow Video Team also followed the article's instructions and verified that they work.
This article has been viewed 23,971 times.
Learn more...
If you’ve ever enjoyed sweet coconut meat or hydrating coconut water, you’ve probably been left with the dilemma of what to do with the coconut shell. Since it’s such a huge part of the fruit, it can be tough to just throw it out with the trash. If you have a coconut shell that you’d like to recycle into something useful, you can spend an afternoon doing a DIY project to decorate your home with. Plus, you’ll be reducing your waste and cutting down on your garbage output. It’s a win-win!
Steps
Coconut Shell Bowls
-
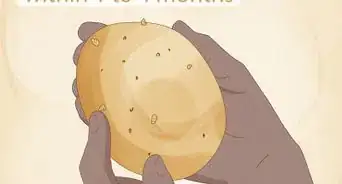
1Sand the coconut shell with sandpaper until it’s smooth. If your coconut shell still has hair on the outside, pull that off as best you can. Then, use a piece of 80-grit sandpaper to start sanding the outside. Once it feels smooth, move onto a 240-grit sandpaper, then a 400-grit sandpaper.[1]
- Staple your piece of sandpaper to a block of wood for an easier handhold.
- Sanding is probably the part that takes the longest in this project. Expect to spend about 30 minutes on sanding!
-
2Saw the coconut shell in half. Hold the coconut steady with one hand and pick up a hand saw with the other. Saw the coconut in half, making sure both halves are fairly even, until you’re left with 2 separate halves of the coconut.[2]
- If you’re worried about your halves being uneven, use a marker to draw a line down the center of the coconut before you start.
- If your coconut shell still has meat or water in it, drain / cut it out before you move on.
Advertisement -
3Sand the inside of the coconut shell until it’s smooth. Grab your 80-grit sandpaper again and use it on the inside of both coconut shells. Keep going until the shell feels smooth, then move onto your 240-grit and 400-grit.[3]
- The sanding on the inside shouldn’t take quite as long since it doesn’t have the hairy outside. However, it still might take you a little elbow grease to get it done.
-
4Rub mineral oil into the shell with a cloth to seal the bowl. Drizzle 1 to 2 tablespoons (15 to 30 mL) of mineral oil into the bowl and use a cloth to spread it around, making sure to get the top, bottom, and sides. You’ll really start to see the color pop![4]
-
5Wait 20 minutes for the oil to soak in and wipe off any excess. Set your bowl aside and let the oil soak in. Then, take a clean cloth and wipe off any drips so the mineral oil dries shiny and smooth.[5]
- Your bowl will look a little more matte as the oil dries.
-
6Wipe on more mineral oil at least 3 more times. The coconut shell is pretty dry, so it needs a lot of oil to make it shine. Keep adding mineral oil, letting it dry, and wiping off the excess until the color looks deep and rich.[6]
- Now you have 2 coconut shell bowls! If they get dirty, wash them by hand with water and mild dish soap, and keep them out of the dishwasher at all costs.


Coconut Shell Planters
-
1Cut the top 1 in (2.5 cm) of the shell off. Mark off the top 1 in (2.5 cm) of the shell with a permanent marker or a pencil, then grab your handsaw. Use the saw to cut the top part of the shell off but leave the majority intact.[7]
- The top part of the shell will be the drainage plate, while the bottom part will be the actual pot.
- If your coconut still has water or meat in it, drain it and cut the meat out.
-
2Sand the inside and the outside of the shell to make them smooth. Start with a piece of 80-grit sandpaper and go to town on both pieces of the shell. Make sure you get the tops, bottoms, inside, and outside of each piece to make it nice and smooth. Then, use a piece of 240-grit sandpaper to really make your coconut shell shine.[8]
- Sanding takes the longest, but it will be worth it when your plant pots look professionally made!
-
3Cut a 2 to 3 in (5.1 to 7.6 cm) hole in the small piece of shell with a saw. Grab the smaller piece of shell and make a circle in the center, leaving about 1 in (2.5 cm) around the border. Use your saw to cut out the hole so you’re left with just the border (or a hollow circle).[9]
- This is the base that the plant pot will sit on.
-
4Drill a hole into the bottom of the large shell for drainage. Grab a drill and attach a masonry bit, then turn your large coconut shell upside down. Drill a hole into the center of the bottom part to let the water drain out when you water your plant.[10]
- Not adding a drainage hole can lead to too much moisture in your plants, which can cause mold or mildew.
-
5Coat the shell pieces in mineral oil. Pour 1 to 2 tablespoons (15 to 30 mL) of mineral oil onto each piece of your coconut shell and rub it in with a cloth. The color will turn deep brown and your plant pots will start to look shiny![11]
- If you prefer the light brown of your coconut shells, don’t add any mineral oil.
- Mineral oil is food safe, so it won’t hurt your plants.
-
6Set the large shell on top of the small shell as a drainage plate. Place the small hollowed out circle wherever you’d like your plant to sit, then set your large shell on top of it. Fill the shell up with potting soil, then use it to plant your plant![12]
- When you water your plant, the excess moisture will run out of the drainage hole in the bottom of the pot.

Warnings
- Use caution whenever you’re using hand tools or power tools. If you aren’t sure how to use them, check the manufacturer’s instructions.⧼thumbs_response⧽
Things You’ll Need
Bowls
- 80-grit, 240-grit, and 400-grit sandpaper
- Hand saw
- Knife
- Mineral oil
- Cloth
Plant Pots
- Knife
- Hand saw
- Permanent marker
- Drill
- 80-grit and 240-grit sandpaper
- Masonry drill bit
- Mineral oil
- Cloth


References
- ↑ https://www.youtube.com/watch?v=fTKBiy3IKZ0&feature=youtu.be&t=42
- ↑ https://www.youtube.com/watch?v=zwHMlPAPXQ0&feature=youtu.be&t=106
- ↑ https://www.youtube.com/watch?v=zwHMlPAPXQ0&feature=youtu.be&t=152
- ↑ https://www.youtube.com/watch?v=fTKBiy3IKZ0&feature=youtu.be&t=208
- ↑ https://www.youtube.com/watch?v=fTKBiy3IKZ0&feature=youtu.be&t=218
- ↑ https://www.youtube.com/watch?v=zwHMlPAPXQ0&feature=youtu.be&t=199
- ↑ https://www.youtube.com/watch?v=lLkyzCLgi8A&feature=youtu.be&t=115
- ↑ https://www.youtube.com/watch?v=yRg-XwrTxaM&feature=youtu.be&t=76
- ↑ https://www.youtube.com/watch?v=yRg-XwrTxaM&feature=youtu.be&t=46
About This Article