This article was co-authored by Crystal Chadwick. Crystal Chadwick is a Licensed General Contractor and the Owner of Yin & Yang Construction out of Salt Lake City, Utah. With over 16 years of experience in the construction industry, she specializes in remodels, repairs, and handyman services. Crystal leads her team with vision and a detail-oriented approach, allowing them to provide quality work and design to their clients.
There are 10 references cited in this article, which can be found at the bottom of the page.
This article has been viewed 69,638 times.
Wood floors and furniture look great, but they’re unfortunately vulnerable to all types of stains. While removing water stains is one thing, getting rid of dark, black stains is a little harder. These stains are soaked into the wood and need some special tricks to get them out. Luckily, there are a few ways to successfully clean dark stains on wood. If you'd like to, you could also lighten wood with a dark stain finish on it. These tips are ranked from the easiest to most involved, so you can work your way down the list to see what works best. With the right methods, you can lift dark stains off in no time!
Steps
Hydrogen Peroxide
-
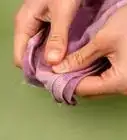
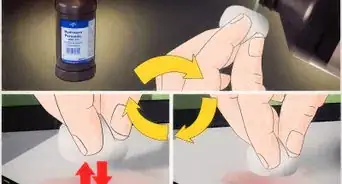
1Soak a cloth in 3% hydrogen peroxide. This is a standard hydrogen peroxide type. You can get it at any drugstore or pharmacy. Take a clean rag and soak it with the peroxide.[1]
- Don’t use a stronger concentration of peroxide. This might discolor the wood or lighten it too much.
- Peroxide shouldn’t irritate your skin, but wash your hands after you handle it. Don’t touch your eyes or face before you wash your hands.
- This trick works on finished and unfinished wood. It shouldn't discolor the finish.
-
2Press the cloth onto the stain. Take the rag and rub it a bit over the stain to wet the wood. Then lay it down directly over the stain and press it a bit so the peroxide soaks into the wood.[2]
- Make sure you cover the whole stain. If it’s a very large stain, you may need another rag.
Advertisement -
3Leave the cloth over the stain overnight. This isn’t a quick treatment. The peroxide needs a few hours to lift and soak up the stain. Let it sit over night for the best results.[3]
- If you do this in the morning, then let the rag sit for 4-6 hours instead of waiting until the next morning.
-
4Remove the rag and wipe up any remaining peroxide. After a few hours pass, you can pick up the rag. Wipe it around to pick up any excess peroxide. If the treatment worked, the stain should be significantly lighter or gone completely.[4]
-
5Wipe the wood before applying peroxide again. It’s normal if the stain isn’t completely gone, and you might need 1 or 2 more peroxide applications. Before using additional treatments, take a wet sponge and wipe the wood to remove any dried peroxide. Let it dry, then try another peroxide treatment.[5]
- If you’ve tried this 2 or 3 times and don’t see any improvement in the stain, then it probably won’t work. You need a stronger treatment like bleach or sanding.


Bleach
-
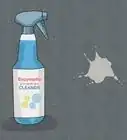
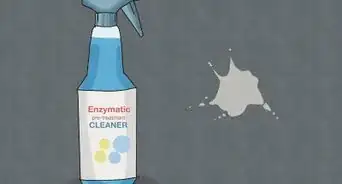
1Get a wood bleach that contains oxalic acid. There are a few types of wood bleach and they all work differently. Oxalic acid is best for spot-treating wood to remove set-in stains. You can find it at most hardware stores.[6]
- Oxalic acid usually comes in powder form, which you can mix in with water when you’re ready to use it.
- This method also works for finished and unfinished wood.
-
2Put on rubber gloves and goggles. Bleach is irritating if you get it on your skin or in your eyes. Always protect yourself by wearing goggles and rubber gloves whenever you handle it.[7]
- If you get any bleach in your eye, flush it for 15 minutes with cool water. Just let the water flow over your eye and don't rub it at all. After that, call poison control for further instructions.[8]
-
3Mix 1 oz (28 g) of oxalic acid with 1 pint (473 ml) of warm water. Since oxalic acid comes in powder form, you need to mix it with water before using it. Measure out 1 oz (28 g) of oxalic acid and pour it into a container with 1 pint (473 ml) of warm water. Stir the mixture until the powder entirely dissolves.[9]
- Always check the instructions to confirm the mixing instructions. They may be different for different brands.
- Don’t mix the bleach ahead of time and try to use it later. It doesn’t last very long in storage.
-
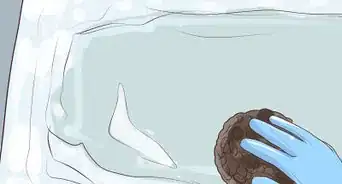
4Scrub the bleach into the stain with a toothbrush. Dip a clean toothbrush into the bleach and swirl it around. Then scrub it into the stain using a circular motion.[10]
- Make sure the toothbrush is clean and unused so you don’t get any stains on the wood.
- Don’t rub the bleach on unstained spots or you might discolor the wood. If you want to protect the unstained areas, you can tape off the stain with masking or painter’s tape.[11]
-
5Let the bleach sit until the wood dries. The bleach needs a few hours to soak in and lift the stain. Leave it alone for a few hours and let the area dry completely.[12]
- Keep kids or pets away from the area. Bleach is toxic and they might touch it.
-
6Wipe the area with a wet sponge. Once the bleach is dry, wet a clean sponge with plain water. Wipe the spot to soak up any bleach residue. If the treatment was successful, the stain should be significantly lighter.[13]
- You can repeat this 1 or 2 more times if the stain isn’t completely gone. If it still isn’t gone after this, then you may need to sand the wood.


Sanding and Refinishing
-
1Wash the wood if you’ve used any chemical treatments on the stain. If you’ve already tried to bleach or clean the stain, there could be chemical residue on the wood. Breathing this in could irritate your lungs, so make sure to wash it away before you start. Use a wet sponge and dish soap to scrub the area around the stain. Then rinse and dry the wood.[14]
- Even if you haven’t tried to clean the stain with chemicals, it’s a good idea to wash the area first to get rid of any dirt.
-
2Put on goggles and a dust mask so you don’t breathe in any sawdust. Sanding can kick up sawdust, which could irritate your eyes or airways. Always put on goggles and a dust mask to protect yourself before starting.
-
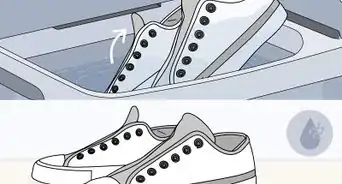
3Remove the wood finish over the stain with 100-grit sandpaper. Coarse sandpaper is best for stripping away the wood finish. Take 100-grit sandpaper and sand the finish above the stain. Work along with the grain of the wood. Continue sanding until you reach the bare wood.[15]
- If the stain is only in a small spot, then you probably don’t need an electric or belt sander. If you’re removing a lot of stains, like on an entire floor, then an electric sander might help.
- Try to limit your sanding to the small area above the stain. If you sand too much, you’ll have more to refinish later.
-
4Sand away the stain with 150-grit sandpaper. Switch to a finer sandpaper once you reach the bare wood. Take 150-grit sandpaper and sand the stain directly, again along the grain of the wood. Continue sanding until you remove the whole stain.[16]
- For very severe stains, sanding won’t even get them out. In this case, you’ll have to replace the wood panels or floorboards.[17]
- Try to collect some of the sawdust while you're sanding. You can mix this with wood putty to match it to the wood color if you need to fix any holes.
-
5
-
6Refinish the wood in that spot. If you removed the stain from a finished piece of wood, then you’ll have to repair the spot that you sanded. Since it’s only a small spot, this isn’t a big job. Start by filling any holes or cracks with wood putty. When the putty dries, sand it down with fine-grit sandpaper until the surface is smooth. Then vacuum the area to get rid of dust from sanding. Brush the finish onto the area and let it dry to complete the job.[20]
- Try to match the finish that you use with the original finish on the wood. Otherwise, the colors will be different. If you aren't sure what that color was, try using a finisher's color wheel from a hardware store to match colors and find the right finish type.[21]
- If you have to plug any holes with putty, try mixing some sawdust from when you sanded the floor with the putty. This matches its color to the wood for a less noticeable repair.


Things You’ll Need
Cleaning with Hydrogen Peroxide
- 3% hydrogen peroxide
- Rags
- Water
- Sponge
Bleaching the Stain
- Cup
- Warm water
- Oxalic acid
- Gloves
- Goggles
- Rag
- Toothbrush
Sanding and Refinishing the Spot
- Sandpaper (100- and 150-grit)
- Goggles
- Dust mask
- Rags
- Water
- Wood finish
- Tack cloth


References
- ↑ https://westchestermagazine.com/home-real-estate/removing-stains-from-a-hardwood-floor/
- ↑ https://youtu.be/CwhlfRfoOyk?t=28
- ↑ https://westchestermagazine.com/home-real-estate/removing-stains-from-a-hardwood-floor/
- ↑ https://youtu.be/CwhlfRfoOyk?t=31
- ↑ https://westchestermagazine.com/home-real-estate/removing-stains-from-a-hardwood-floor/
- ↑ https://www.woodmagazine.com/materials-guide/finishes/get-the-color-out-with-wood-bleach
- ↑ https://www.mountainwoodworker.com/articles/Tips_for_Removing_Water_Stains_from_Wood.pdf
- ↑ https://www.mayoclinic.org/first-aid/first-aid-eye-emergency/basics/art-20056647
- ↑ https://www.popularwoodworking.com/projects/bleaching-wood/
- ↑ https://westchestermagazine.com/home-real-estate/removing-stains-from-a-hardwood-floor/
- ↑ https://www.mountainwoodworker.com/articles/Tips_for_Removing_Water_Stains_from_Wood.pdf
- ↑ https://www.popularwoodworking.com/projects/bleaching-wood/
- ↑ https://www.popularwoodworking.com/projects/bleaching-wood/
- ↑ https://www.popularwoodworking.com/projects/bleaching-wood/
- ↑ https://www.mountainwoodworker.com/articles/Tips_for_Removing_Water_Stains_from_Wood.pdf
- ↑ https://www.mountainwoodworker.com/articles/Tips_for_Removing_Water_Stains_from_Wood.pdf
- ↑ https://westchestermagazine.com/home-real-estate/removing-stains-from-a-hardwood-floor/
- ↑ Crystal Chadwick. Licensed General Contractor. Expert Interview. 16 March 2021.
- ↑ https://www.mountainwoodworker.com/articles/Tips_for_Removing_Water_Stains_from_Wood.pdf
- ↑ https://www.bhg.com/homekeeping/house-cleaning/surface/how-to-remove-stains-from-wood-floors/
- ↑ https://www.woodmagazine.com/woodworking-tips/techniques/finishing/match-new-stain-to-old-wood
About This Article