wikiHow is a “wiki,” similar to Wikipedia, which means that many of our articles are co-written by multiple authors. To create this article, 30 people, some anonymous, worked to edit and improve it over time.
There are 8 references cited in this article, which can be found at the bottom of the page.
This article has been viewed 305,606 times.
Learn more...
As opposed to standard mail, when you send a registered letter, the US post office promises to secure your package from the point of departure to the point of delivery.[1] In addition, they will insure the package for up to $50,000 (with some limitations on the coverage amount).[2] Registering a letter or package is typically useful for when you're sending valuable contents by mail.
Steps
Preparing Your Registered Mail at the Post Office
-
1Locate and visit your local US Post Office. Click here to look up the locations of the branches nearest you. These days, small branches can often be found inside office supply stores like Office Depot or Staples. The employees in those stores will be able to help you send a registered letter as well.[3]
-
2Find the public service table. There, you’ll find a wide variety of forms for the different mailing services offered by the USPS. Feel free to ask a post office employee if you need help finding the right form — PS Form 3806, in this case.[4]
- If you want to skip hunting around for the form at the post office, you can download PS 3806 directly from the USPS website here.
Advertisement -
3Fill out the appropriate registered mail form. There are two types: one for domestic registered mail, and another for international mailings. Be sure to review the form carefully before filling it out.
- If there’s a long line, it’s best to enter the line while filling out the form. By the time you’ve finished, you’ll have moved along quite a ways.
- If the line is short, or if there is no line, fill out the form at the table so you don’t inconvenience the people around you by holding up the line.
-
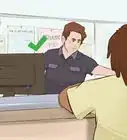
4Hand the filled out PS Form 3806, along with payment and the letter being mailed, to the post office employee at the counter. The cost of sending registered mail has risen in the past few years, but will likely be slightly above $10.[5]
- The post office accepts cash, credit and debit cards, and checks (with appropriate ID).
- The employee should provide you with a receipt of transaction, but if they forget, don’t be too shy to ask for it — it’s the whole reason you’re paying for this service! The receipt will prove exactly when the letter was sent, so you can’t be held accountable if it doesn’t reach its intended recipient.
-
5Tell the employee at the counter if you would like to purchase insurance for the letter. The USPS offers insurance up to $25,000 for registered mail. Rates will vary depending on how much insurance you want to purchase.[6]


Preparing Your Registered Mail at Home or at the Office
-
1Visit a post office branch to get authorization to print the appropriate labels off on your own printer.[7] Click here to look up the locations of the branches nearest you.
- Label 200 is the form that requires official authorization for off-site printing.[8]
- This permission is generally only given to individuals who send a lot of registered mail. If this is a one-time service for you, just send it through the post office as in the previous method.
- This permission is only given for domestic mail. If you’re sending international mail, go to the post office.
-
2Fill out PS Form 3806 on your computer. This will help reduce any complications with illegible handwriting, since you won’t be there to answer any questions when the postal worker enters the information into their system. Be sure to review the form carefully before printing.
-
3Print off the appropriate forms: Label 200 and the filled-out PS Form 3806. Make sure the ink levels are healthy enough to deliver a clearly legible form.
- PS Form 3806 should be printed in black and white ink, and Label 200 should be printed in color, so as to be nearly identical to the official label used by the Postal Service.
- Label 200 must be printed on either 1) white OCR bond, 20-pound basis weight paper (17 inches × 22 inches) with little to no fluorescence or 2) Smudge-proof Litho Label, 50-pound basis weight paper (17 inches × 22 inches), with general-purpose, permanent-type, pressure-sensitive adhesive coating on the back.
- Label 200 must be printed on adhesive paper that sticks to the letter directly. Don’t try to tape the label to the package being mailed.
-
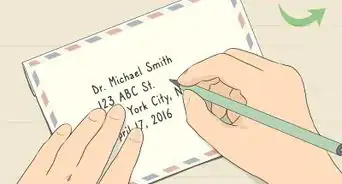
4Affix Label 200 to the letter to be mailed. Make sure it doesn’t bend over the corners of the letter, as this might make it difficult to read some of the information on it or scan its barcode.
-
5Deliver the letter and PS Form 3806 to the post office for mail-out. Hand the filled out PS Form 3806, along with payment and the letter being mailed, to the employee at the counter.
- Again, don't forget to ask for the receipt of transaction if the employee forgets to offer it to you.
-
6Tell the employee at the counter if you want to purchase insurance for the letter. The USPS offers insurance up to $25,000 for registered mail. Rates will vary depending on how much insurance you want to purchase.[9]


Community Q&A
-
QuestionDoes registered mail have to be signed for by the recipient?
 Community AnswerYes. Registered Mail IS required to be signed for. When they deliver it to the customer, they verify their ID as well as get their signature. If you want something that does not have to be signed for, then you can do Delivery Confirmation (best for packages), or even send it as Certified Mail (best for envelopes) and request a signature waiver.
 -
QuestionCan a registered letter be sent to a PO box?
 Community AnswerYes. The recipient will receive a notification in his box, and will have to sign for the letter at the counter.
 -
QuestionIs an envelope provided, or do I need to provide one when sending a registered letter?Community AnswerYou need to provide one, or you can purchase one from a ReadyPost kiosk at the post office if you don't have one with you. The only free envelopes the post office gives out are for Priority/Priority Express, and they won't let you use those for non-Priority.
-Step-12-Version-2.webp)

-Step-10.webp)


References
- ↑ https://faq.usps.com/s/article/What-is-Registered-Mail
- ↑ https://www.usps.com/ship/insurance-extra-services.htm
- ↑ https://tools.usps.com/find-location.htm
- ↑ https://about.usps.com/forms/ps3806.pdf
- ↑ https://www.usps.com/business/prices.htm
- ↑ https://about.usps.com/postal-bulletin/2008/html/pb22247/html/not123_063.html
- ↑ https://www.usps.com/ship/online-shipping.htm
- ↑ https://store.usps.com/store/product/shipping-supplies/registered-mail---label-200n-P_LABEL200N
- ↑ https://about.usps.com/postal-bulletin/2008/html/pb22247/html/not123_063.html
About This Article
To send a registered letter, which is a more secure way to send valuables by mail, go to your local post office and get the registered mail form PS form 3806 from the public service table. Fill out that form and hand it, the payment, and the letter being mailed to an employee at the counter. It will probably cost a little over 10 dollars. If you want to insure the letter, just tell the employee and they will tell you the insurance rate. For more information on sending domestic and international domestic mail, read more!


-Step-12-Version-2.webp)

-Step-10.webp)


