This article was co-authored by Ndeye Anta Niang. Ndeye Anta Niang is a Hair Stylist, Master Braider, and Founder of AntaBraids, a traveling braiding service based in New York City. Ndeye has over 20 years of experience in African hair including braiding box braids, Senegalese twists, crochet braids, faux dread locs, goddess locs, kinky twists, and lakhass braids. Ndeye was the first female of her tribe in Africa to move to America and is now sharing her knowledge of African braids passed on from generation to generation.
There are 13 references cited in this article, which can be found at the bottom of the page.
This article has been viewed 27,893 times.
Getting your braids done takes a lot of time (and money), and the last thing you want to see is your ends unraveling, getting frizzy, or curling up on themselves. Thankfully, there’s a super simple process called “dipping” that helps straighten, set, and seal your beautiful braids. The entire process shouldn’t take you more than 15 minutes, and you can do it right after you get your hair braided or anytime your hair needs a refresh.
Steps
Dip and Seal Your Braids
-
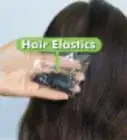
1Dab the ends of synthetic braids with glue for extra-staying power. This is totally optional—some people love it while others prefer to skip it altogether and go straight to dipping their braids. If you want to, use nail glue or super glue. Just put a few drops on the end of each braid to help them last longer.[1]
- These types of glues dry incredibly fast. Even so, make sure your braids are completely set before moving on to dipping your braids.
- You really shouldn’t use glue on your natural hair. If you do, apply it at the ends and keep in mind that you might have to trim off that part once you’re ready to take your braids out.
-
2Boil a pot of water. Use a pot on the stove, a tea kettle, or a bowl in the microwave—the method doesn’t make a difference as long as the water heats up! Heat enough water to fill a big pitcher.[2]
- Dipping your braids in hot water (rather than cold or warm water) keeps the ends straight and frizz-free, and it helps keep them from coming undone. It’s an easy way to set newly-done braids or to refresh older ones.
Advertisement -
3Pour the water into a big plastic pitcher. Be super careful and protect your hands with a towel or oven mitt if needed. Avoid using thin, plastic containers or glass ones, as they can get too hot to handle.[3]
- Squeeze 2-3 drops of baby oil into the pitcher to give your braids a nice, natural shine.[4]
-
4Section your hair into parts if your pitcher can’t fit all the ends at once. Depending on how much hair you have and how thick your braids are, working in sections might be easier than trying to treat all your braids at once. The call is totally up to you, though.[5]
- Tie or clip up half of your hair to do the bottom section first. Or, do the left side first before switching to the right side.
-
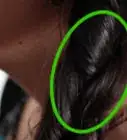
5Dip the ends of your braids up and down in the pitcher. Saturate the braids as high up as you can go—the deeper you dip, the smoother your braids get. Everyone has their own rhythm they like to follow, and there isn’t a set “right” way to do this. As an example, try dipping your braids up and down 4-5 times and holding them in the water for 5-10 seconds each time.[6]
- If the pitcher is too hot to handle with your bare hands, wear a pair of gloves.[7]
- If you’re doing this for someone else, put a towel across their back to keep them from getting wet.
-
6Squeeze and pull your braids with a dry towel to remove moisture. After you’ve dipped the ends of your braids, wrap them in a towel. Pull down on your braids and stretch them straight. Repeat until your braids are just slightly damp.[8]
- This is a super important part of the process. The pulling and stretching keep the ends of your braids from curling or getting matted.
- Dip and dry one section before moving on to the next.
-
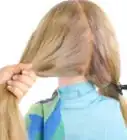
7Brush the ends of damp, unglued braids if you’re worried about tangles. If your braids are done to the end or if you used glue to seal them, this isn’t something you have to worry about. But, if the tips of your hair are unbraided, brushing them helps keep them straight and tangle-free.[9]
- Use a hard bristle brush or whatever your favorite detangling brush is.


Braid Maintenance Tips
-
1Sleep on a silk or satin pillowcase to reduce friction and frizz. It takes a long time to get your braids done, and you want them to look fresh for as long as possible! Silk or satin lets your hair slide across rather than rub against the pillowcase, which means your braids look nicer for longer.[10]
- A silk or satin scarf or bonnet works just as well as a pillowcase.
-
2Let a water-based mousse dissolve on your scalp to tame flyaways. Focus the mousse on your scalp, and don’t be afraid to really coat your braids. Once the mousse is in place, pull your hair back into a ponytail and cover it with a silk scarf. Wait for an hour, then undo your frizz-free locks.[11]
- If there is any mousse leftover, massage a few drops of grapeseed or jojoba oil into your braids. The oil gets rid of the mousse and leaves your hair with a beautiful shine.
-
3Combat frizz with a hot towel if you prefer a product-free option. Submerge a clean towel in a pot of boiling water, then remove it (carefully!) with a pair of tongs. Let it cool down enough to touch it without getting hurt, and lay it over your scalp and braids. Leave it until the towel cools off, then take it off and let your hair dry. Your braids should be less frizzy and look refreshed![12]
- Since the towel is so wet and there’s no way to wring it out because of how hot it is, it’s best to do this in the bathroom or kitchen where it won’t matter if water drips on the floor.
-
4Treat dryness and buildup with an essential oil spray. Fill a small spray bottle halfway with witch hazel. Add 3 to 5 teaspoons (15 to 25 mL) of distilled water and 10 drops of lavender essential oil. Spritz your scalp with this solution whenever you notice it feeling dry, itchy, or looking flaky.[13]
- If you aren’t interested in mixing your own spray, there are ones you can buy at the drugstore specially made for braids.[14]
-
5Wash your braids once every 1-3 weeks to keep your hair from drying out. Use a lightweight shampoo so your braids don’t get weighed down. To clean your scalp, wet a cloth and run it between your braids.[15]
- To clean your scalp between washes, try using a baby wipe dipped in 3 parts water mixed with 1 part apple cider vinegar. However, if you have a lot of product buildup, you should just go ahead and wash your hair—that buildup isn't good for your scalp, and it can even lead to fungal growth.[16]
- Use mousse on your braids after you wash them to eep the frizz down.[17]
-
6Remove your braids after 6-8 weeks to keep your hair healthy. Braids aren’t meant to last forever, so plan on taking them out within 2 months after getting them put in. And remember, the better you care for your braids while you have them, the longer you can go between getting them done![18]
- The type of braid you use will determine how long you can keep them in. For instance, cornrows aren't going to last as long as box braids.[19]
- You can undo your braids yourself or have your hairstylist do it for you.
- Keeping your braids in for too long can cause your hair to break and become brittle.


Expert Q&A
Did you know you can get expert answers for this article?
Unlock expert answers by supporting wikiHow
-
QuestionHow do I clean product buildup off my scalp?
 Ndeye Anta NiangNdeye Anta Niang is a Hair Stylist, Master Braider, and Founder of AntaBraids, a traveling braiding service based in New York City. Ndeye has over 20 years of experience in African hair including braiding box braids, Senegalese twists, crochet braids, faux dread locs, goddess locs, kinky twists, and lakhass braids. Ndeye was the first female of her tribe in Africa to move to America and is now sharing her knowledge of African braids passed on from generation to generation.
Hair Stylist & Master BraiderMix 3 parts warm water with 1 part apple cider vinegar and soak a few baby wipes in it. Squeeze the excess liquid from one of the wipes, then use that to clean in between your braids. Do that 3 times, using a new wipe each time, then let your hair air out until the vinegar smell evaporates. Afterward, apply leave-in conditioner or very light hair oil or lotion.
Support wikiHow by unlocking this expert answer.
Warnings
- Be careful when handling boiling water! Protect your hands with hot pads or towels, and watch out for the steam.⧼thumbs_response⧽
Things You’ll Need
Dip and Seal Your Braids
- Glue (optional)
- Pot or tea kettle
- Plastic pitcher
- Towels
- Hard bristle brush
Braid Maintenance Tips
- Silk or satin pillowcase
- Water-based mousse
- Towels
- Braid spray
- Lightweight shampoo


References
- ↑ https://www.naturallycurly.com/curlreading/kinky-hair-type-4a/how-to-maintain-your-braids-this-summer
- ↑ https://www.allure.com/story/how-to-touch-up-box-braids-at-home
- ↑ https://youtu.be/WHxSEGMgDpk?t=70
- ↑ https://www.allure.com/story/how-to-touch-up-box-braids-at-home
- ↑ https://youtu.be/WHxSEGMgDpk?t=152
- ↑ https://youtu.be/D6oxqOsxLMM?t=341
- ↑ https://youtu.be/WHxSEGMgDpk?t=103
- ↑ https://youtu.be/vULTFREq7rQ?t=178
- ↑ https://www.naturallycurly.com/curlreading/kinky-hair-type-4a/how-to-maintain-your-braids-this-summer
- ↑ https://www.stylist.co.uk/beauty/braids-how-to-maintain-keep-in-longer-tight-fresh-braids-twists/330285
- ↑ https://www.naturallycurly.com/curlreading/how-tos-styles/7-top-tips-to-maintain-your-box-braids
- ↑ https://www.allure.com/story/how-to-touch-up-box-braids-at-home
- ↑ https://www.naturallycurly.com/curlreading/curls/diy-spritzes-that-you-can-use-on-your-hair-and-skin
- ↑ https://youtu.be/MqfQC1TRDMM?t=80
- ↑ Ndeye Anta Niang. Hair Stylist & Master Braider. Expert Interview. 5 March 2020.
- ↑ Ndeye Anta Niang. Hair Stylist & Master Braider. Expert Interview. 5 March 2020.
- ↑ Ndeye Anta Niang. Hair Stylist & Master Braider. Expert Interview. 5 March 2020.
- ↑ https://www.curlcentric.com/box-braids/
- ↑ Ndeye Anta Niang. Hair Stylist & Master Braider. Expert Interview. 5 March 2020.
- ↑ https://www.naturallycurly.com/curlreading/how-tos-styles/7-top-tips-to-maintain-your-box-braids
About This Article