This article was co-authored by Ashley Adams. Ashley Adams is a Licensed Cosmetologist and Hair Stylist in Illinois. She completed her Cosmetology education at John Amico School of Hair Design in 2016.
There are 9 references cited in this article, which can be found at the bottom of the page.
This article has been viewed 31,866 times.
A lace closure is a small patch of lace with vented hair. It is typically worn alongside sewn-in wefts or tracks to mimic the look of real hair. In order to install a lace closure, you need to have your hair cornrowed, then covered with a weaving hair net. Once you install the closure, you can sew in your wefts or tracks as usual. The style can last up to 8 weeks, depending on how fast your hair grows.
Steps
Installing the Lace Cap
-
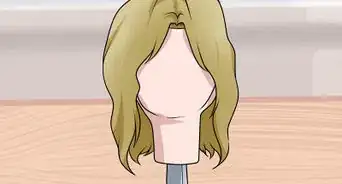
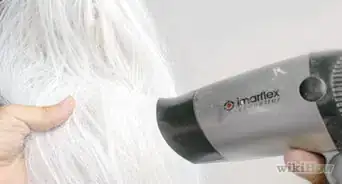
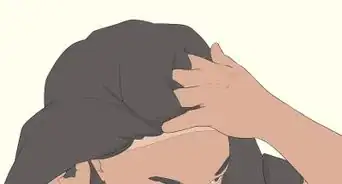
1Start with clean, freshly-washed hair. You will be wearing the wefts and lace closure in your hair for some time, so make sure that your hair and scalp are clean and freshly-washed. It would be best to use some sort of clarifying shampoo. Be sure to use conditioner and to moisturize your hair afterward. Make sure that your hair is dry before moving on.
- You can use your regular cornrowing hair products, or you can use something natural, such as shea butter and olive oil.
-
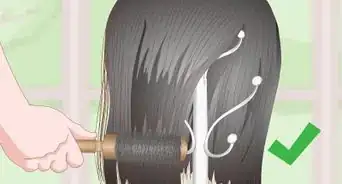
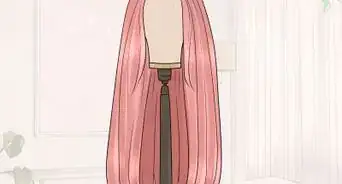
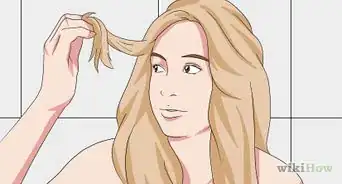
2Cornrow your hair. Part your hair where you want your final style to be parted. Cornrow your hair using your favorite technique, making sure that each braid comes out of that part. Keep your braids small, and make sure that you have a cornrow braid all along your hairline (especially the front).[1] The braids need to be small to ensure that your foundation is flat. Having a flat foundation helps the overall look of the sew-in and closure, making it appear more natural.
- If you have long braids at the end of your cornrows, pull them back along your head and pin or sew them to the adjacent cornrows.
- Great options for cornrow patterns to use include straight to the back cornrows or a beehive pattern, though you can use whatever style appeals to you.
Advertisement -
3Place a square of weaving hairnet on top of your head. This type of netting looks a little bit like tulle, except that it is much thicker. Try to match the color of the netting to your hair. Black will work for most people, but if you have lighter hair, dark brown may also work. You can find this in stores that sell supplies for braiding, wafting, sew-ins, and wig making, such as beauty supply stores.
- The square needs to be big enough to cover all your hair, from hairline-to-hairline. The exact dimensions of the square will depend on how big your head is.
- A hair net is optional. You may want to use it if your hair is thin and you want to be able to sew in as many wefts as possible to create fullness.
-
4Whipstitch the netting to your edge cornrow, starting from the back. Thread a curved needle with thick, sturdy thread. Start sewing from the back-center of your head and finish sewing at the front-center of your head. Pull the netting in front of your needle as you go. Keep your stitches small and consistent.[2]
- The edge cornrow is the cornrow along your hairline.
- The whipstitch is where you pull the needle through the netting and out through the cornrow. Pull the needle back up and repeat the stitch.
- Your thread should be the same color as your hair. Black or brown thread will work for most people.
-
5Continue whipstitching the netting, pulling and pleating it as you go. When you reach the top center of your head, take a moment to re-thread your curved needle. Gently tug the netting towards the edge cornrow and continue whipstitching it. Fold and pleat the netting every so often so that it is nice and smooth.[3]
- To make a pleat: pinch some netting between your thumb and index finger, then fold it against the rest of the netting. How much you pleat depends on how much extra netting you have.
-
6Tie and cut the thread, then cut the excess netting off. Once you get back to where you started, sew through the netting a few times, then knot and cut the thread. Trim the excess netting off, as close as possible to your edge cornrow and stitching.
- If you happen to have any unwanted large gaps from cutting the excess thread, you can simply close the gap by sewing it.


Sewing in the Lace Top
-
1Get a lace closure and position it over your part. Depending on where your cornrowed part is, this could be on the top-center of your head, or just off to the side. Make sure that the straight edge is aligned with your front hairline, overlapping it by a little less than 1 centimeter (0.39 in). Your closure needs to be flat. There shouldn't be any space left between the closure and your natural hair.
- The lace closure will have a ½-inch (1.3-cm) lace (mesh) seam all along the curved edge. Do not cut this off.
- Some lace closures come with a pre-made part. Make sure that the closure's part matches your part.
-
2Tack down the left side of the closure to the cornrow along your hairline. Thread a curved needle with thick, sturdy thread. Push the needle down through the lace, netting, and cornrow. Pull the needle back out through the cornrow and netting, just below the edge of the lace closure. Repeat this stitch a few more times to anchor the closure.[4]
- Leave the needle threaded. Hook it through the netted cap so you don't lose it.
- This is difficult to master if you are a beginner. Ask a friend or someone who has experience with closures to help you secure your closure to your cornrows.
-
3Tack down the right side of the closure with a second needle. Thread another curved needle with more thick, sturdy thread. Pull the lace closure taut against your hairline, then tack down the right side.
- Keep the needle threaded.
-
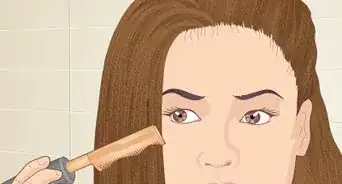
4Create a horizontal part just behind the front edge of the closure. Slide the handle of a rat-tail comb through the hair on the closure, about 1⁄8 to 1⁄4 inch (0.32 to 0.64 cm) behind the front, straight edge. Comb the hair on the lace closure forward to reveal the lace netting.
-
5Sew down the front of the lace closure. Start sewing from the left side of the closure until you get to the part, then sew your way back to the side edge. Repeat this step for the right side as well. Do not sew across the part on the lace closure. You can do this with a straight stitch or back stitch.[5]
- Make sure that you are sewing through both the wig cap netting and the cornrow underneath it.
- Keep both needles threaded. Hook the right needle through the netting for now.
-
6Whipstitch your way along each side of the closure towards the back. Start sewing on the left side of the lace closure and finish at the back-center. Repeat this step for the right side and finish sewing at the back, where you left off. Knot the threads together, then trim the excess off.[6]
- Make sure that you sew through the netting. If you come across a cornrow, sew through it too.
-
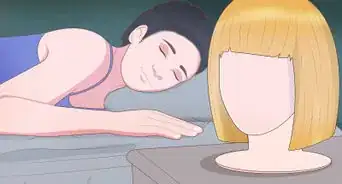
7Clip the hair on the lace closure out of the way. Gently twist the hair on the lace closure into a loose bun and secure it with a clip. If you are doing this on someone else, you could even drape it across their face. The goal is to get the hair out of the way for the next segment.


Sewing in the Wefts
-
1Use the curved needle to tack a weft to an edge cornrow. Hold the end of the weft on the left side of your nape. Pull the needle through the weft and cornrow, and out through the upper edge of the cornrow. Bring the needle down over the weft and up through the cornrow.[7]
- After your needle is through the first time, you may want to create a knot in the thread for extra protection before you continue to sew. This will give your wefts some stability.
-
2Continue sewing until you reach the top of your right ear. Keep tacking and sewing the weft to the cornrow on the edge of your hairline. If you find that you have nothing to sew to, sew right onto the netted cap instead. Keep your stitches small—about the same width as each stitch on your cornrow.
- Do not cut the weft.
-
3Fold the weft towards the left and continue sewing. When you reach the top of your right ear, fold the weft back towards the left side. Continue sewing across the back of your head towards the top of your left ear. Knot the thread and cut the excess off.[8]
- You will have some gaps between the cornrows, so be careful! Sew right onto the netted cap, if you need to.
- Folding the wefts rather than cutting them helps to reduce shedding.
-
4Continue sewing the weft to your braids back-and-forth across your head. Keep folding the weft back on itself and whipstitching it to your cornrows and netting. Work your way in a zigzag from one side of your head to the other until you reach the edge of the lace netting. Sew down the weft with a few stitches in the same place to secure it, then cut the rest off.
-
5Sew your final weft over the lace closure's edge. After you have finished sewing your lace closure, you will still have the 1/2-inch (1.3-cm) wide netting visible. Cut a weft long enough to curve around this seam, and sew it down using the same technique as before. Sew the weft directly onto the netting, as close to the laced hair as possible.[9]


Things You'll Need
- Weaving hair net
- Lace closure
- Wefts or tracks
- Curved needles
- Strong, thick thread


References
- ↑ https://www.youtube.com/watch?v=iuTJz6Sgihs&feature=youtu.be&t=35s
- ↑ https://www.youtube.com/watch?v=8gy6myQtShM
- ↑ https://www.youtube.com/watch?v=8gy6myQtShM&feature=youtu.be&t=1m18s
- ↑ https://www.youtube.com/watch?v=iuTJz6Sgihs&feature=youtu.be&t=1m10s
- ↑ https://www.youtube.com/watch?v=iuTJz6Sgihs&feature=youtu.be&t=3m
- ↑ https://www.youtube.com/watch?v=iuTJz6Sgihs&feature=youtu.be&t=6m15s
- ↑ https://www.youtube.com/watch?v=RaouzbNXFL8&feature=youtu.be&t=1m15s
- ↑ https://www.youtube.com/watch?v=RaouzbNXFL8&feature=youtu.be&t=2m15s
- ↑ https://www.youtube.com/watch?v=RaouzbNXFL8&feature=youtu.be&t=10m10s
About This Article