This article was co-authored by Vanna Tran, a trusted member of wikiHow's volunteer community. Vanna Tran is a home cook who started cooking with her mother at a very young age. She has catered events and hosted pop-up dinners in the San Francisco Bay Area for over 5 years.
wikiHow marks an article as reader-approved once it receives enough positive feedback. This article received 17 testimonials and 89% of readers who voted found it helpful, earning it our reader-approved status.
This article has been viewed 386,341 times.
Learn more...
Serrated knives tend to hold their edge longer than straight-edged knives, and are more difficult to restore without changing their shape. For these reasons, it's best to sharpen your serrated knives only when you notice them becoming less effective. That said, if you're willing to put in the labor, a cheap handheld tool will do the job.
Steps
Using a Sharpening Rod
-
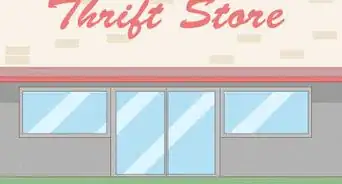
1Purchase a serrated knife sharpening tool. Serrated knives need different sharpeners than straight-edged blades. Most serrated knife sharpeners are rod-shaped, usually with a taper to accommodate different sized serrations.
-
2Locate the side of your knife with a beveled edge. Serrated knives generally do not look the same from both sides. On one side, the face of the blade will continue at the same angle until the blade's edge. On the other, the face of the blade will angle down slightly just before the serrated edge; this is called the bevel. Only apply a sharpening tool to the beveled edge.Advertisement
-
3Place the sharpening rod in one of the serrated scallops ("gullets"). Choosing an angle is easier for serrated blades, because you can use the angle of the bevel as a guide. This is typically between 13 and 17 degrees compared to the edge of the blade, which is shallower than you may be used to sharpening knives.[1]
- If the knife also has a straight edge portion, the bevels are usually ground to the same angle — about 20 to 25 degrees.[2]
- If you want a better guide, draw on the gullets with permanent marker. You'll know you're hitting them at the right angle if the marker is removed.
-
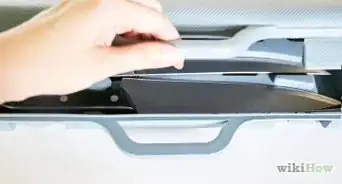
4Move the rod to match the gullet's diameter. If your sharpening rod is tapered, locate the rod in the gullet at the point where the rod's diameter is the same size as the gullet's, or slightly smaller.
-
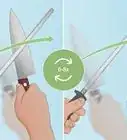
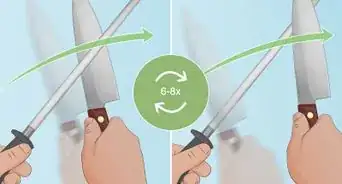
5Sharpen the first gullet. Run the sharpening rod along the first groove in several short strokes. Push in one direction away from the edge of the blade, toward the spine. Rotate the rod as you push it for a more even grind.[3]
- Push only to the point of the rod with the same diameter as the gullet, to avoid enlarging the gullet.
-
6Check for a burr. Run your fingers along the backside of the groove to check for a "burr," or metal shavings. As soon as you can feel a burr, you have sharpened the groove sufficiently. This often only takes a few strokes.
- Try running your fingernail along the back edge. If you feel it catch, there's a burr.[4]
-
7Continue sharpening each groove on the blade. If the knife's serrations are different sizes, adjust the position of the tapered sharpening rod so that the rod just fills the groove.
-
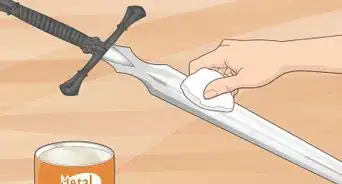
8File away all the burrs. The burrs are the metal shavings that you filed off when sharpening the blade. To remove them, rub the back of the knife against a sheet of fine-grit sandpaper. As an alternative, you could lightly run the sharpening rod against the backside of each groove, being careful not to apply more pressure than necessary to remove the shavings.
-
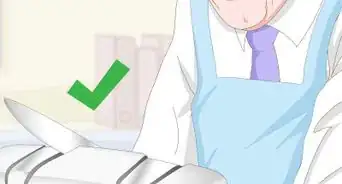
9Sharpen any straight-edged portion of the blade. If your knife is only serrated along a part of the blade's length, sharpen the remaining length with a whetstone or other sharpening tool. Don't attempt to use the serrated knife sharpener on the straight portion of the blade.


Using Other Tools
-
1Use a triangle-shaped sharpener. Like the rods, these tapered triangles are designed specifically for serrated knives. Due to the shape, they tend to work best on knives with V-shaped gullets. The process is almost identical to the rod-shaped method described above, except that you rock the edge of the tool back and forth along the bevel instead of rotating it.[5]
-
2Make your own tool from emery cloth and dowels. If you would rather not buy a single-purpose tool, you can buy a few cheap dowels from a hardware store instead. Find a dowel that sits in the knife's first scallop without wobbling, then wrap a piece of emery cloth most of the way around the dowel. Hold the cloth in place with your finger, and sharpen carefully and slowly. Switch dowels to match the size of the scallops as you move along the knife.
- Use a round dowel for a knife with round scallops, or a square dowel for V-shaped scallops.
-
3Sharpen with a square stone. This is a difficult and unreliable last resort, but it is possible. Hold the knife spine securely against a hard surface and tilt the blade so the beveled edge is on top. Bring the corner of the sharpening stone to the scalloped edge and use it to sharpen the edge, rocking it back and forth to cover the full area of each scallop.[6]


Community Q&A
-
QuestionWhat if the serrations are really small?
 Community AnswerA narrow triangular tool is your best bet. If you can't find one that works, focus on sharpening the tip of the edge rather than the scallops. The result won't be perfect, but it can still make a big difference on a dull knife. If it's important to get the best quality, send your knives to a professional.
 -
QuestionWhat are safe secure storage procedure for knives?
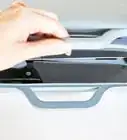
 Community AnswerThe best place for kitchen knives is in a knife block. It keeps the edges safe so they don't become dull from contact with other kitchen utensils, and it keeps your hands safe from getting cut when you reach into a drawer filled with random utensils. Make sure your knives are dry before inserting them into the block to avoid unnecessary rusting. The knife block's position is all up to you, but if you are worried about children you can move it to the back of the counter space or in a cabinet with child locks. Another method of storage is a magnetic strip mounted on the wall. It allows for easy access, but keeps the knives well out of reach of small children.
Warnings
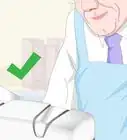
- Compared to a straight knife, serrated knives are more difficult to return to a factory appearance.[8] If you want a perfect edge, you may need to a hire a professional, or send your knives to the manufacturer for re-sharpening. Fortunately, sharpening services are usually quite cheap.⧼thumbs_response⧽
- Even a high-quality electric sharpener typically has trouble sharpening the full gullets along a serrated knife edge. It's best to stick to manual sharpeners.[9]⧼thumbs_response⧽
Things You'll Need
- Serrated knife
- Serrated knife sharpener
- Fine-grit sandpaper

References
- ↑ https://lansky.com/index.php/blog/how-sharpen-serrations/
- ↑ https://www.knifecenter.com/info/sharpening-serrations
- ↑ http://www.buckknives.com/pdf/WEBKnifeSharpeningDocument.pdf
- ↑ https://lansky.com/index.php/blog/how-sharpen-serrations/
- ↑ https://lansky.com/index.php/blog/how-sharpen-serrations/
- ↑ https://lansky.com/index.php/blog/how-sharpen-serrations/
- ↑ https://www.smithsproducts.com/edgesmith-knowledge/
- ↑ http://www.buckknives.com/pdf/WEBKnifeSharpeningDocument.pdf
- ↑ https://www.cooksillustrated.com/how_tos/5816-sharpening-serrated-knives
About This Article
To sharpen serrated knives, you can use a sharpening rod to individually sharpen each groove on your blade. Like the rods, a triangle-shaped sharpener works great on serrated knives, especially those with V-shaped gullets. If you prefer to make your own tool, you can buy some dowels, wrap them in emery cloth, and sharpen your knife with this homemade kit. For tips on how to sharpen with a square stone, keep reading!