This article was co-authored by wikiHow Staff. Our trained team of editors and researchers validate articles for accuracy and comprehensiveness. wikiHow's Content Management Team carefully monitors the work from our editorial staff to ensure that each article is backed by trusted research and meets our high quality standards.
This article has been viewed 64,270 times.
Learn more...
Whether you have just moved into a new house with outdated tile designs and colours, or you just want to change the ambience of a room, staining tiles is a good alternative to removing and replacing them. However, this can be a pretty big job so you need to be prepared to set aside a lot of time for the whole process to be completed. Follow these steps to successfully stain your ceramic tiles and give your home a new look.
Steps
Preparing Your Ceramic Tiles
-
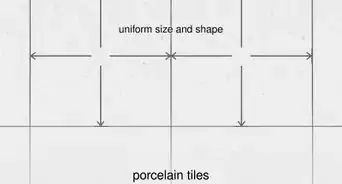
1Work out how much stain or paint you will need. Measure the area that you want to cover in sections. This will give you an idea of how much you need to purchase and prevent you from buying too much or too little.
- Multiply the length and height of each section and divide the product by 12. The total should give you the exact amount of stain needed to cover the entire area in litres.[1]
-
2Use masking tape on areas that you want to avoid. Staining ceramic tiles is a very meticulous process that yields long lasting results. It is recommended that you prevent getting any stain or paint on places where you do not want it. Applying masking tape along the edges of the area that you want to stain will also help you achieve clean and crisp lines.
- You can also use masking tape on grout lines if you do not want to stain them. This can be a very tedious task, but often the end result will be worth the effort.[2]
Advertisement -
3Clean the area thoroughly. This is the most important step when preparing your ceramic tiles for staining. Make sure that the area that you want to stain is free of dirt, grease and soap scum. You might have to use stronger cleaning products for more stubborn stains.[3]
- Having a clean surface before starting the staining process is important to avoid any build up of old bacteria from affecting the new stain.[4]
- Use a cloth or cleaning brush to scrub the tiles in a circular motion. Aim to remove as much debris as possible then wait for the tiles to dry before moving on to the next step.[5]
-
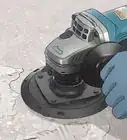
4Scrub the tiles lightly with sandpaper. Sanding the tiles is essential for bonding the primer and the stain. It will also improve the overall finish of the stain and ensure that the tiles are nice and smooth after staining.
- Use 180 to 200 grit sandpaper and remove as much shine from the tiles as you can.[6] Rinse off any dust particles and debris created from sanding and allow the tiles to dry.
-
5Use primer made for ceramic surfaces. The primer will help the stain or paint to stick better and last longer. Stir the primer before applying it on the tiles to make sure that it has not settled.[7] Apply the primer in even coats using a roller brush, making smooth up and down strokes. Work through small sections at a time until you have covered the entire area.
- Allow 2 to 4 hours for the initial coat of primer to dry before applying another coat using the same procedure.
- Try to find a primer that also has protective properties for your ceramic tiles. Some primers that are available on the market can protect tiles from mould and fungus.[8]


Applying the Stain on Your Tiles
-
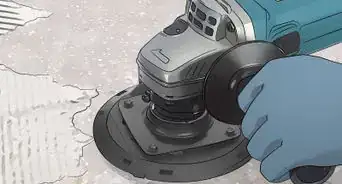
1Sand the primed tiles lightly. For good measure, it is recommended to lightly sand the tiles after both coats of the primer are dry.[9] Again this will give your tiles a nice and smooth finish, as well as help the longevity of the stain.
-
2Coat your tiles with your chosen stain or paint colour. Apply the stain evenly on the tile surface using a clean roller brush. Do the same up and down motion as when you applied the primer and also work in small sections. For the finishing strokes, work in one direction from top to bottom to smooth out the surface.
- Let the stain dry for at least 6 hours before applying the next coat. You can also do some light sanding in between coats.[10]
- Use an oil-based or latex stain that contains urethane resin, which is an adhesive that sticks to ceramic surfaces very well.[11]
- Allow some time between 24 to 48 hours for the stain to fully dry before moving on to the last few steps.
-
3Remove dust and dirt. Once the stain is dry, take a cloth and wipe off any accumulated dust or dirt on the surface of the tiles.[12] This will allow you to closely inspect the stain and make sure that you are satisfied with the work that you have done before applying a finishing coat.
-
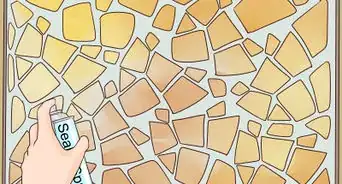
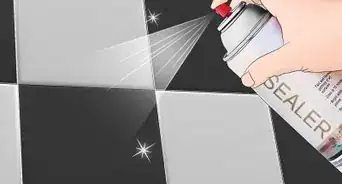
4Apply polyurethane coat to your tiles. This will protect your newly stained tiles and prevent them from getting chipped. Apply only the recommended amount by the product manufacturer to avoid over coating. Wait at least 4 hours in between coats.[13]


Taking Care of Your Ceramic Tiles
-
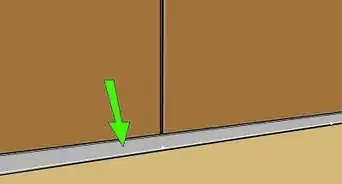
1Clean the grout regularly. Grout is used to fill the spaces between your ceramic tiles and keeping it clean is an important part of tile maintenance. Once dirt settles into the grout, it can be difficult to clean and eventually compromise the durability of your tiles.[14] You can use acid and ammonia free products to give your grout a good clean.
-
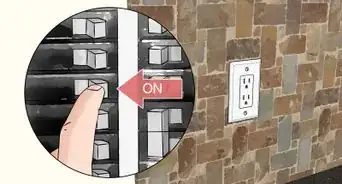
2Clean off dirt and dust from the surface. Use a broomstick or vacuum to remove any type of dirt and debris that has accumulated on the surface of your tiles.[15] Do this 2 to 3 times a week to make sure that your tiles remain dust free.
- If you choose to vacuum your tiles, make sure to use a vacuum cleaner that does not have a beater bar as this can damage the surface of your tiles over time.[16]
-
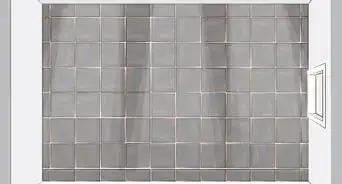
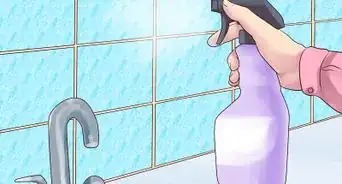
3Wash your tiles once a week. You can use a gentle detergent and warm water to give your tiles an overall clean. Be careful not to oversaturate your tiles with water during this process and allow enough time for them to dry completely.[17]
- You can also use a cleaning product that has been approved for ceramic surfaces. This ensures that you are using a product that is safe for your tiles.[18]
- Avoid using oil-based cleaners as they can often leave residues that can trap dirt and cause damage to your tiles.


Warnings
- Staining or painting ceramic tiles is not a simple job. It requires some serious time commitment and endurance. Be sure that you carefully consider what you are getting yourself into before tackling the job.⧼thumbs_response⧽


References
- ↑ https://www.youtube.com/watch?v=IjcYo_YA8Zo
- ↑ https://www.hunker.com/12002082/how-to-stain-existing-ceramic-tile
- ↑ https://www.youtube.com/watch?v=IjcYo_YA8Zo
- ↑ https://www.youtube.com/watch?v=ISsW1dxRFpM
- ↑ https://www.hunker.com/13411688/how-to-change-the-color-of-ceramic-tile
- ↑ https://www.hunker.com/13411688/how-to-change-the-color-of-ceramic-tile
- ↑ https://www.youtube.com/watch?v=IjcYo_YA8Zo
- ↑ https://www.youtube.com/watch?v=IjcYo_YA8Zo
- ↑ https://www.youtube.com/watch?v=IjcYo_YA8Zo
- ↑ https://www.youtube.com/watch?v=IjcYo_YA8Zo
- ↑ https://www.hunker.com/12002082/how-to-stain-existing-ceramic-tile
- ↑ https://www.hunker.com/13411688/how-to-change-the-color-of-ceramic-tile
- ↑ https://www.hunker.com/12002082/how-to-stain-existing-ceramic-tile
- ↑ http://www.flooringbypatterson.com/ceramic-tile-flooring/care-for-ceramic-tile/
- ↑ http://www.flooringbypatterson.com/ceramic-tile-flooring/care-for-ceramic-tile/
- ↑ http://www.flooringbypatterson.com/ceramic-tile-flooring/care-for-ceramic-tile/
- ↑ https://www.etflooringdesign.com/maintenance-care/ceramic-tile-care-maintenance/
- ↑ https://www.etflooringdesign.com/maintenance-care/ceramic-tile-care-maintenance/
About This Article