This article was co-authored by wikiHow Staff. Our trained team of editors and researchers validate articles for accuracy and comprehensiveness. wikiHow's Content Management Team carefully monitors the work from our editorial staff to ensure that each article is backed by trusted research and meets our high quality standards.
There are 12 references cited in this article, which can be found at the bottom of the page.
The wikiHow Video Team also followed the article's instructions and verified that they work.
This article has been viewed 29,163 times.
Learn more...
Lanyards are a type of strap designed to hold small objects securely, usually worn around a person's neck or wrist for easy access. They can be made from a variety of sturdy materials, from nylon ribbon to leather strips to woven plastic. Because of this, there are many ways you could start a homemade lanyard. Some require additional tools, like key rings or button fasteners, while others only require a single length of cord.
Steps
Tying a Diamond Knot
-
1Lay a single length of cord out on a flat surface. Bend the cord into a loop with its bight (the U-shape) at roughly its midpoint.
- The diamond knot is sometimes called a lanyard knot.[1]
- Use a cord that is roughly twice the length of the lanyard you plan to make.
- In general, the best type of cord for making this type of lanyard is a specific kind of nylon rope called paracord. Paracord is both incredibly strong and highly durable while also very light and soft against the skin.[2]
-
2Form a flat loop near one end of the cord. Take the left end of the cord and slide it back around under itself using a circular motion. The loop you form should be much closer to the left end of the rope compared to the right. Make sure to keep the cord flat against your work surface.[3]Advertisement
-
3
-
4Take the right end of the cord to form a second bight arching directly opposite the first loop. The left half of the new bight should be draped over the portion of cord to the left of the first loop.[6]
-
5Tuck the right tip under the portion of cord directly to the right of the first loop. Keep in mind that before you do this step the right tip will also be the right half of the second bight.
- At this point, both end tips should be facing the same direction. What was originally the right end will now be to the left of the original left end.[7]
-
6Bring the original right end through and around the first loop. Bring the right tip of the cord end down so that it crosses overtop both sides of the first loop while sliding under the segment in the middle. Tug on the original right tip to pull it through.
-
7Weave the original right end back through the center of the developing knot. Bring the original right end up and around with a clockwise motion. Slide the right tip underneath the top half of the knot. Pull the original right end up through the center and then across to the right.
- The knot should remain slack at this point.[8]
-
8Repeat with the original left end. Bring the original left end around across the right side of the first bight. Slide the tip underneath the left half of the knot. Thread the original left end back up through the center of the knot and across to right half.
- The right and left ends should now be parallel to each other.[9]
-
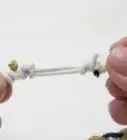
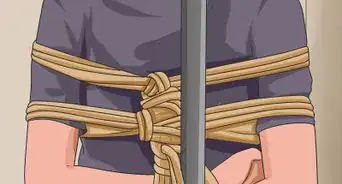
9Tighten to finish. Pull both tips of the cord with one hand while holding the remainder of the first bight in place with the other. This should tighten the cord into a secure knot.
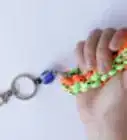
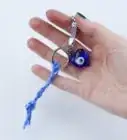
- Use the free ends to attach the lanyard to your item of choice. This style of lanyard is typically used to hold a knife.[10]

Adding Extra Grip with an Overhand Knot
-
1Figure out what you'd like to make into a lanyard. This method is useful for starting improvised lanyards on the fly when you need them quickly. One or more of these "stopper knots" can make a lanyard out of a simple strap or length of rope.
- Overhand knots can be used to add extra grip to a potential lanyard.
- Overhand knots can also be incorporated into more complicated lanyard-starting methods.[11]
-
2Make a bight with two free ends. Place the bight anywhere along your lanyard cord you would like to have an overhand knot. When you've finished, your knot will be roughly at the bight's apex. The free ends don't need to be even, but they should be parallel to each other.[12]
- In knot-tying, a bight is a U-shaped loop on the cord.
-
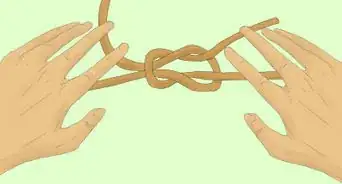
3Drape one end over the other and loop it underneath through the center of the bight. Draw one side over the other. Wrap the working cord around the opposite side. Pull its end back around through the bight, which should now be a loop.[13]
-
4Cinch the knot to tighten. Pull each end at the same time.[14] When working further on your lanyard, you may choose to add more overhand knots along the cord or over top the first to further strengthen its grip. Keep in mind that this is a "jamming" knot and will be incredibly difficult to untie.[15]

Starting a King Cobra Lanyard
-
1Gather your materials. To start a "king cobra" lanyard, you will need roughly 13 feet (4 m) of paracord, a metal clip, a tape-measure, a rubber band, a pair of scissors, and a lighter.
- The king cobra paracord lanyard is popular among hikers and survivalists, as it allows you to conveniently carry a long amount of rope in the palm of your hand.[16]
- This same style of braiding is also used in scoubidou, also known as gimp, a popular knotting craft among children. When made using plastic strings, it can be used as a decorative lanyard in its own right.[17]
-
2Mark the center of the paracord. Fold your length of paracord in half. Tie your rubber band around the loop that forms in order to mark its center.[18]
- You can substitute other markers for the rubber band as long as the alternative is both secure and temporary. Twist ties and bread clips are good options.
-
3Tie a knot with the two ends of rope. Position the knot so that it is roughly two inches away from the rubber band marker. You may remove the rubber band once the knot is secure. Two potential knots you can use are:
- The diamond or lanyard knot – This type of knot is both very secure and aesthetically pleasing.
- A simple overhand knot – This knot is much easier to do but is also bulkier and less decorative compared to the diamond knot.[19]
-
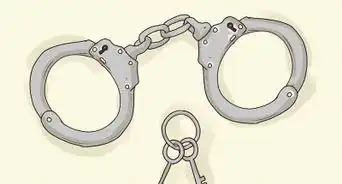
4Thread the two loose ends through your metal clip. Push the two free tips of paracord through the solid loop portion of your metal clip. Pull them through until the knot is roughly five inches from the loop. Position the two long portions of the paracord so that they are on either side of the central five-inch stretch.[20]
-
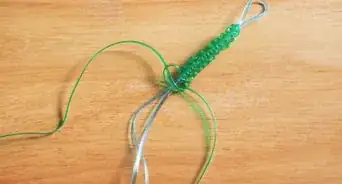
5Loop the left cord over the center cords, making a bight on the left side. This will start your first cobra stitch.[21]
- In knot tying, a bight is a U-shaped loop formed by the cord.
-
6Drape the right cord over the portion of the left cord that is now on the right side. Keep the knot slack.
-
7Take the right cord back behind the center and pull the right end through the left bight. Make sure to leave the knot slack at this point.
-
8Cinch the stitch tight. This action finishes your first cobra stitch.[22]
-
9Loop the current right strand over the center cord, making a bight on the right side. This will start your second cobra stitch. You'll be making the same stitch as you did for the first but this time with the directions reversed.[23]
-
10Drape the left cord on top of the portion of right cord that has crossed over. Keep the knot slack.[24]
-
11Bring the left cord behind the central cords and pull its end up through the right bight. Cinch to to tighten the stitch.[25]
-
12Continue this pattern to create the main part of your lanyard. Make additional cobra stitches, alternating between left and right, until you reach your diamond or overhand knot.
- For a king cobra lanyard, you will repeat these stitches in the opposite direction, using your first set of cobra stitches as your new central strings.
- Use your lighter to seal the ends and prevent fraying when you've finished.[26]


References
- ↑ http://www.animatedknots.com/lanyard/
- ↑ http://modernsurvivalblog.com/preps/five-benefits-of-parachute-cord/
- ↑ http://www.animatedknots.com/lanyard/
- ↑ http://www.realknots.com/knots/bends.htm
- ↑ http://www.animatedknots.com/lanyard/
- ↑ http://www.animatedknots.com/lanyard/
- ↑ http://www.animatedknots.com/lanyard/
- ↑ http://www.animatedknots.com/lanyard/
- ↑ http://www.animatedknots.com/lanyard/
- ↑ http://www.animatedknots.com/lanyard/
- ↑ http://www.handymariner.com/overhand-knot/
- ↑ http://www.animatedknots.com/overhand/
- ↑ http://www.animatedknots.com/overhand/
- ↑ http://www.animatedknots.com/overhand/
- ↑ http://www.handymariner.com/overhand-knot/
- ↑ http://www.homemade-gifts-made-easy.com/paracord-lanyard.html
- ↑ http://www.scoubiguide.co.uk/whatis.html
- ↑ http://www.homemade-gifts-made-easy.com/paracord-lanyard.html
- ↑ http://www.homemade-gifts-made-easy.com/paracord-lanyard.html
- ↑ http://www.homemade-gifts-made-easy.com/paracord-lanyard.html
- ↑ http://www.boondoggleman.com/prj_cobra_stitch.htm
- ↑ http://www.boondoggleman.com/prj_cobra_stitch.htm
- ↑ http://www.boondoggleman.com/prj_cobra_stitch.htm
- ↑ http://www.boondoggleman.com/prj_cobra_stitch.htm
- ↑ http://www.boondoggleman.com/prj_cobra_stitch.htm
- ↑ http://www.homemade-gifts-made-easy.com/paracord-lanyard.html
About This Article

To start a lanyard, lay a single length of cord on a flat surface and bend it into a loop with the U-shape at the midpoint. Next, take the left end of the cord and slide it back around under itself in a circular motion. Then, slide the right half of the cord under the loop and form a second U-shape. Afterwards, tuck the right tip under the cord to the right of the first loop, and weave the original right and left ends back through the center of the knot. Finish by tightening the cord into a secure knot. To learn how to add extra grip to an overhand knot, keep reading!