X
This article was co-authored by Ikaika Cox. Ikaika Cox is the Shop Director at the Salt Lake City branch Bicycle Collective in Salt Lake City, Utah. He has been a bike mechanic since 2012, beginning as a volunteer with the Provo Bicycle Collective, and growing and honing his skills as a bicycle mechanic and educator in multiple Bicycle Collective locations over the years. He now leads the Salt Lake City branch of the Bicycle Collective.
This article has been viewed 26,097 times.
Brakes screech when they slip and catch repeatedly. This happens when there's not enough friction, usually because the brake pads are brand new, too worn out, or coated in grease. A quick check and cleaning should solve the issue.
Steps
Method 1
Method 1 of 3:
Fixing Squeaky Disc Brakes
-
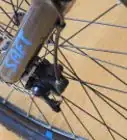
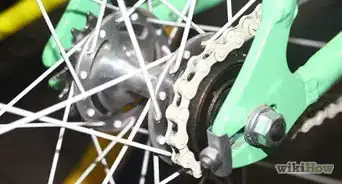
1Remove the wheel. Most mountain bikes and some other bikes use disc brakes, located at the hub. To get full access to its parts, remove the wheel. In most cases, this is as simple as turning the quick release handle outward and lifting the wheel away.
- Never activate the brakes while the wheel is removed. The brake pads will move inward and make it very difficult to reinsert the wheel.
-
2Remove the pads. These parts are usually held in the calipers by a screw or cotter pin, which you can unbend with needle-nose pliers. There may be additional clips holding in the pads.[1]
- Disc brake designs vary. If you can't figure out how to disassemble yours, track down a user manual.
- Try not to touch the braking surface of the pads or rotors with your hands, especially after cleaning them.
Advertisement -
3Inspect the pads for wear and replace them if necessary. Disc brake pads usually need replacement once they've worn down to 1 mm thick, but you may want to confirm that with the manufacturer instructions.[2] If your pads aren't worn enough to require replacement, try the solutions below instead.
- If you replace the pads, it's best to replace the rotors as well.
-
4Clean the pads and rotors with rubbing alcohol. Grease on the brakes is one of the most common causes of squeaking. Wipe the braking surface of the pads and rotors with rubbing alcohol to dissolve dirt and grease.
- Avoid using water to clean the brake pads or rotors as it can cause rusting.
-
5Sand old pads and rotors. Older brake pads are usually glossy from the heat of braking. Lightly scuff the surface of the pads and rotors with sandpaper.
-
6Reassemble the bike. Place the pads back in the disc brakes. Fasten the wheel back onto the bike. Double check that all bolts are tight, as loose attachments are another cause of squeaking and poor braking.
- Wet brake pads may screech. Let the alcohol evaporate before reassembly.
-
7Bed-in the brakes if you replaced them. New pads and rotors need to undergo a procedure called "bed-in" before you ride your bike. Find a safe area with low traffic, like an empty parking lot, to bed-in your brakes. Begin riding your bike and work up to a moderate speed. Apply the brakes evenly in a controlled manner to reduce your speed. Before you come to a complete stop, release the brakes. Repeat the procedure about 20 times.[3]
- Then, work up to a faster speed and apply the brakes until you reach a walking speed. Release the brakes and repeat the process 10 times to bed-in your breaks and ensure they will operate consistently.
- Be sure to remain seated at all times and avoid locking up the wheels at any point! Let the brakes cool completely before you ride your bike again.
- If you are not familiar with the operation and power of the bike and brakes, have a certified bike mechanic perform this procedure for you, as you must perform some heavy braking. This could lead to injury if you are not an experienced rider that is familiar with the bike at hand.[4]


Advertisement
Method 2
Method 2 of 3:
Silencing Rim Brakes
-
1Wipe the rim with a dry cloth. V-brakes or center pull brakes press directly on the rim to stop the bike. Dirt or grease on the rims can interfere with the brake friction and cause squealing. Wipe off obvious dirt with a clean cloth.
-
2Clean off grime. Rubbing alcohol, acetone, or another oil-free solvent are ideal for removing grease. Wet a cloth in one of these substances, then scrub away grease on the rims.
-
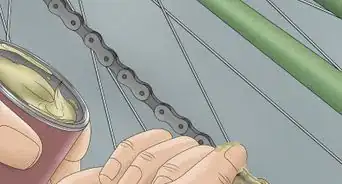
3Dry the rims. A wet surface has less friction, so dry it with a clean cloth or paper towel. Handle the wheel by the spokes, not the rims, to avoid transferring oil from your hands. (This is a good tip to follow in daily use as well.)
-
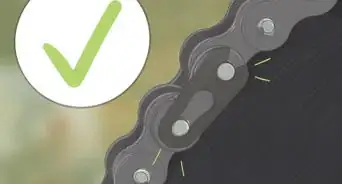
4Check the brake pads for damage. Occasionally, a sharp object or a fragment of metal embeds itself in a rim brake pad. Inspect the pads carefully and pick out any foreign objects with an awl or other sharp tool.
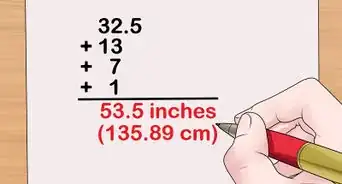
- If the brake pads are worn thin, you may need to replace them. Typically, there should be at least 1⁄8 inch (3.2 mm) of rubber between the clamp and the tire when the caliper is engaged to brake the bike. You can use a brake pad gauge to measure this precisely.
-
5Sand the brake pads or rims. New brake pads have a hard surface that needs to be worn in. This will happen naturally over time, but you can shortcut it with a light sanding. If your rims are especially smooth and shiny, scuff them up a little as well.
-
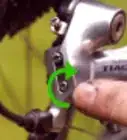
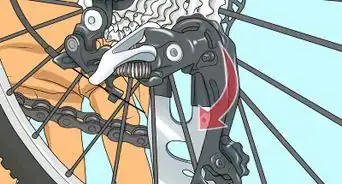
6Toe in the brake pads. You'll have less noise and better braking ability if the pads are angled inward. Looking down from above the wheel, the front of the brake pads should be slightly closer to the rim. Most rim brakes allow you to adjust the angle by tightening or loosening nuts, and/or rotating washers.[5]
- Never bend the arms of the brake pads to adjust the angle. This will weaken the metal.[6]
- If your bike doesn't allow for this adjustment, consider replacing the brakes.


Advertisement
Method 3
Method 3 of 3:
Troubleshooting
-
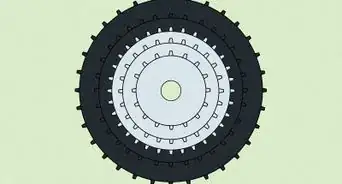
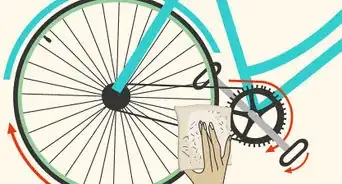
1Test the wheel. Spin the wheel. If it wobbles or fails to spin freely, you may need to true the wheel. This can be difficult if you haven't done it before, but a bike shop will usually true your wheels for cheap.
-
2Check the cables. Squeeze the brake handles and make sure the cable moves. If it does not, your cable may be stuck in the cable housing, or the clamp in the handle may be loose.
-
3Make sure the caliper moves when the cable pulls on it. If you have caliper brakes, have a friend operate the brakes while you watch the caliper. If the brake cable moves but the end of the caliper does not, the cable may be broken inside the cable housing. The whole cable assembly will have to be replaced.


Advertisement
Community Q&A
-
QuestionHow do I make drum brakes quiet?
 Paul SCommunity AnswerDrum brakes squeal when the internal shoes wear and make dust inside the hub. Disassemble and use a wet cloth to remove the dust, then you could follow up with automotive brake cleaner spray. Don't use compressed air to remove the dust, as asbestos dust is toxic and hazardous to inhale. Sturmey-Archer hubs are the only dependable drum brake hubs. Ones made in China are not durable, and generally not rebuildable nor long-lasting.
 -
QuestionWhen I spin the wheel and then apply the brakes without being on the bike the brakes don't make noise but as soon as I try to stop when riding they do. Why is this and what do I do about it?Matt GanderCommunity AnswerThis noise means the wheel, pad or braking surface is dirt or contaminated with oil. For rim brakes use soapy water to clean the wheel and pads. for disck brakes do the same with the disc or use alcohol wipes.
Advertisement
Warnings
- Don't forget to put the brake back together after doing any adjustments.⧼thumbs_response⧽
Advertisement
Things You'll Need
- Kitchen or butter knife

References
- ↑ http://www.singletracks.com/blog/mtb-repair/mechanical-disk-brake-service/
- ↑ https://totalwomenscycling.com/road-cycling/maintenance/ask-expert-know-brake-pads-need-replacing-44610/#4Q9fXLDCyStO46wT.97
- ↑ https://youtu.be/iUV2Eo9ERSk?t=76
- ↑ https://youtu.be/iUV2Eo9ERSk?t=47
- ↑ http://www.bikeradar.com/us/gear/article/workshop-step-by-step-guide-to-quiet-rim-braking-22677/
- ↑ http://www.sheldonbrown.com/rim-brakes.html
About This Article

Ikaika Cox
Bicycle Mechanic
This article was co-authored by Ikaika Cox. Ikaika Cox is the Shop Director at the Salt Lake City branch Bicycle Collective in Salt Lake City, Utah. He has been a bike mechanic since 2012, beginning as a volunteer with the Provo Bicycle Collective, and growing and honing his skills as a bicycle mechanic and educator in multiple Bicycle Collective locations over the years. He now leads the Salt Lake City branch of the Bicycle Collective. This article has been viewed 26,097 times.
Co-authors: 14
Updated: May 6, 2021
Views: 26,097
Categories: Bicycle Brake and Chain Maintenance
Advertisement