This article was co-authored by Antoine de Villiers. Antoine de Villiers is an Artist and the Founder of Antoine Art Studio LLC based in Savannah, GA. Antoine has over 25 years of experience, specializing in oil painting, graphite & charcoal drawing. She has had over 70 exhibitions around the globe and her work has received numerous awards including Best Figurative Artist by The Richmond Art Museum, Indiana (USA), Best Solo Artist by Eric Smith at the New York Art Expo, and first place in Figurative Painting by Pamela Jean Tinnen from Artrepreneur. She earned her Web Design Diploma from Boston Business College and studied Indian Art, Visual Art, and Modern Art at the University of Oxford, Department of Continuing Education.
There are 9 references cited in this article, which can be found at the bottom of the page.
This article has been viewed 41,357 times.
Whether you collect art as a hobby or have a studio of your own, you may eventually need to place your artwork in storage. To properly protect and store your artwork, you have to choose a storage environment and packing materials that won’t cause premature aging or damage. Handle all work with care.
Steps
Selecting a Suitable Location
-
1Pick a room that’s as dark as possible. Light is one of artwork’s biggest enemies. It can cause all sorts of damage, so you want to store your art in a dark place. Choose a windowless room, such as a finished basement or study, to store your artwork.[1]
-
2Keep the room at a temperature of about 70 °F (21 °C). For most artworks, a steady, cool temperature is ideal. More extreme climates can crack paint, warp or yellow paper, and foster mold growth.[2]
- If the room you’ve selected goes through drastic changes in temperature during different seasons, you should pick another location to store your art.
- If you are not storing art in your home, your next-best option is a storage unit. Give nearby storage companies a call and ask if they have temperature-controlled units available.
- If you have a local art gallery near you, you can call and ask them for recommended storage services.[3]
Advertisement -
3Maintain a humidity of 50% in the storage room. Materials like paint and wood are especially sensitive to humidity. Keeping a constant, moderate level of humidity in the storage area will keep your artwork from changing shape or getting moldy.[4] You can moderate the room’s humidity using a humidifier or dehumidifier.[5]


Preparing Your Art for Storage
-
1Put on gloves before touching any art. Some art materials are hypersensitive, even to the natural oils on your fingertips. Wearing cotton or powder-free latex gloves when handling your art can prevent you from accidentally causing it harm.[6]
-
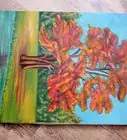
2Check to see if all works are dry. If you’re storing any paintings, sculptures, or ceramics, make sure they’re completely dry before handling. Some artwork, such as oil paintings, can take up to an entire year to dry.[7]
-
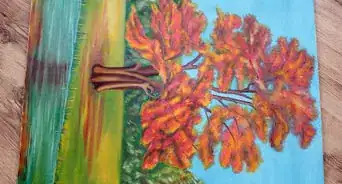
3Clean your art. Cleaning artwork before storage will help extend its lifespan. A dry microfiber cloth, rag, or paper towel is enough to clean most artwork. Gently sweep it across frames, glass panes, ceramics, and acrylic paintings. You can brush over painted surfaces, drawings, and mixed media with a wide, soft makeup or paint brush.[8]
-
4Protect framed paintings with acid-free tissue. Acid is in many paper and packing materials, and will age art much faster and can change its color. Using acid-free tissue, wrap around the painting to protect it and give it breathing room. Then roll it into a padding, like bubble wrap, to protect the frame.
- You can wrap paintings with plastic wrap instead of tissue, but you risk sealing humidity inside. If your art is part of a valuable collection, steer clear of it.[11]
-
5Group smaller prints together in a folder. Put acid-free paper or tissue between the prints if they are unprotected. Slip your prints into sturdy folders, with about 10-15 in each.[12]
-
6Seal unframed paper in glassine. Glassine is a material used by archivists to preserve unframed artwork and documents. You can purchase glassine online, at a printmaking shop, or in an art supply store. Cut a sheet of glassine about two times the size of each piece. Wrap it as you might a present, then tape it facedown onto a piece of foamcore.
- You also have the option to roll your work into the glassine, but it may be more difficult to flatten once you remove it from storage.
-
7Wrap sculptures and other 3D objects in bubble wrap. When preparing to store sculptures, wrap them in bubble wrap. Use multiple layers if necessary. Tape the bubble wrap in place.
-
8Place all wrapped artwork into boxes. You should try to give each item its own sturdy cardboard box, though you can place folders horizontally in a box together. Once you’ve put your art in boxes, stuff the rest of each box with newspaper to prevent the art from shifting around.[13]


Housing Your Art
-
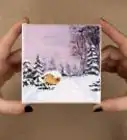
1Handle one piece at a time. You don’t want to ruin all of your hard work and preparation by trying to store it too quickly. Move your artwork piece by piece when putting it into storage.[14]
-
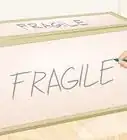
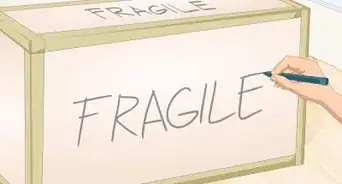
2Label and keep a record of your stored art. Using tape and a permanent marker, label all the boxes of artwork. Include each work’s title and artist on your label. Create a spreadsheet or written record of what art you’ve stored and where it’s located.[15]
-
3Keep art off of the ground. You never want your artwork touching the storage room floor. Place smaller boxes on shelves or in drawers. Larger boxes can be elevated on racks or risers.[16]
-
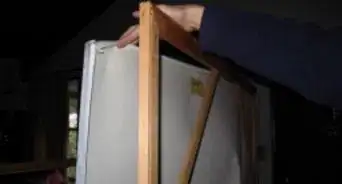
4Stand paintings on their sides in boxes or on storage racks. You want to avoid putting any pressure on paintings, so don’t stack them flat. Stand them on their sides and place them next to one another as you would if you were putting books on a bookshelf.[17]
- Shelves with vertical dividers are ideal but if you have limited space, canvasses of the same size can rest on each other vertically as long as the stretchers are aligned.
-
5Check your art for damage every few months or so. Even if you’ve set up perfect conditions for your artwork, problems and subtle changes can still arise in the storage environment. Checking in on it is the best method to catch any potential issues early on. Take a look at your collection once in a while make sure it’s performing well and hasn’t changed or had any unwelcome visitors (e.g. pests, mold).[18]
- Look for these signs of pests in your storage area: entry or exit holes, fur, fallen particles from feeding, droppings, or cocoon cases.[19]
- Leave traps of your choice once you’ve found signs of infestation.
- Mold will appear as fine webbing, or clusters of spotty or fuzzy material. If your collection feels damp or smells musty, this can also indicate mold. Reduce the humidity level in the room, then go online or consult an expert for how to appropriately handle the variety of mold that has invaded.


Community Q&A
Did you know you can get answers researched by wikiHow Staff?
Unlock staff-researched answers by supporting wikiHow
-
QuestionHow can I store the kids' artwork?
 wikiHow Staff EditorThis answer was written by one of our trained team of researchers who validated it for accuracy and comprehensiveness.
Staff AnswerwikiHow Staff EditorStaff AnswerChildren can be prolific little artists and it can be hard to decide where to keep it all. You could purchase an artwork file/portfolio available from art stores as one option. For large pieces of artwork, mailing tubes can be a great way to keep these stored, rolled up and uncreased. It's also a good idea to get used to choosing pieces you and your children like the most and recycling other pieces on a yearly basis; this will help to reduce clutter and ensures that the best artwork is appreciated by all.
Support wikiHow by unlocking this staff-researched answer.
-
QuestionWhat if I live in an apartment, and the only windowless room is the bathroom?wikiHow Staff EditorThis answer was written by one of our trained team of researchers who validated it for accuracy and comprehensiveness.
Staff AnswerwikiHow Staff EditorStaff AnswerChoose a wardrobe, closet or lockup in a garage space instead if you don't have a windowless room. Or, choose a room that doesn't get much light. Keeping the artwork well wrapped or inside boxes will also prevent light from getting to it.Support wikiHow by unlocking this staff-researched answer.
-
QuestionHow do I store my art carefully with little to no space?wikiHow Staff EditorThis answer was written by one of our trained team of researchers who validated it for accuracy and comprehensiveness.
Staff AnswerwikiHow Staff EditorStaff AnswerConsider areas that might not be getting used and won't be in the way, such as the top of a wardrobe, hanging an art folder on a spare wall, placing under a bed or inside a chest, or at the back of a wardrobe behind your shoes and clothes.Support wikiHow by unlocking this staff-researched answer.


References
- ↑ https://www.si.edu/mci/downloads/RELACT/storage_documents.pdf
- ↑ https://www.artworkarchive.com/blog/how-to-store-your-art-collection-like-an-expert
- ↑ https://www.art-mine.com/collectorscorner/caring-art-storing-art/
- ↑ http://www.nytimes.com/2009/04/05/arts/design/05kino.html
- ↑ https://www.artworkarchive.com/blog/how-to-store-your-art-collection-like-an-expert
- ↑ https://www.si.edu/mci/english/learn_more/taking_care/care_painting.html
- ↑ https://burnaway.org/feature/whats-the-best-longterm-storage-for-paintings/
- ↑ https://www.art-mine.com/collectorscorner/caring-art-cleaning-protecting/
- ↑ https://www.artfulhome.com/servlet/Guild/CareInstructions.html
- ↑ https://www.art-mine.com/collectorscorner/caring-art-cleaning-protecting/
- ↑ https://www.artworkarchive.com/blog/how-to-store-your-art-collection-like-an-expert
- ↑ https://www.si.edu/mci/downloads/RELACT/storage_documents.pdf
- ↑ https://www.art-mine.com/collectorscorner/caring-art-storing-art/
- ↑ https://www.art-mine.com/collectorscorner/caring-art-storing-art/
- ↑ https://www.art-mine.com/collectorscorner/caring-art-storing-art/
- ↑ https://www.artworkarchive.com/blog/how-to-store-your-art-collection-like-an-expert
- ↑ https://burnaway.org/feature/whats-the-best-longterm-storage-for-paintings/
- ↑ https://www.art-mine.com/collectorscorner/caring-art-storing-art/
- ↑ http://www.philamuseum.org/conservation/10.html?page=5
About This Article

Before you store art, make sure it’s all dry and wipe it with a microfiber cloth to clean off any dust or dirt. Then, store it at 70 °F in a dark room with about 50% humidity to prevent warping, cracking, or discoloration. To further protect the art from discoloration, wrap it in acid-free tissue paper or glassine. Remember: you can store the art in a temperature-controlled storage unit if you need to. To learn how to check your art for damage, read on!