This article was co-authored by wikiHow Staff. Our trained team of editors and researchers validate articles for accuracy and comprehensiveness. wikiHow's Content Management Team carefully monitors the work from our editorial staff to ensure that each article is backed by trusted research and meets our high quality standards.
There are 10 references cited in this article, which can be found at the bottom of the page.
The wikiHow Video Team also followed the article's instructions and verified that they work.
This article has been viewed 39,213 times.
Learn more...
If you’re somehow able to resist the temptation of eating fresh waffles, you’re going to need a good way to store them. Waffles, unfortunately, don’t last very long, but there are a few steps you can take to keep them soft and tasty. They will last a few days when refrigerated inside a sealed container. Perhaps you would rather have homemade waffles to reheat for a quick breakfast or serve as a snack. In that case, freeze them to keep them fresh for longer. With careful storage, you can keep waffles fresh whether you plan on eating them tomorrow or at a later date.
Steps
Refrigerating Leftover Waffles
-
1Refrigerate the waffles within 2 hours of cooking them. Wait for the waffles to cool down first. Once they are cool enough to handle, store them so they remain safe to eat. Any waffles left out for more than 2 hours could have unsafe bacteria on it, so throw them out instead.[1]
- Bacteria spreads on any food under 140 °F (60 °C). Quick storage prevents bacteria from forming, keeping your waffles safe for another day.
- If the temperature is above 90 °F (32 °C), the waffles will become unsafe to eat after 1 hour, so be sure to store them before then!
-
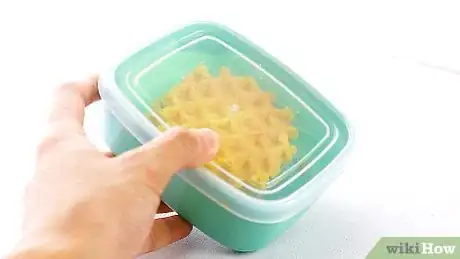
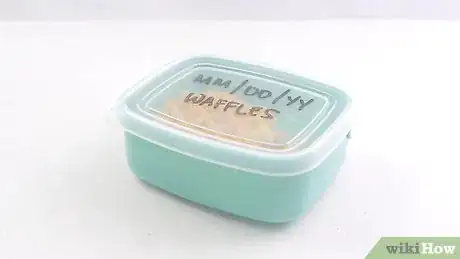
2Place the waffles in an airtight bag or container. Try using resealable plastic zipper bags. No matter what size the waffles are, you can usually fit a few of them in food storage bags. If you have big enough refrigeration containers, they will also work well. You could label them with today’s date to remind yourself of how old the waffles are.[2]
- If you don’t have any storage containers, wrap the waffles up in aluminum foil or plastic wrap. You can wrap them all together, but make sure they are well-sealed so they don’t dry out.
Advertisement -
3Use the waffles within 2 to 3 days. Unfortunately, fresh waffles don’t hold up very well in the refrigerator. They harden and lose their taste over time. If you intend on using the waffles right away, refrigerating them is fine. Freeze them instead if you wish to keep them edible long-term.[3]
- Throw the waffles away if you notice anything strange, such as mold growth. Watch for color changes or for a soft, mushy texture.
-
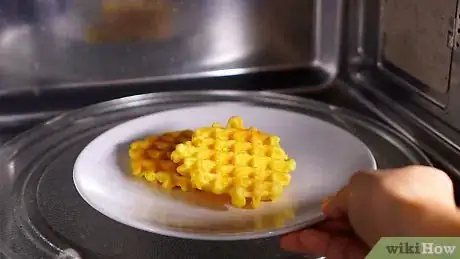
4Reheat cold waffles in a microwave for 45 seconds. Set the waffles on microwave-safe plates. Try cooking 1 or 2 at a time so they all reach the correct temperature. When they feel warm all over, take them out to enjoy for breakfast or as a snack.[4]
- If you want your waffles to be a little crisper, reheat them in an oven or toaster. Try putting them on a baking sheet in a 350 °F (177 °C) oven and baking them for about 5 minutes, for instance.
Freezing Homemade Waffles
-
1Let the waffles cool down for 30 minutes after cooking them. To ensure the waffles freeze properly, wait until they feel cool to the touch. It usually doesn’t take long. However, make sure you store the waffles within 2 hours of cooking them, or else they won’t be safe to eat.[5]
- If the waffles are still warm when you put them in the freezer, they won’t stay as dry. The moisture causes them to spoil faster than usual.
- Freezing waffles is a better alternative to refrigerating them, especially if you don’t plan on eating them right away. They maintain their flavor and texture much better in the freezer.
-
2Spread the waffles in a single layer on a baking sheet. Make sure the baking sheet will fit in your freezer. You can then cover it with a layer of parchment paper to make the frozen waffles easier to remove. Also, leave a little bit of space between each waffle to prevent them from sticking together.[6]
- If you have more waffles than you can fit on the baking sheet, freeze them in batches. You could also use multiple baking sheets.
- Another option is to stack the waffles in layers on the same baking sheet. Place parchment paper between each layer. Keep in mind, however, that the lower layers could get crushed.
- If you’re short on space, you could wrap each waffle up individually and place it in the freezer. As long as they are well-sealed, you won’t have to take them out until you’re ready to eat them.
-
3Freeze the waffles for 2 hours to solidify them for easy storage. Wait until the waffles are completely frozen. They will feel cold and hard all over. Take them back out of the freezer to prepare them for long-term storage.[7]
- If some of the waffles stick to the baking sheet, scrape them up with a spatula. You could also wait for them to defrost, but be prepared to either freeze them again or store them separately.
-
4Place the waffles in an airtight container labeled with today’s date. The waffles are just frozen pucks at this point, so you can store them all together in a single container. Try using a plastic freezer bag instead of a container. You can usually fit more waffles together that way. Push as much air out of the bag as you can before sealing and labeling it.[8]
- Use a plastic straw to reduce the amount of air left in freezer bags. Close the bag almost all of the way, put the straw in, then stuck the air out. It helps keep the waffles fresh for longer.
- For a different approach, wrap the waffles up in plastic wrap, then cover them with foil. Wrap them in pairs to save on space. Make sure each package is airtight before freezing it.
-
5Freeze the waffles for up to 3 months. Make sure the storage container is well-sealed before putting the waffles back into the freezer. Well-stored waffles will taste almost as good as fresh ones when reheated. However, they will start to lose quality after a few months. If they change color, throw them out. They start turning white due to freezer burn.[9]
- Homemade waffles are a lot like store-bought frozen waffles. You do not have to thaw them before warming them up. For example, you could reheat them in the microwave until they are warm all over.
-
6Reheat the frozen waffles in an oven or toaster. Preheat an oven to 350 °F (177 °C). Spread the frozen waffles in a single layer on a baking sheet, then move it into the oven once it is hot. After about 5 minutes, take them back out. If they don’t feel warm and crisp all over, continue heating them for up to 5 more minutes.[10]
- If you’re only reheating a couple of waffles, use a toaster on its lowest heat setting for a quick and easy snack. Take the waffles out once they are warm and crisp.
- You could also warm the waffles in the microwave, but they won’t be crisp. Heat them for about 45 seconds.
Warnings
- Label containers with the date to keep track of how long they have been in storage. Waffles decrease in quality and even become unsafe to eat over time.⧼thumbs_response⧽
- Store waffles in a timely manner and keep them well-sealed to prevent bacterial growth. For safety, store them within 2 hours of cooking them or throw them away.[13]⧼thumbs_response⧽
Things You’ll Need
Refrigerating Leftover Waffles
- Refrigerator
- Airtight bag, container, or wrap
Freezing Homemade Waffles
- Refrigerator
- Baking sheet
- Airtight freezer bag or container
- Parchment paper (optional)
- Plastic wrap (optional)
- Aluminum foil (optional)
References
- ↑ http://www.eatbydate.com/grains/how-long-do-waffles-last/
- ↑ https://www.stilltasty.com/fooditems/index/18653
- ↑ http://www.eatbydate.com/grains/how-long-do-waffles-last/
- ↑ https://www.eatingonadime.com/how-to-freeze-pancakes-and-waffles/
- ↑ https://www.squirrelsofafeather.com/freezing-waffles-reheating-waffles/
- ↑ https://www.epicurious.com/recipes/food/views/overnight-waffles
- ↑ https://www.squirrelsofafeather.com/freezing-waffles-reheating-waffles/
- ↑ https://simplebites.net/how-to-freeze-a-big-batch-of-homemade-waffles/
- ↑ https://simplebites.net/how-to-freeze-a-big-batch-of-homemade-waffles/
- ↑ https://carlsbadcravings.com/cranberry-pecan-gingerbread-waffles-orange-syrup/
- ↑ https://www.thekitchn.com/the-best-way-to-keep-pancakes-and-waffles-warm-238073
- ↑ https://www.thekitchn.com/how-to-freeze-and-reheat-pancakes-252404
- ↑ https://www.fsis.usda.gov/wps/portal/fsis/topics/food-safety-education/get-answers/food-safety-fact-sheets/safe-food-handling/keep-food-safe-food-safety-basics/ct_index


