This article was co-authored by Joel Giffin, PT, DPT, CHT and by wikiHow staff writer, Jennifer Mueller, JD. Dr. Joel Giffin is a Doctor of Physical Therapy and the Founder of Flex Physical Therapy in New York, New York. With over 15 years of experience as a Certified Hand Therapist (CHT), Dr. Giffin treats the whole body and specializes in rehabilitation of the hand and upper extremities. He has treated Broadway theater performers backstage at shows such as The Lion King, Sleep No More, Tarzan, and Sister Act. Flex Physical Therapy also specializes in occupational and pelvic floor therapy. Dr. Giffin earned his Master’s degree in Physical Therapy with honors from Quinnipiac University and received his Doctor of Physical Therapy (DPT) degree with distinction from Simmons College. He is a member of the American Physical Therapy Association and the American Society of Hand Therapists.
There are 13 references cited in this article, which can be found at the bottom of the page.
This article has been viewed 25,044 times.
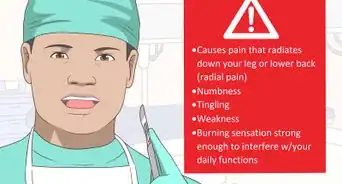
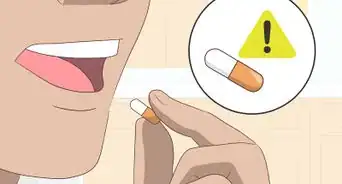
A herniated or slipped disc is extremely painful, but it usually heals on its own within 6 to 8 weeks. If you have a herniated disc, your inclination may be to avoid any physical activity at all. It is important to apply heat and get lots of rest during your recovery, but you can also try some stretches when you feel ready. These stretches may help relieve your discomfort. Other stretches and exercises may improve the stability of your core muscles and correct muscle imbalances in your back and core, which may keep the problem from happening again.[1] If you are having severe pain or back spasms, do not attempt any stretches or exercises and contact your doctor right away.
Steps
Relieving Discomfort
-
1Hang to decompress your spine. Use a chin-up bar if you have access to one. You can also use the top of the door or anything you can comfortably grip and hang on. Reach up and allow your body to hang. Hold for 30 seconds, breathing deeply.[2]
- You may want to place a step stool nearby. After 30 seconds, step up onto the stool. Then you can step off again and hang. Do 3 to 5 repetitions.
- If you find it uncomfortable to hang, or if it does nothing to decrease your pain, stop and do something else.
-
2Hug your knees to open space in your spine. The lumbar flexion stretch will gently open up your spine and can bring you some relief. Lay on your back and bring your knees up to your chest slowly. Wrap your arms around your shins and hug your legs, opening up your back and spine. Hold for about 30 seconds, breathing deeply, then release your legs.[3]
- Repeat the stretch 10 times if you can do so without pain. Stop if you find that your pain increases.
- You don't have to lay flat on the hard floor for this stretch. Lay on your bed or the couch, anywhere that's comfortable.
Advertisement -
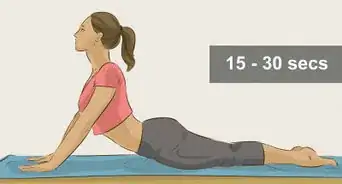
3Press up to extend your lower back. While laying on the floor on your stomach, raise up onto your elbows. Keep your forearms flat on the floor in front of you, in line with your body. Hold the stretch for 30 seconds, breathing deeply. Then lower to the ground.[4]
- Work up to 10 repetitions. This stretch is good if your herniated disc is in the lumbar region of your spine.
- If you can do so without pain, extend your elbows and raise up onto your hands to deepen the stretch.
-
4Move your hips off center to centralize your pain. If you have pain radiating down your legs, you want that pain to return closer to your spine. Do the same press up, but move your feet and hips to one side or the other. You may find it better to move your hips away from the side of your body where you feel the most pain.[5]
- Aim for 10 repetitions, breathing deeply and holding the press-up for 30 seconds at the top. Pay attention to your pain. If it doesn't change or gets worse, stop and do something else.
- Don't push yourself. You may find that you can't raise up as far with your hips off center as you could when you were doing press ups with your hips straight on.
-
5Rotate your spine to make space. Gentle rotation may give your nerves more room, decreasing your pain. Lie on your side (usually you want to lie on the side with the most pain) and straighten your bottom leg. Bend the knee of your top leg, tucking your foot behind your bottom knee. Open up your chest, lowering your top shoulder to the floor. Hold for 10 seconds, breathing deeply, then return to your starting position.[6]
- Try to do 10 repetitions of this stretch. You can repeat on the other side if you want to, but it's not necessary.
- Pay attention to your pain. If the stretch doesn't decrease or change your pain, stop and do something else.


Improving Core Stability
-
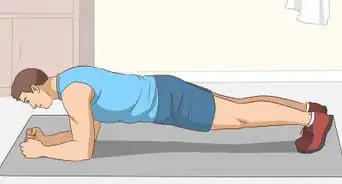
1Start with planks. Lie flat on the floor with your forearms on the mat and your legs straight out behind you. Engage your core to lift your body until only your forearms and toes are on the floor. Keep your back neutral, shoulders rolled back. Hold for 20 to 30 seconds, then release to the floor.[7]
- Engage your core and glutes and breathe deeply through this exercise.
- Try for 5 to 10 repetitions. You can also do fewer reps while holding the plank for longer.
-
2Progress to side planks. Lie on your side with your bottom forearm on the floor and your elbow directly under your shoulder. Lift your hips so that only the edge of your foot and your forearm are on the floor. Hold for 20 to 30 seconds, then release.[8]
- Aim to do 5 to 10 repetitions at 20 to 30 seconds, breathing deeply. If you increase the time you hold the plank, you can do fewer repetitions. After you finish your reps, switch and do the other side.
- Keep your back neutral and avoid hunching your shoulders. Your top and bottom shoulder should be in alignment.
-
3Use the bird dog exercise to strengthen your lower back. Get on all fours with your knees directly under your hips and your wrists directly under your shoulders. Keep your back flat. Raise your left arm and kick your right leg behind you at the same time, so that your arm and leg extend out flat from your torso. Hold for 2-3 seconds, then return to start and repeat with your right arm and left leg.[9]
- Aim for 10 repetitions on each side. Make sure you're breathing through the movements and keeping your spine neutral. Don't hunch your shoulders or crunch your neck.
-
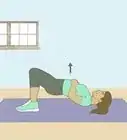
4Engage your glutes with the bridge. Lie on your back with your knees bent and your feet flat on the floor. Engage your glutes and core to lift your hips toward the ceiling, resting your arms palm down on either side of your torso. Hold for 3 to 5 seconds, breathing deeply, then lower your body slowly to the floor.[10]
- Aim for 10 to 15 repetitions of this exercise. Check that your body forms a straight line from your knees down to your shoulders when you are at the top of the bridge.
-
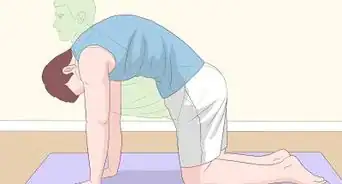
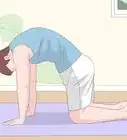
5Do the cat-cow stretch to increase spinal mobility. Start on all fours with your knees under your hips and your wrists under your shoulders. Breathe deeply. On an inhale, drop your stomach to the floor and arch your back, looking upward. On an exhale, lift your stomach up towards the ceiling, rounding your back, and tuck your chin down.[11]
- Alternate between cat and cow for 10 repetitions with a breath for each movement, then take a short break. Do 2 to 3 sets of this exercise.


Correcting Muscle Imbalances
-
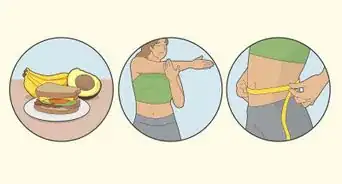
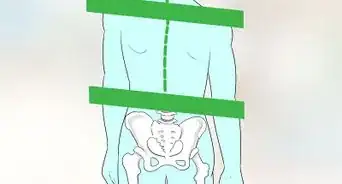
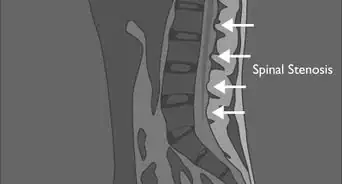
1Study your standing posture and gait. Standing and walking around can reveal muscle imbalances in your back. These muscle imbalances put pressure on your spine and can make herniated discs more likely.[12]
- Stand sideways in front of a mirror and look at your back. If it's curved or hunched, this could indicate a muscle imbalance. Then walk towards the mirror, observing whether your shoulders hunch or your torso leans forward to lead the rest of your body.
- You can also have a friend observe and point out possible issues, or work with a trainer or physical therapist.
-
2Incorporate other exercises to fix common posture problems. Depending on the issues you observed with your posture and gait, there are easy exercises you can add to your regular routine to start correcting those muscle imbalances.[13]
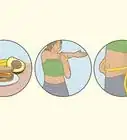
- If you have a "Donald Duck" posture, with a pronounced arch in your lower back that causes your rear to stick out, try planks and side-lying leg raises to strengthen your glutes and hip flexors. The same exercises also help if you stand with a flat back and your shoulders crunched forward.
- Bridges can help if you have rounded shoulders or if you find you frequently stand with the bulk of your weight on one leg.
-
3Stretch your hamstrings to support your back and core. Lay on the floor facing a wall, and place your feet up the wall until your legs are laying flat against the wall. Keep your hips flat against the floor and breathe deeply. Hold for 20 to 30 seconds, then release.[14]
- If you have difficulty doing both legs at once, you can do one leg at a time using a doorway. Raise one leg against the wall, and keep the other straight out on the floor, through the door. Hold for 20 to 30 seconds, then do the other side.
- Tight or shortened hamstrings place additional stress on your lower back, and can lead to problems such as a herniated disc in the lumbar region of your spine.
-
4Walk barefoot to improve posture. Walking barefoot encourages a more even weight distribution and will keep you from leaning forward or to one side. Walking barefoot also strengthens your feet, which improves your balance.[15]
- Try walking barefoot for 5 minutes a day to start, especially if you are seldom barefoot or if you frequently wear heels. Give your feet time to adjust.
- Work up to walking barefoot 20 to 30 minutes a day. If you're going to walk outside, inspect the ground first for metal or broken glass that could cause injury.
-
5Use deep breathing exercises to balance your core. Sit in a quiet place and center your focus. Inhale deeply, expanding your chest to make room for as much air as possible. Pause, then gently press your belly inward as you slowly exhale, squeezing the air out from the bottom. Continue for 5 to 10 minutes.[16]
- Your breath is a huge part of your core functioning. Regular deep breathing exercises can help your body repair and correct muscle imbalances on its own.
-
6Correct your posture while working. People's heads are usually in a forward posture from looking down at phones, computers, and keyboards. Sit up tall when you're at your computer, have something behind your lower back for lumbar support, pinch your shoulders back a little, and think of the crown of your head as reaching up towards the ceiling.[17]
-
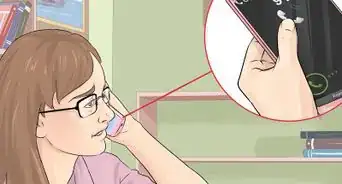
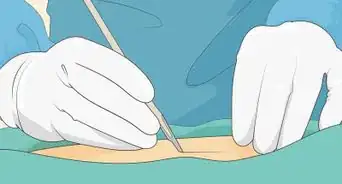
7Do manual muscle testing with a physical therapist. If you're concerned about significant muscle imbalance, a physical therapist can perform manual muscle testing to diagnose and treat you.[20] This test will require a referral from your doctor or physical therapist.
- Manual muscle testing can help you differentiate an exercise or habitual imbalance, which can be corrected with further exercise, from a neuromuscular imbalance, which requires more specialized therapy.
- Muscle testing may reveal spinal or neurological problems that require further treatment.


Expert Q&A
-
QuestionHow do you fix a herniated disc at home?
 Joel Giffin, PT, DPT, CHTDr. Joel Giffin is a Doctor of Physical Therapy and the Founder of Flex Physical Therapy in New York, New York. With over 15 years of experience as a Certified Hand Therapist (CHT), Dr. Giffin treats the whole body and specializes in rehabilitation of the hand and upper extremities. He has treated Broadway theater performers backstage at shows such as The Lion King, Sleep No More, Tarzan, and Sister Act. Flex Physical Therapy also specializes in occupational and pelvic floor therapy. Dr. Giffin earned his Master’s degree in Physical Therapy with honors from Quinnipiac University and received his Doctor of Physical Therapy (DPT) degree with distinction from Simmons College. He is a member of the American Physical Therapy Association and the American Society of Hand Therapists.
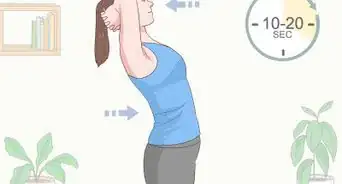
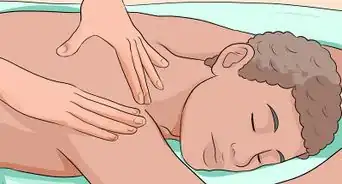
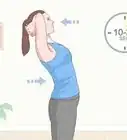
Physical TherapistIn terms of relieving the pain of a herniated desk, it depends on whether the disc is in your neck or lower back. If the pain is in your neck, try tucking your chin in to make a double chin while keeping your eyes looking forward. Relax and repeat. If the pain is in your lower back, try laying on your back on a foam roller.
Warnings
- Stop stretching immediately if the movement is causing you pain, particularly if you have a resurgence of back pain or spasms.⧼thumbs_response⧽
- If you experience a loss of bowel or bladder control, seek medical attention immediately. While rare, this could be an indication of a more severe spinal injury.[22]⧼thumbs_response⧽
References
- ↑ https://www.coreconcepts.com.sg/article/slipped-disc-dos-and-donts/
- ↑ https://backintelligence.com/herniated-disc-exercises/
- ↑ https://www.verywell.com/exercise-for-low-back-pain-2696217
- ↑ https://www.spine-health.com/wellness/exercise/exercise-sciatica-a-herniated-disc
- ↑ https://www.verywell.com/exercise-for-low-back-pain-2696217
- ↑ https://www.verywell.com/exercise-for-low-back-pain-2696217
- ↑ https://backintelligence.com/herniated-disc-exercises/
- ↑ https://yurielkaim.com/core-stabilization-exercises/
- ↑ https://backintelligence.com/herniated-disc-exercises/
- ↑ https://yurielkaim.com/core-stabilization-exercises/
- ↑ https://backintelligence.com/herniated-disc-exercises/
- ↑ https://jada.ada.org/article/S0002-8177(14)65116-3/references
- ↑ https://www.nhs.uk/livewell/backpain/pages/back-pain-and-common-posture-mistakes.aspx
- ↑ https://www.spine-health.com/blog/3-hamstring-stretches-lumbar-herniated-disc-pain-relief
- ↑ https://www.medicaldaily.com/walking-barefoot-helps-you-avoid-foot-injuries-also-improves-posture-balance-and-362164
- ↑ https://www.physio-pedia.com/Diaphragmatic_Breathing_Exercises
- ↑ Joel Giffin, PT, DPT, CHT. Physical Therapist. Expert Interview. 9 September 2020.
- ↑ Joel Giffin, PT, DPT, CHT. Physical Therapist. Expert Interview. 9 September 2020.
- ↑ Joel Giffin, PT, DPT, CHT. Physical Therapist. Expert Interview. 9 September 2020.
- ↑ https://philmaffetone.com/muscle-imbal/
- ↑ https://www.spineuniverse.com/conditions/herniated-disc/exercise-herniated-discs
- ↑ https://backintelligence.com/herniated-disc-exercises/


Medical Disclaimer
The content of this article is not intended to be a substitute for professional medical advice, examination, diagnosis, or treatment. You should always contact your doctor or other qualified healthcare professional before starting, changing, or stopping any kind of health treatment.
Read More...