This article was co-authored by Ndeye Anta Niang. Ndeye Anta Niang is a Hair Stylist, Master Braider, and Founder of AntaBraids, a traveling braiding service based in New York City. Ndeye has over 20 years of experience in African hair including braiding box braids, Senegalese twists, crochet braids, faux dread locs, goddess locs, kinky twists, and lakhass braids. Ndeye was the first female of her tribe in Africa to move to America and is now sharing her knowledge of African braids passed on from generation to generation.
There are 10 references cited in this article, which can be found at the bottom of the page.
This article has been viewed 30,622 times.
Long braids are a protective style for natural hair. They are gorgeous, chic, and versatile. If you are getting tired of wearing your braids down all the time, consider styling them differently to switch up your look. It can be as simple as changing the part, to as fancy as wrapping embroidery floss around them.
Steps
Trying Simple Styles
-
1Switch up the way you part your braids. If you normally part your braids down the center, part them to the left or right. If you normally part them to the side, try a center part.[1]
- This is a great, simple way to switch up your daily look.
- Another option is to comb your braids straight back, then let them part on their own.
-
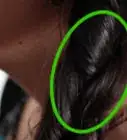
2Pull your braids up into a high ponytail for a chic look. Lean forward and gather all of your braids into a ponytail at the top of your head. Straighten back up, then wrap a thin, elastic headband around the ponytail to keep it in place.[2]
- Update your look by taking 1 to 2 braids from your ponytail, then wrapping them around the elastic to hide it. Secure the ends of the braids with a large bobby pin.
- You may be able to secure your ponytail simply by wrapping 1 to 2 braids around it instead of using an elastic headband. Secure the wrapped braids with a large bobby pin.
Advertisement -
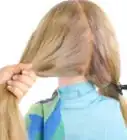
3Try a simple half-up ponytail for a graceful look. Instead of doing a full half-up ponytail, which can create bulk, simply gather 2 to 3 braids from each side of your temples, then pull them towards the back of your head. Tie them together into a double knot, or secure them with a clear hair elastic.[3]
-
4Create a pair of French braids if you want volume. Apply some mousse to your braids, starting from the roots and finishing at the ends. Next, part your hair in half. Starting at your hairline on the left side of your part, begin a French braid, then tie it off with a hair tie. Repeat the process for the right side of your head.[4]
- Create a Dutch braid for even more volume. Instead of crossing the strands under each other, cross them over.
- You can also create a single French or Dutch braid.
-
5Curl your braids for a twist. Divide your braids into 18 sections. Tightly wrap each section around a flexi rod, then fold the ends of the rod down to secure it. Dip your wrapped hair into boiled water, lift them out, then pat them dry. Wait about 5 to 10 minutes, then take the rods out.[5]
- Do not wrap your braids more than halfway up. If you wrap too close to your scalp, you risk burning yourself.
- Your braids will be a little damp after you take the rods out, which is fine. You can also wait until they are completely dry.
- A flexi rod is a flexible foam rod used for curling hair. You can find it in a beauty supply store.
- When you want to straighten your braids, simply dip them in hot water again.


Doing Updos and Buns
-
1Twist your braids into a crown braid for a romantic look. Create a deep side part, then Dutch braid your hair starting from the thicker side of the part. Work your way across your forehead, down the side of your head, and across your nape. Continue to work up the other side of your head until you reach the part again. Finish off with a regular braid, then coil it around the inside of the crown.[6]
- Use a hair tie to secure the end of your braid, and bobby pins to keep it in place.
- A Dutch braid is similar to a French braid, except that you cross the strands under the middle strand.
- Instead of doing a Dutch braid, try a rope braid instead!
-
2Create a braided halo for another romantic look. Create a deep side part. Gather some braids from the thicker side of the part, divide them in half, then twist them together. Add a few strands from your hairline to the bottom section and twist again. Keep going until you reach your ear, then finish with a regular rope braid. Repeat the process for the other side, then pull both braids behind your head, and secure them with a hair tie.[7]
- You are only using the first few rows of braids from next to your hairline.
- Leave the rest of your braids down.
-
3Upgrade a simple ponytail by twisting it into a bun. Gather your braids into a high ponytail. Secure the ponytail with an elastic headband. Twist your braids into a loose rose, then wrap them around the base of the ponytail. Tuck the ends under the bun, then use extra bobby pins to keep the bun in place, if things feel loose.[8]
- Consider wrapping a silk scarf around your head to cover the bun for a turban-effect.
-
4Try a half-up bun if you like wearing your hair down. Gather your hair into a half-up ponytail above ear-level. Secure it with a hair tie, then twist your braids into a rope. Wrap the rope into a bun, then tuck the ends under it. Secure the bun as needed with bobby pins.[9]
- You can include more or fewer braids in your bun.
-
5Create a set of half-up space buns for a unique look. Part your hair like creating pigtails. Choose 1 side to start with, and part it horizontally at ear level. Braid the hair from the top half, then coil it into a bun. Push the end of the braid into the bun to secure it, then repeat the process for the other side of your head.[10]
- Position the buns on the top of your head. They should be in line with the edges of your eyebrows.


Adding Accessories
-
1Crisscross embroidery floss around your braids for a hint of color. Cut a long piece of colored embroidery floss. Center it behind a braid, then tie the strands into a double-knot. Cross both strands over the front of the braid to create an X. Wrap them to the back and cross them again to create another X. Keep wrapping and crossing the thread until you reach the end of your braid, then tie it off. Cut the excess floss off.[11]
- Use gold or silver thread for a hint of sparkle![12]
- You can start the embroidery thread wherever you want: at the top of the braid, in the middle, etc.
- You aren’t limited to just embroidery floss. Try colored yarn instead!
-
2Wrap embroidery floss around your braids to create colorful bands. Hold the end of a piece of embroidery floss against 1 braid. Wrap the rest of the floss around your braid tightly to create a 1 to 2 in (2.5 to 5.1 cm) band of color. Cut the floss, then add the next color. Keep going until you get the look you want, then tie the floss to itself. Cut the rest of the floss off.[13]
- When adding new colors, hold the end of the old color and the new color against the braid before wrapping.
- Vary the width of the sections. Make some 2 inches (5.1 cm) long, and others 3 inches (7.6 cm)!
- You can start the wraps wherever you want: at the top of the braid, a third of the way down, halfway down, etc.
-
3Sew cowrie shells onto your braids for a unique look. Thread a needle, then tie the ends together to create a double strand. Loop the thread around a cowrie shell in a slip knot, then pull the thread through your braid. Push the needle up through your braid again so that it comes out the other end of the shell. Pull the thread across the edge of the shell and back through the braid. Tie the thread to itself, then cut it.[14]
- You may have to do a few stitches before the shell feels secure.
- Combine this look with either of the wrapped embroidery thread looks.
-
4Use a hair beader tool to add beads onto your braids. Slide some chunky beads with wide openings onto a hair beader tool. Slide your braid through the loop at the top of the tool, then slide the beads onto your braid. Wrap the end of your braid over the bottom of the last bead, then secure it with a mini hair elastic above the bead.
- A head beading tool looks like a wooden or plastic handle with a long, wire loop attached to the top. You can find it online in braiding supply stores.
- Slide the second-to-last bead over the rubber band to hide it.
- For a hint of sparkle, slide a crimp bead onto your braid, then pinch the bead to close it.
-
5Cover your braids with a scarf for a chic look. Fold a square scarf diagonally to make a triangle. Drape it across your head, with the folded edge against your hairline. Pull the ends around your head to the back, and tie them into a knot, making sure to tuck the pointed tip under it.[15]
- Keep your braids down for this style so that they are visible.
- Alternatively, pull your braids up into a bun, then wrap a long silk scarf around your head like a turban. Twist the ends into a bun or knot at the front of your head.


Playing with Color, Length, and Pattern
-
1Give your braids highlights by using colored braiding hair. When you get your braids done, you will likely match the hair to your natural color. Instead of using the same color throughout your hair, however, consider using a few strands of blonde braiding hair here and there. This will give your braids some highlighted streaks.[16]
- You are not just limited to natural colors. Try some bright red highlights!
- For a unicorn look, do some braids in pink, pastel purple, and light blue or teal.
-
2Use an unnatural color for all of the braiding hair. Instead of sticking to black, brown, or dark brown when getting your braid done, try a bright color instead. Blue, purple, or red are especially popular, but you can try other shades too, such as silver, blonde, or even green.[17]
-
3Try shorter braids for a unique look. Most braids come down past the shoulders and down to the elbows. For a twist, try having shorter braids. A bob-length would look especially cute and chic.[18]
- You may be able to shorten your current braids, but you'll have to thin and heat-seal the ends.
-
4Combine your braids with cornrows for a unique look. Instead of just creating multiple sections, then adding braiding hair together, start off with doing cornrows first. When you reach the end of the row, use braiding hair to create a longer braid.
- The cornrows don’t have to run from your hairline to your nape. Try to create patterns, such as zigzags or swirls.
- Cornrows don’t tend to last as long compared to other braids. They also have the ability to damage your hair follicles. Just keep this in mind if you do decide to do this![19]


Maintaining the Braids
-
1Trim away frizz, dip the braids in hot water, then set them with gel. Over time, your braids may start to fray and look frizzy. When that happens, simply trim off the tiny, stray hairs. Dip your braids into hot water that's just short of boiling, then pat them dry. Apply hair get into the damp braids, then let them finish air drying.
- The hot water will help smooth the braids, and the gel will help set the style.
-
2Re-do the braids around your hairline. As your natural hair continues to grow, the braids will start to feel and look loose. This is most noticeable around the edges of your hairline. Instead of getting all of your braids redone, consider getting just the ones on your hairline redone.
- Follow up with the hot water and gel treatment to smooth down the other braids.
-
3Tame the baby hairs around your hairline with edge control cream. This is a must regardless of when you got your braids done. It will help your style look sleek and fresh. Simply purchase a tub of edge control cream, and apply it to the fine hairs around your hairline. Use a soft-bristled toothbrush to smooth the hairs into place.
- You can use edge control on your actual braids as well. Simply apply it to wherever the hairs look frizzy to keep them under control.
-
4Switch up the length and style of your braids. If you wore long braids for a while, cut them into a chic bob, then seal the ends. If you curled your braids, straighten them out again by dipping them into boiled water; use gel to tame any frizz.
- Plan on changing your style every 2 to 3 weeks.
-
5Cover unruly hairlines and roots with clever styling or a scarf. Sometimes, your roots are showing too much, and you can't schedule an appointment right away. When that happens, wear your braids in such a way that they drape across your forehead.
- Alternatively, pull your braids up into a bun, and wrap a chic scarf around your head!
- Match the color of the scarf to your outfit. If you are wearing black, consider choosing a vibrant color for contrast.


Expert Q&A
-
QuestionWhat styles can I do with my braids?
 Ndeye Anta NiangNdeye Anta Niang is a Hair Stylist, Master Braider, and Founder of AntaBraids, a traveling braiding service based in New York City. Ndeye has over 20 years of experience in African hair including braiding box braids, Senegalese twists, crochet braids, faux dread locs, goddess locs, kinky twists, and lakhass braids. Ndeye was the first female of her tribe in Africa to move to America and is now sharing her knowledge of African braids passed on from generation to generation.
Hair Stylist & Master BraiderThe options are really endless. Braids are incredibly versatile and there's a lot you can do with them. I love something called chou, or cauliflower braids for short hair. You could also do side braids, French braids, or box braids in a variety of different ways. It's really up to you!
Things You'll Need
Trying Simple Styles
- Hair ties
Doing Updos and Buns
- Elastic headbands
- Hair ties
- Large bobby pins
Adding Accessories
- Embroidery floss
- Needle
- Cowrie shells
- Chunky beads
- Hair beader tool
- Headscarves
Playing with Color, Length, and Pattern
- Colored braiding hair
- Flexi Rods
- Hot water
Maintaining the Braids
- Hair gel
- Edge control cream
- Hot water


References
- ↑ https://www.hercampus.com/school/vcu/5-poppin-ways-style-your-box-braids
- ↑ https://www.hercampus.com/school/vcu/5-poppin-ways-style-your-box-braids
- ↑ https://www.hercampus.com/school/vcu/5-poppin-ways-style-your-box-braids
- ↑ https://www.seventeen.com/beauty/hair/a19496095/box-braids-hairstyles/
- ↑ https://www.youtube.com/watch?v=TnqXlBjNwvs
- ↑ https://www.allure.com/gallery/box-braids-hair-inspiration
- ↑ https://www.youtube.com/watch?v=hGe1h9EPTvQ
- ↑ https://www.hercampus.com/school/vcu/5-poppin-ways-style-your-box-braids
- ↑ https://www.hercampus.com/school/vcu/5-poppin-ways-style-your-box-braids
- ↑ https://www.seventeen.com/beauty/hair/a19496095/box-braids-hairstyles/
- ↑ https://www.youtube.com/watch?v=v-g7SvpYqwc&feature=youtu.be&t=3m
- ↑ https://www.allure.com/gallery/box-braids-hair-inspiration
- ↑ https://www.youtube.com/watch?v=v-g7SvpYqwc&feature=youtu.be&t=30s
- ↑ https://www.youtube.com/watch?v=v-g7SvpYqwc&feature=youtu.be&t=4m25s
- ↑ https://www.youtube.com/watch?v=TcRWFEzrzMQ&feature=youtu.be&t=12s
- ↑ https://www.allure.com/gallery/box-braids-hair-inspiration
- ↑ https://www.allure.com/gallery/box-braids-hair-inspiration
- ↑ https://www.allure.com/gallery/box-braids-hair-inspiration
- ↑ Ndeye Anta Niang. Hair Stylist & Master Braider. Expert Interview. 10 January 2020.
About This Article