This article was co-authored by Isaac Hess and by wikiHow staff writer, Eric McClure. Isaac Hess is a Baseball Coach, Instructor, and the Founder of MADE Baseball Development and Champion Mindset Training Program, a baseball training program based in Los Angeles, California. Isaac has over 14 years of experience coaching baseball and specializes in private lessons and tournaments. He has played baseball for both professional and collegiate leagues including Washington State University and the University of Arizona. Isaac was ranked as one of Baseball America's top 10 prospects for 2007 and 2008. He earned a BS in Regional Development from the University of Arizona in 2007.
There are 12 references cited in this article, which can be found at the bottom of the page.
This article has been viewed 36,084 times.
Proper throwing mechanics are the most important element when it comes to how hard or far you can throw a baseball. Use your front elbow to aim at your target, keep your throwing elbow bent at 90-degree angle, and rotate your torso and hips as you release the ball. To improve your throwing distance, practice letting the ball roll off of your fingers as you throw, aim to throw the ball at a 45-degree into the air, and practice long toss regularly. Remember to stretch before you throw to ensure that you don’t hurt yourself and keep your throwing arm healthy.
Steps
Using Proper Form
-
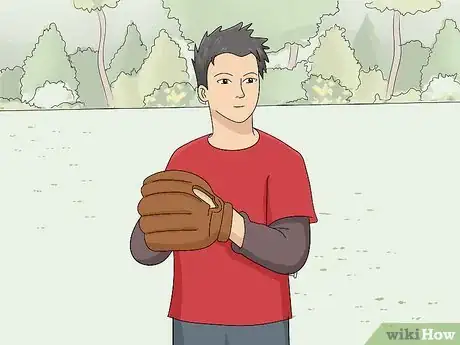
1Hold the ball against your chest before you aim at your target. Stuff your throwing hand into your glove as soon as you catch the ball. Hold the ball in your glove against your chest as you shift into your throwing position with your legs lined up with your target.[1]
- While there are multiple steps involved in the throwing motion, this entire process should only take 2–3 seconds. Practice this process step by step until you can commit the proper throwing form to memory.
-
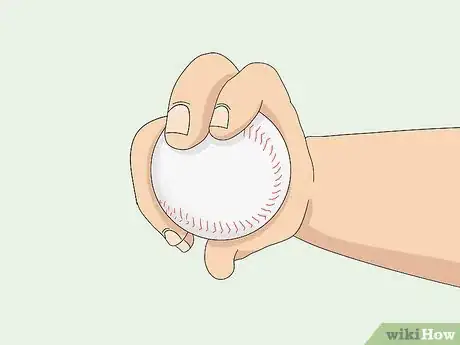
2Rotate the ball in your glove to find a solid 4-seam grip. A 4-seam grip is where your index and middle finger are resting on one of the horizontal seams of the ball with your thumb on the side and your other fingers curled under the ball. There should be 1–2 inches (2.5–5.1 cm) of space between the bottom of the ball and the crest between your thumb and index finger. Hold the ball firmly, but no so tight that your knuckles turn white or it’s hard to let go of the ball.[2]Advertisement
-
3Shift your feet and shoulders so they’re lined up with your target. While you’re adjusting your grip, move your nondominant leg in front of you and turn your shoulders to align with your target. Keep your feet facing the same direction as your chest. If your legs and shoulders aren’t lined up with the target, your arm will have a hard time staying on an accurate path towards the person that you’re throwing to.[3]
- Some players will shuffle their feet forward while they’re lining up. This takes an extra 0.5–1 seconds, but it may be a helpful option if you find yourself struggling to remain accurate with long throws.
Tip: If you aren’t sure if your legs are staying on a straight path to your target, draw a line with your toe in the infield dirt. Then, throw your ball and check the dirt next to the line to see if your feet made indentations parallel to your line.
-
4Extend your front elbow towards your target and lower your throwing arm. As you bring the ball out of your glove, lower your throwing arm with the ball facing the ground. Raise your front elbow up so that it’s lined up with your target. Look down your elbow to maintain eye contact with your target as you perform the rest of these steps.[4]
- Your elbow should stay pointed at your target until you rotate your torso towards the target.
- This stabilizes you and helps your shoulders stay square as you throw.
-
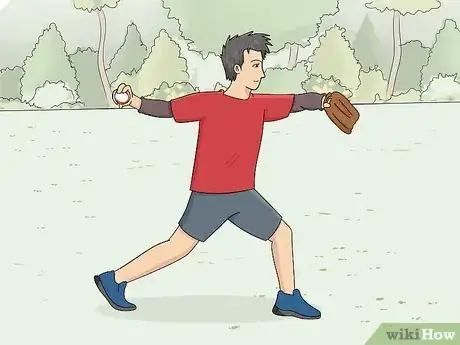
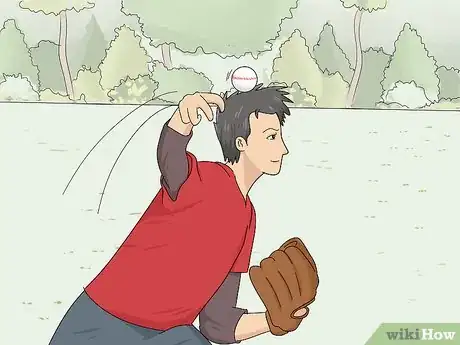
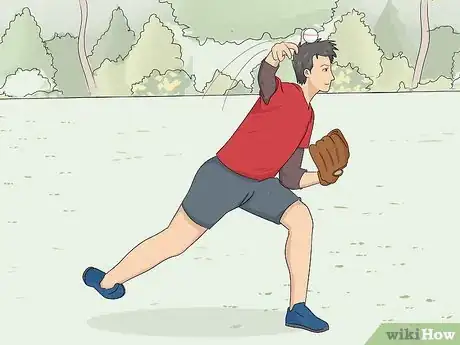
5Shuffle your feet forward while leaning back and extending the ball. Move your back foot forward 1–3 feet (0.30–0.91 m) and do the same with your front foot as your back foot lands. Lean back 10-20 degrees while raising the ball up behind you. Keep the baseball facing away from you as you plant your front foot and begin pivoting your front ankle towards the target.[5]
- The farther you shuffle, the more momentum you will create as you turn your torso to throw the ball. However, if you shuffle too far, you may end up off-balance and waste energy trying to stabilize yourself.
- Some people rotate their throwing arm a little behind them while doing this. If this is comfortable for you, don’t worry about it. This may disrupt your accuracy, though.
- Your front shoulder will naturally raise up to your chin while you do this. Do not fight against your front shoulder or try to force it down.
-
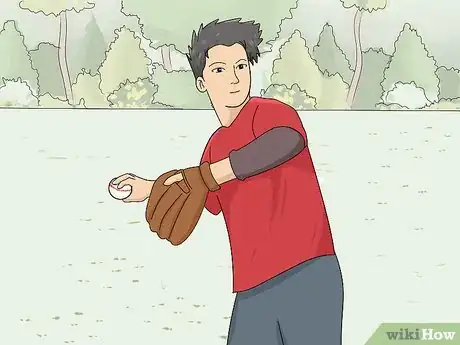
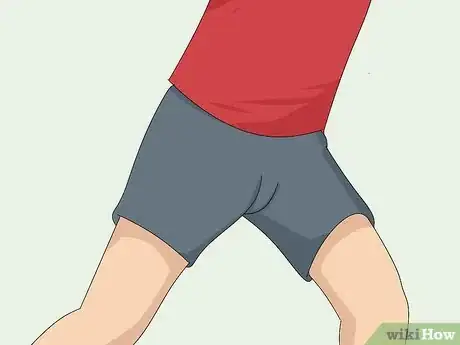
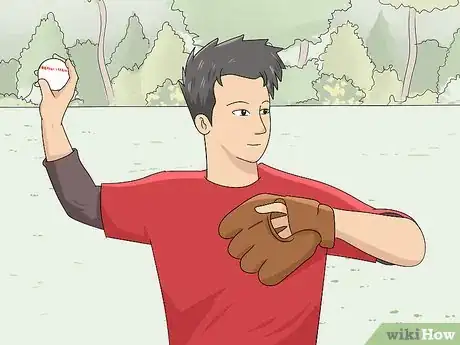
6Rotate your hips and torso forward while bringing your throwing arm up. As your front ankle pivots towards your target, raise your throwing arm with the elbow bent at a 90- to 110-degree angle. Rotate your back hip forward while letting your throwing arm trail behind your back hip as you’re turning. Turn your chest until it’s lined up with your target. While your torso rotates, lift your glove up towards your chest.[6]
- Your hips, legs, and shoulders are the main source of power—your throwing arm mainly guides the ball.
-
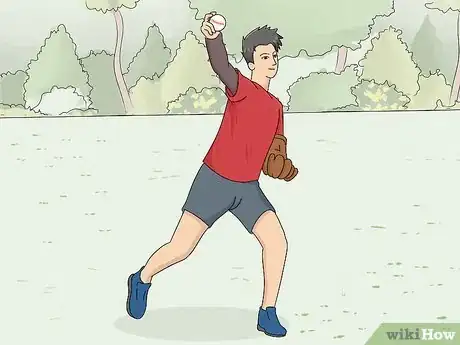
7Whip your arm forward and release the ball. Stop pivoting and pull your throwing arm forward. While it passes the horizontal plane of your chest, extend your forearm forward. Release the ball by whipping your wrist toward your target once your arm is fully extended. Let the ball roll off of your fingers. While doing this, keep your glove against your chest to keep your balance while you’re carried forward.[7]
- Pay the most attention to your wrist and fingers as you release your ball. A bad release and stiff wrist is a common cause for a poor-distance throw. The ball should roll off of your fingertips as you flick your wrist, like you’re shooting a free throw.
-
8Follow through and plant your feet firmly in the ground. With the ball released, allow your arm to propel forward and pull it to your hip on the opposite side of your body. If necessary, allow your feet to hop forward a little to brace yourself. Keep your glove in your chest to ensure that you maintain proper balance.[8]
- If you don’t allow your body to naturally move forward, you’re going to subconsciously slow your arm down to control your body. This will cause you to cut back on the speed of your throw which is a major contributor to your throwing distance.
Improving Your Distance
-
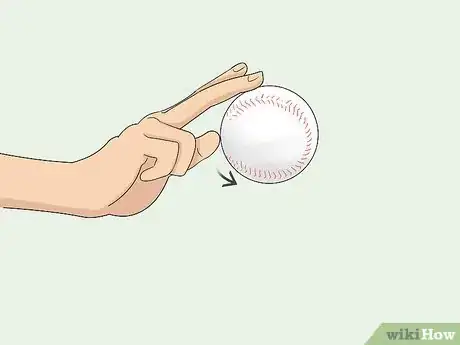
1Practice keeping your fingers on the ball as you release it to increase spin. One of the most common mistakes among baseball players is the release. To ensure that your throw travels as far as it possibly can, let the ball roll off of your fingers as you release it instead of simply letting go of the ball. This will increase the rotation of the ball as the seams dig into your fingers and roll out of your hand.[9]
Tip: The faster the ball spins, the lower the drag will be. However, if the ball is spinning at an angle that isn’t parallel to the ground, your ball may travel in an odd arc. If you notice the ball spinning at strange angles, work on keeping your index and middle finger on top of the ball as you release it.
-
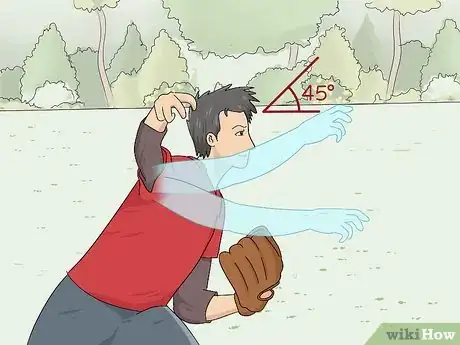
2Throw on a 45-degree arc to maximize the distance of each throw. To find this angle, tilt your head up so that it’s halfway between the ground and the sky directly above you. This is a 45-degree angle to the ground. Be mindful though, since your eyes should remain on your target, not the sky while you throw.[10]
- It’s hard to figure out where the 45-degree angle is since you can’t take the time to measure it when you’re playing. Practice throwing at different arcs to develop a sense for the optimum angle for your throw.
-
3Monitor the wind to make adjustments to your angle. If there is a strong wind at your back, raise the angle of your throw a little to take advantage of the wind. If there’s a strong wind blowing against you, lower the angle to minimize the amount of time that the ball spends in the air. Paying attention to the wind will help you make minor adjustments to throws as you make them.[11]
-
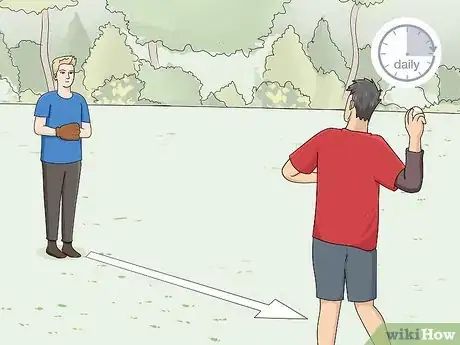
4Practice long toss for at least 15 minutes every day. Grab a partner to play catch with. Start with 10–20 feet (3.0–6.1 m) between you and throw the ball back and forth 5-6 times. Then, have you and your partner take 5 steps back. Repeat this process until your partner and you are as far as either of you can go. Do this for 15 minutes every day to train your arm to throw at longer distance.[12]
- Long toss trains your arm to throw at targets that are farther away and makes it easier to identify what your limitations are. It’s also a great way to gauge whether your throwing distance is improving or not.
Staying in Shape for Throwing
-
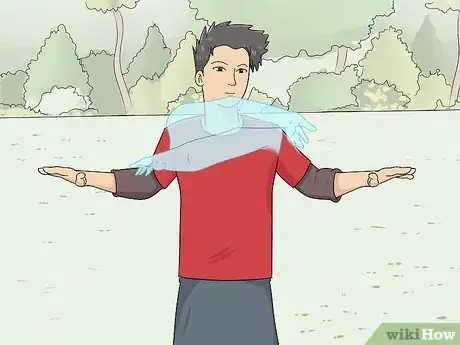
1Stretch before throwing or playing baseball to avoid injuries. Before playing or throwing, do 5 arm swings with each arm. Throw them around in a circular motion to get the blood flowing. Do 5 leg swings with each leg by swinging your leg back and forth. Do 5 lunges, and stretch each arm across your chest, behind your head, and out to your side. Push your wrist down and up against your forearm to stretch your wrist muscles. This will ensure that your body isn’t stiff and your muscles are ready for throwing.[13]
- Other good options include side shuffles, neck twists, and hip rotations.
- Always stretch after working out to ensure that your muscles don’t tighten up after exercising them.
Tip: Stretching will also loosen your muscles and make it easier for your body to perform a long-distance throwing motion.
-
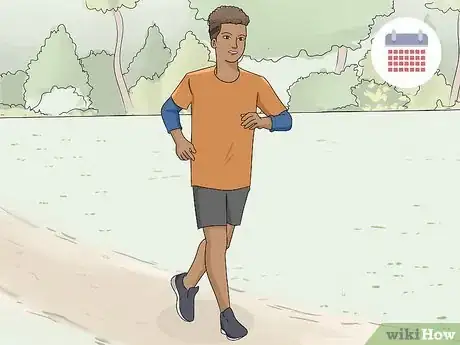
2Run regularly to ensure that your body stays limber and healthy. Every day, do 5-10 short-distance sprints to exercise your entire body. After throwing for an extended period of time, gently jog for 5–10 minutes to loosen your muscles back up and increase blood flow in your arms. Running regularly is key to working your entire body out and ensuring that none of your throwing muscles atrophy over time.[14]
- Long distance running tends to be better for recovery than sprinting, but they’re both beneficial if you’re trying to build up your arm strength.
-
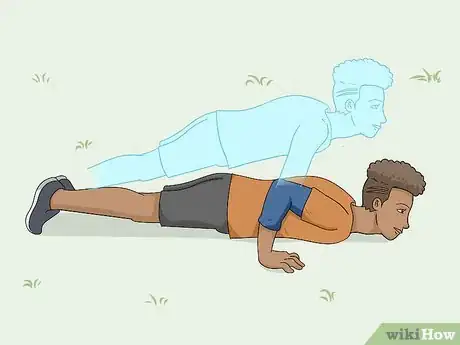
3Do pushups maintain your arm strength. Keep your hands under your shoulders and lower your body until you bend your elbows at a 90-degree angle. Going all the way down tends to be bad for throwing since you want to keep your shoulder muscles flexible. Do 2 sets of 5-10 pushups every other day to keep your arms strong and lean.[15]
- It’s good to have strong arms, but you don’t want to bulk up and add a ton of muscle.
-
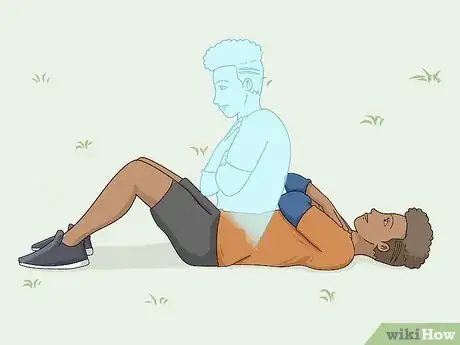
4Use sit ups to keep your core strong and stable. Lay down on a soft, flat surface and place your arms at your side. Tighten your core and raise your chest up off of the ground. Do 2 sets of 10 every other day to ensure that your abdomen stays tight.[16]
- Lunges and planks are a few other excellent options when it comes to tightening your core.
- A strong core makes it easier to rotate your torso and maintain balance as you throw.
-
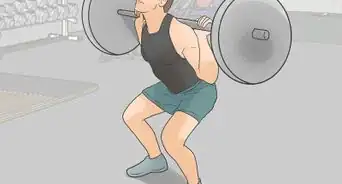
5Avoid working out your arms with heavy weights. While some lightweight resistance training is fine, lifting heavy weights tends to build a lot of muscle, which is bad for throwing a baseball. Bulky muscles tend to take away from your range of motion, and most of a baseball’s speed and distance doesn’t come from raw strength.[17]
Expert Q&A
-
QuestionHow do baseball players throw so far?
 Isaac HessIsaac Hess is a Baseball Coach, Instructor, and the Founder of MADE Baseball Development and Champion Mindset Training Program, a baseball training program based in Los Angeles, California. Isaac has over 14 years of experience coaching baseball and specializes in private lessons and tournaments. He has played baseball for both professional and collegiate leagues including Washington State University and the University of Arizona. Isaac was ranked as one of Baseball America's top 10 prospects for 2007 and 2008. He earned a BS in Regional Development from the University of Arizona in 2007.
Baseball Coach & Instructor Practice, mechanics, and physical fitness. A lot of it comes down to working on your throwing mechanics, though. Leading with your legs, turning your hips, and throwing overhand with a good grip. If you want to throw far, just practice throwing every other day or so. Over time, your arm strength will improve.
Warnings
- Don’t go out and try to throw as far as you can without stretching or warming up with some short toss first. You may strain a muscle or damage your throwing arm.⧼thumbs_response⧽
References
- ↑ http://probaseballinsider.com/baseball-instruction/how-to-throw-a-baseball-part-2-mechanics-of-throwing-2/
- ↑ http://probaseballinsider.com/baseball-instruction/how-to-throw-a-baseball-part-1-the-4-seam-grip/
- ↑ https://youtu.be/-aO9KtcUQCo?t=243
- ↑ http://probaseballinsider.com/baseball-instruction/how-to-throw-a-baseball-part-2-mechanics-of-throwing-2/
- ↑ http://probaseballinsider.com/baseball-instruction/how-to-throw-a-baseball-part-2-mechanics-of-throwing-2/
- ↑ https://thefatherlife.com/mag/2010/06/14/how-to-throw-a-ball-farther/
- ↑ http://probaseballinsider.com/baseball-instruction/how-to-throw-a-baseball-part-2-mechanics-of-throwing-2/
- ↑ https://www.nytimes.com/2017/09/14/sports/baseball/mlb-velocity-pitchers.html
- ↑ http://probaseballinsider.com/basic-throwing-mechanics/
- ↑ https://www.scientificamerican.com/article/the-physics-of-baseball-how-far-can-you-throw/
- ↑ https://www.scientificamerican.com/article/the-physics-of-baseball-how-far-can-you-throw/
- ↑ https://thefatherlife.com/mag/2010/06/14/how-to-throw-a-ball-farther/
- ↑ https://www.upmc.com/services/sports-medicine/for-athletes/baseball/education-material/dynamic-warm-up
- ↑ https://youtu.be/fHGxgGNMDgw?t=72
- ↑ Isaac Hess. Baseball Coach & Instructor. Expert Interview. 20 March 2020.
- ↑ https://www.latimes.com/socal/burbank-leader/sports/tn-blr-sp-burbank-high-baseball-camp-20190618-story.html
- ↑ http://baseballnews.com/is-weight-lifting-a-cause-of-tommy-john-surgery/
