This article was co-authored by wikiHow Staff. Our trained team of editors and researchers validate articles for accuracy and comprehensiveness. wikiHow's Content Management Team carefully monitors the work from our editorial staff to ensure that each article is backed by trusted research and meets our high quality standards.
This article has been viewed 13,802 times.
Learn more...
A nail knot is widely used in fly fishing to connect the fly line to the leader.[1] However, just because it’s called a “nail knot” doesn’t mean you have to use a nail to make it. These days, it’s common to use a hollow tube like a straw instead, which many find to be easier. Whatever tool you choose to use, careful and neat tying can get you a secure knot.
Steps
Creating the Coils
-
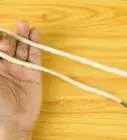
1Hold a short tube or nail parallel to the fly line in your left hand. Pinch the fly line to the tube or nail using your thumb and forefinger. Line up the end of the fly line with the end of the tube or the tip of the nail.[2] Keeping things neat will help as you create the knot.
-
2Grab the butt end of the leader with your right hand. Place it against the backside of the fly line and tube or nail, facing to the left. A leader is a transparent connection between the line and the fly, and is often made of monofilament nylon, with the butt end being larger in diameter.[6]
- Pinch the leader to the line and the tube or nail with your left thumb and forefinger, leaving about 10 to 12 inches of tag end on the leader to allow you to create the knot.[7]
- You should now be holding the fly line, tube or nail, and leader between the same two fingers. This will keep everything together so you can easily wrap the coils.
Advertisement -
3Wrap the tag end of the leader around the bundle with your right hand. It should go around the tube, the fly line, and the rest of the leader. Pull from underneath, and around to the top. Do this 6 to 8 times, moving from left to right.[8]
- Make sure the coils are neat and close together, using the middle finger of your left hand to help guide the leader as you coil it.[9]
Tightening the Knot
-
1Thread the tag end of the leader through the tube or the space created by the nail. Use your right hand to pass the leader through from the right side. You can carefully push the tube closer to the knot to make this easier.
- Once you’ve threaded the leader through, switch hands, pinching the knot between your right index finger and thumb.[10]
-
2Pull the tube or nail out carefully with your left hand. Hold onto the coils with your right fingers while you do this to make sure they stay in place. Tidy up the coils by pushing them together to sit side by side in a barrel shape.
- While the knot is still a bit loose, move it to where you want it on the fly line so you won't have as much to trim off.[11]
-
3Tighten the knot. Pull on each end of the leader individually while holding the knot in place with your other hand. Then pull on both sides of the leader to make sure it’s completely secure.[12]
- Trim any excess on the fly line and leader close to the knot. Make sure the knot is completely tight before cutting.[13]
References
- ↑ http://www.101knots.com/nail-knot.html
- ↑ https://www.youtube.com/watch?v=nlvIbFhuYcY
- ↑ https://midcurrent.com/videos/how-to-tie-a-nail-knot/
- ↑ https://www.netknots.com/fishing_knots/nail-knot
- ↑ https://www.youtube.com/watch?v=_8OLaAP_gn8
- ↑ https://www.active.com/outdoors/articles/fly-fishing-101-leader-tippet-and-fly
- ↑ https://www.netknots.com/fishing_knots/nail-knot
- ↑ https://www.netknots.com/fishing_knots/nail-knot
- ↑ https://www.youtube.com/watch?v=nlvIbFhuYcY
