This article was co-authored by wikiHow Staff. Our trained team of editors and researchers validate articles for accuracy and comprehensiveness. wikiHow's Content Management Team carefully monitors the work from our editorial staff to ensure that each article is backed by trusted research and meets our high quality standards.
This article has been viewed 60,310 times.
Learn more...
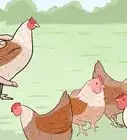
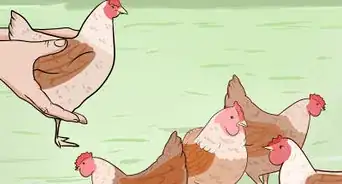
Trussing a chicken, or tying string around its body before roasting it, helps the chicken cook evenly, prevents the wing tips and legs from burning during roasting or grilling, and gives the finished bird an attractive shape. Learn how to master this useful culinary skill in three different ways: by tying the legs first, tying the wings first, or using a shortcut.
Steps
-
1Prepare your workspace. Since you'll be dealing with raw poultry, gather everything you need before you begin trussing the chicken. That way you won't have to worry about finding supplies after you've already touched it. You'll need the following equipment:
- A cutting board
- 3 feet (0.9 m) of kitchen twine or string
- A scissors
- A roasting pan
-
2Prepare the chicken. Remove any giblets, organs or neck pieces from inside the chicken's cavity. These can be discarded or set aside for later use. Rinse the chicken's outer surface and inner cavity. Pat it dry with paper towels, inside and out, before you begin the trussing process.
- If you plan to stuff the chicken, go ahead and stuff it before you start the trussing process.
- Wait to season the chicken until after it has been trussed.


Truss a Chicken Using a Shortcut
-
1Start with the chicken positioned breast-side up. The legs should be pointing toward you.
-
2Cross the legs and tie them with twine. Loop the twine around the crossed legs and tie it as tightly as possible, so the legs are snug against the chicken's breast.
-
3Trim the excess twine. Use the scissors to cut off the excess length of twine after you've made the knot to prevent the twine from burning during cooking.
-
4Tuck in the wings. Place the chicken in the roasting pan and tuck the wings behind the neck area of the chicken.


Truss a Chicken by Tying the Legs First
-
1Position the chicken. Set the chicken on the cutting board so that the legs and wingtips are facing you and the breast side of the chicken is facing up.
-
2Lay the piece of twine under the legs. Center the twine under the legs so that you have equal lengths of twine extending from either side.
-
3Cross the twine over the legs. Lift the ends of the twine so they are taut underneath the chicken's legs, then cross the ends over each other to form an "x" across the legs.
-
4Pull the ends under the two drumsticks and up on either side. Pull the twine tight, so the ends of the legs are pulled close together.
-
5Place the strings under the thighs and over the wings. Hold the ends together at the top of the chicken, near the neck. Pull the strings taught so they don't come loose.
-
6Turn the chicken over. While keeping the twine tight, flip the chicken over so the legs are now facing away from you.
- This is the hardest step of trussing chicken, so don't get discouraged if it takes you more than one attempt.
- When the chicken is flipped, you should see the twine bends threaded over each thigh and under each wing.
-
7Knot the twine. Position the twine under the neck bone of the chicken and tie it in a tight knot.
- If the chicken's neck bone has been cut off, just position the string near the neck opening.
- Make sure the string is very taught. The chicken's body should make a creaking sound as it tightens.
-
8Trim the excess twine. Use the scissors to cut off the excess length of twine after you've made the knot to prevent the twine from burning during cooking.
-
9Flip the chicken breast-side up. Place it in the roasting pan and tuck the wings behind the neck area of the chicken. Pull the skin over the breast meat as tightly as you can, and tuck it into the cavity. The chicken is now trussed and ready to cook.


Truss a Chicken by Tying the Wings First
-
1Start with the chicken positioned breast-side up. Center the twine at the front of the chicken so it aligns with the neck opening. If the neck bone is still there, tuck it under the neck to hold it in place.
-
2Bring the ends of the twine forward. The twine ends should go over the wings, holding them flat against the chicken's body, and into the crevices formed where the the thighs meet the breasts. Pull the ends taught on either side.
-
3Tie the twine under the breasts. The twine ends should run through the cracks where the thighs meet the breast around to the ends of the breasts. Tie them together at the front of the breast, just above the back opening of the chicken.
-
4Thread the ends of the twine below the legs. Cross the legs tightly against the chicken's breast. Loop the strings around the ends of the legs once more and tie a tight knot.
-
5Trim the excess twine. Use the scissors to cut off the excess length of twine after you've made the knot to prevent the twine from burning during cooking.


Warnings
- Make sure you thoroughly wash your hands and any contact surfaces such as counter tops or cutting boards after handling raw poultry.⧼thumbs_response⧽
Things You'll Need
- Scissors
- Kitchen twine (Note: use 100% cotton kitchen twine, also known as butcher's twine. Household string often contains polyester, not good next to food.)
- Cutting board
- Soap and water
- Roasting pan

About This Article