This article was co-authored by Kieren Dutcher. Kieren Dutcher is a Professional Artist and a Teaching Artist at the NIAD Art Center in Richmond, California, and other venues around the Bay Area. With 30 years of experience, she specializes in colorful illustrations inspired by folk art, nature, and color. Kieren earned her Master of Education in Art Education from San Francisco State University and her BFA from the California College of the Arts. Her work has been published by St. Martin's Press, Uppercase Magazine, Highlights Magazine, in hospitals, and on TV. Her picture book Chinese and English Nursery Rhymes: Share and Sing in Two Languages (2010) won best book of the year from the Chinese American Library Association.
This article has been viewed 106,792 times.
Copic markers are high quality, double-ended, refillable markers that have many artistic uses, including cartoon illustration, fashion design, and anime and manga drawing. They can also be used by the everyday artist for hobbies like scrapbooking and coloring stamps for arts and crafts. Because they are simple to use and easy to refill, Copic markers are great for hand-lettering, coloring, and stamping. With the right care, they can even last a lifetime.
Steps
Lettering with Copic Markers
-
1Choose the right marker. There are four types of Copic marker - sketch, ciao, wide, and classic. For hand lettering, the wide marker with a chisel nib is a good choice.
- Working on good paper is also essential for hand-lettering. When practicing, plain printer paper works just fine. Because Copic markers are alcohol-based, they won’t destroy or erode regular paper like water-based markers do.
- You may also use grid paper if you want to ensure the straightness and uniformity of your letters.[1]
-
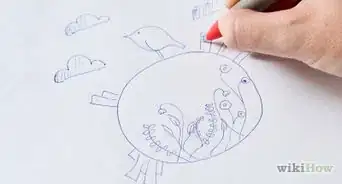
2Practice drawing simple fonts. Wide Copic markers are good for practicing easy, larger fonts. Learning hand-lettering is also one of the best ways to learn how to line draw and shade. Beginners can learn by working on simpler fonts and eventually moving onto fancier lettering as they improve.
- Try a font that is familiar to you first. Choose one you like from a book or one that you’ve found online. Draw it in a larger size with a pencil first, then go over it in Copic marker.
Advertisement -
3Add color and depth to the letters. Start with the lightest shade, then add darker shades on top. Choose colors from the same color family when blending, such as a light blue and dark blue.
- Always begin with the lightest color as the base, then add on layers of the darker color.
-
4Blend the colors together using a colorless blender marker. Colorless blender markers will help create seamless, shaded letters.
- You can also create unique effects by smearing the edges of each letter with the blender.


Coloring with Copic Markers
-
1Draw the outline of your design with a Copic pen or sketch marker. Copic pens come in a variety of colors and nib sizes, just as the markers do. Pens allow for very precise, thin lines when drawing, and sketch markers allow for slightly thicker, but still precise lines.
- The beginner artist can always draw in pencil first, then go over the lines with a Copic pen or sketch marker when satisfied with the initial sketch.
- Alternatively, you can use a rubber stamp to create the outline of a design, then color in the image using Copic markers.
-
2Begin coloring with the lightest shade of your choice. You can use either end of the Copic marker when coloring. Move the marker in small circles over the area you want to fill in order to cut down on visible lines and streaks.
- Experiment with using either end of the pen to find out which one works for you when coloring.
-
3Add in the darker shades to give depth or volume when coloring illustrations. When adding dimension, be sure to pick a color one or two shades darker than the base color, but still in the same color family.
- If you don’t know where shading would look best, start with the outer edges of the design.
-
4Use the base shade to blend the two colors together. In the space where the darker and lighter shades intersect, color the area with the lighter shade of marker, using circular motions.
- Copic markers work extremely well for blending, but you must blend while the colors are still relatively wet in order to create a seamless color transition.
-
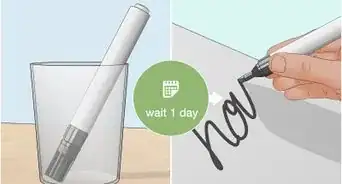
5Continue coloring until you complete the illustration. Try using different colors in different areas, practicing blending in each section. Allow the paper to dry completely before touching, framing, or handling in any way.
- If you plan on using colored pencils to add depth to an image, apply them as the last layer. The Copic marker’s alcohol-based ink can’t absorb into the paper through layers of pencil.


Stamping with Copic Markers
-
1Apply different colors of Copic marker directly onto a rubber stamp. Copic marker tips will not take on the colors of other Copic markers they touch, so feel free to mix and match any colors you like.
- It is okay if the colors dry a little before you start stamping. Just work until you are happy with the color composition of your stamp.
-
2Spray rubbing alcohol lightly over the colored stamp. This helps re-wet the colors, and will also help them adhere to paper or cardstock.[2]
- Use a misting bottle to spray the alcohol onto the stamp.
- If a misting bottle is not available, dip a small bit of paper towel into the rubbing alcohol and dab it onto the stamp very lightly. Be careful not to smear or remove any colors.
-
3Stamp the colorful image onto paper or cardstock. You can stamp the image approximately two times before needing to reapply the alcohol mist.[3]
- To keep consistent coloring in each image, check the rubber stamp after each stamping to see if any colors need to be reapplied.


Choosing and Caring for Copic Markers
-
1Choose the right Copic marker for your needs. Each marker comes with a letter that tells you which color family it belongs to and a number code that represents the color saturation.
- An example of the color family codes is the letter “B” - any codes that begin with a "B" belong to the blue family.
- The number code representing saturation is a 2-digit number code. The first digit represents the vibrancy, and the second digit represents lightness. A marker with a "05" code would be a vibrant mid-tone, while a marker with a "99" code would be very dull and dark.
-
2Store Copic markers correctly to ensure quality and longevity. Luckily, these markers are simple to store and are not easily ruined. Keep the caps on them when they are not in use, store them either vertically or horizontally, and try to keep them in a cool, dry place.
- If you accidentally leave your markers on a really hot window ledge or in a cold car, it is okay. The caps on each marker are airtight, so they are not easily destroyed by extreme temperatures.
-
3Refill the Copic marker by uncapping the broad end and holding it at a 45 degree angle. Both ends of the marker get ink from the same reservoir, so it is only necessary to add the ink to one end.
- The broad end is a larger surface for the ink to seep into, and this angle will help the ink drip down into the marker more efficiently.
- Be sure to refill your markers over a protected area. Cover the surface with paper towels, newspaper, or any other thick, disposable paper.
-
4Add 15-20 drops of Copic ink onto the nib of your marker. Allow each ink drop to absorb into the marker before adding the next drop. The ink will run down the tip and into the marker.
- Be sure to add the correct color of ink to your marker.
- If you accidentally overfill the marker and the ink begins to run over, absorb the excess with a tissue or paper towel.
- When you run out of ink in your copic markers, you can buy refills to use them again.


Community Q&A
-
QuestionWill the colorless blender work on Promarkers?
 Community AnswerAs the colorless blender is just filled with a clear alcohol solution, and Promarkers are alcohol-based, I don't see why not.
 -
QuestionHow do I blend colors that aren't in the same color family?Community AnswerUse the lightest base color first, then proceed to add the other color(s) in their areas. Once you've laid everything down, blend by running the previous (lighter) color over the next one.
-
QuestionHow can I refill my Copic marker?Community AnswerYou can buy a copic refill at any art store that sells copic markers. Then, follow the instructions on this page or watch an online video.
Warnings
- The ink from Copic markers is permanent. Exercise caution when using the markers around leather, wood, fabric, or plastic.⧼thumbs_response⧽
- When using Copic markers after outlining a drawing, be sure to let the drawing dry for a few minutes; if you start too soon it will smudge the drawing, and the ink could possibly clog up your nib.⧼thumbs_response⧽


References
About This Article

To use Copic markers, start by drawing the outline of a cartoon or lettering with a dark color such as black. Next, color in each section with the lightest shade of the color you want, using small circles to avoid visible streaks. Then, go back with a darker shade of marker to add depth or shading to your drawing. Finally, blend the light and dark areas using a colorless blender marker in a circular motion. For tips on how to care for your Copic markers so they last a long time, read on!