This article was co-authored by wikiHow Staff. Our trained team of editors and researchers validate articles for accuracy and comprehensiveness. wikiHow's Content Management Team carefully monitors the work from our editorial staff to ensure that each article is backed by trusted research and meets our high quality standards.
This article has been viewed 33,799 times.
Learn more...
A bone folder is used to score, crease, and smooth paper. It plays a big role in bookbinding, card making, origami, and other paper crafts. Some bone folders are made using actual animal bones, while most others are synthetic and come in materials such as Teflon. Using one is fairly simple and it will make your card-making and book-binding exploits a whole lot easier!
Steps
Making Greeting Cards with a Bone Folder
-
1Place a ruler on the paper to give yourself a guideline. Lay the paper horizontally and put the ruler in the middle of it. Make sure to hold the ruler firmly in place with one hand. Where you place the ruler is where the score will end up. The bone folder will follow the ruler, so if it’s crooked, the crease will end up that way.
- A 12 in (30 cm) ruler should do the trick, but if you are working with a bigger piece of paper, use an 18 in (46 cm) ruler or something larger.
-
2Press down on the bone folder firmly as you score it. This makes folding the paper easier because you’re creating a deep score. Make sure you don’t press too hard, as you’ll rip or damage the paper if you do so.
- Unless you plan on scoring more paper, you do not need the ruler after this step.
Advertisement -
3Fold the paper along the score line. The score line creates 2 distinct sides of your paper: one with an indentation, and one with a bump. Folding into the side with the bump gives you a clean, even fold and reduces the paper’s chances of cracking. Do this gently so you don't damage the paper.[1]
- Here’s an easy way to visualize which way to fold the paper: when you make the fold, the indented side should be facing down.
-
4Flatten your paper along its score with the straight sides of the folder. At this point, your fold will be a little rounded, so use the straight sides of the folder to press down on the paper and get a nice, sharp crease. Drag the long edge of the bone folder slowly down the paper for a crisp, professional look.[2]
- Like with the initial paper folding, be gentle with this part.
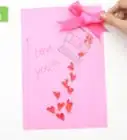
If you need to make a large number of greeting cards to send out to people, you’ll be amazed at how much time you’ll save if you use a bone folder.


Creating Origami with Your Bone Folder
-
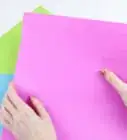
1Lay the origami paper on a flat surface. Make sure the paper is smooth and lacks creases. Run your hands along the material to flatten it completely.
- If you really want to be sure the origami paper is flat before you start folding it, place a book on top of the material and let it sit there for a few minutes.
-
2Cut out excess paper with scissors. Origami is a precise art, meaning any extra paper used will just get in the way of the final design. While you most likely won’t be using the scissors to make the actual origami, it is important to have a pair on hand in case your piece of paper is too big.[3]
- It’s smarter to start with a bigger piece of origami paper anyway, as you can always pare it down to the size and shape you need for the final design.
-
3Score the folds with your bone folder for a precise finish. Be gentle, as origami paper can rip easily if you push too hard on the folder. Go over each fold 2-3 times to make sure each part of the crease is flat.
- If you are making a lot of origami, using a bone folder is the perfect way to ensure each fold is crisp and clean.
Bone folders are especially great for big, awkward folds because they are more accurate than your hand when it comes to scoring the origami paper.


Picking a Specific Bone Folder
-
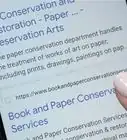
1Choose an authentic bone folder to make even folds. Classic bone folders, those made from real animal bones, are still in use today. These tools are used to bind books and have a smoothness and sturdiness about them that makes them ideal for the process. Not only do authentic bone folders make even folds, they smooth out surfaces just as well.
- Making even folds and smoothing out surfaces is important when gluing book cloth or decorative papers to binder’s board. Natural bone folders smooth down the fibers of paper, allowing the material to stick better.
- Clean your authentic bone folder by rubbing olive oil onto it. This helps you avoid flaking or brittleness.
-
2Go with a synthetic folder so as not to leave a mark. Synthetic folders are common nowadays because they are easy to make. Folders that come in Teflon are popular in book-making because they don’t leave a shiny mark when burnishing book cloth.[4]
- Folders made of real bone are more expensive than synthetic bone folders, but neither is very pricey. You can get a good bone folder online or at a crafts store for between 7-15 dollars.
- If you have a synthetic bone folder, wash it with water after using it to keep it clean.
-
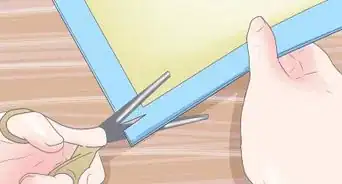
3Select a folder with 1 pointed end and 1 curved end to score and polish. Most bone folders are 5–8 inches (13–20 cm) long and have either curved or pointed ends. The pointed ends are great for working in corners or scoring paper, while the curved side can be used to polish decorative papers.
- The pointed end of a bone folder can also cut paper along creased folds to the size you want.
-
4Opt for a 5 in (13 cm) bone folder if your paper is small. Since bone folders come in many different sizes, you don’t need to use a large one for a small project. If you are making a small greeting card, go with a 5 in (13 cm) folder to get the fold as precise as possible.
- All bone folders have tapered sides, which help you make tight creases.
-
5Pick an 8 in (20 cm) bone folder for larger projects. If you need to cut your paper or are using a large-sized piece of paper, use an 8 in (20 cm) bone folder. This will make it easier for you to score and cut the paper as efficiently as possible.
- The price of a bone folder does not drastically increase if it’s a bigger size.
Get bone folders of varying sizes to make it easier to work on different projects.


Things You'll Need
- Thin card or paper
- Bone folder
- Flat work surface
- Scissors
References
About This Article