This article was co-authored by Anjuli Yera, MD. Dr. Anjuli Yera is a Certified Professional Makeup Artist based out of West Palm Beach, FL. With over 15 years of experience, she specializes in makeup artistry, airbrush application, and bridal and wedding party makeup. Her work has been featured in St. Louis Bride, STL Today as well as the Miami Times. She has received the WeddingWire Couples’ Choice Award, Best of The Knot Award, and Top Pro Status on Thumbtack. Additionally, Anjuli has been invited to KSDK’s, 'Show Me St. Louis,' to cover Makeup Trends of the year. Anjuli is a self-taught professional makeup artist who received further training from the Artistry Makeup Academy.
This article has been viewed 124,521 times.
A well shaped, groomed, and filled in brow requires time, effort, multiple products, and several tools to achieve. Brow brush is an umbrella term used to describe several different types of brushes and combs related to brow maintenance. This term is also applied to a specific combination tool, the mascara brush, that is used to comb through the brow.
Steps
Filling In Your Brows with a Slanted Brush, Brow Brush, and Spoolie
-
1Pick out brow brushes. There are three basics brow brushes: the spoolie, the mascara brush, and the slanted brow brush. Each brush has a distinct shape and serves a different purpose.
- The spoolie brush is essentially a mascara applicator. This spiraled-bristle brush is used to shape your brows and blend your eyebrow filler.
- The mascara comb is a double sided tool. Its plastic comb is used to brush through eyelashes; its thick bristle brush is used to tame and shape brows.
- The angled brow brush, also known as the slanted liner brush, is used to apply eyebrow filler. You may also use the slanted tip brush to apply eye liner to your lids.
-
2Select a brow filler. There are several different forms of brow fillers on the market. Choose the product that will help you achieve the look you desire.
- If you have defined eyebrows with minor gaps, use an eyebrow pencil. Select a brow pencil that is blend-able—it shouldn’t be extremely soft or too waxy. Apply this filler with light, small strokes to mimic the look of hair.
- If you are looking to soften and fill your sparse brows, use a brow powder one shade lighter than your natural hair color. In addition to thickening your brows, you can use powders to add shape and definition to your brows. This product is applied with an angled brush.
- If you are looking to highlight your brows with a bold color, use a brow pomade. Apply this thick product sparingly to your brows with an angled makeup brush. Pomades are very tricky to work with and should only be used after mastering the application of brow pencils and powders.
- If you are concerned about your brow makeup smudging or fading, consider using a brow pencil. Apply this product with light, feathery strokes.
- If you want to maintain the shape of your brows throughout the day, use a clear or tinted brow gel. You can use brow gels in combination with other products.[1]
Advertisement -
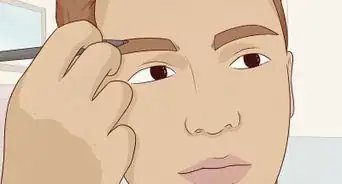
3Apply the filler to your brows. If you are using a powder or pomade, dip your angled brush into the the product and tap off the excess. When applying the filler, start in the center and work your way out to the edges. This method of application will allow you to avoid creating an extremely severe brow.
- To fill your eyebrows with brow pomade, take an angle brush and a brow pomade in your current hair color.
- Then dip the angled brush in the pomade and pancake both sides of the brush on a flat surface to create a thin drawing tip with your brush.
- Then draw in hairs in the sparse areas of the brows in the same direction of the hair growth.
- Place your pencil, pen, or brush at the arch of your eyebrow.
- Move the applicator out towards your nose and upwards towards your forehead in short, feathery motions. Do not draw straight lines.
- Return your applicator to the arch.
- Move the applicator out towards your ear and upwards towards your forehead in short, feathery motions.
- Repeat on the other brow. Do not draw straight lines.[2]
-
4Blend the brow filler and reshape the brow with a brow brush or spoolie. After filling in your brows, you may notice patches of color of misplaced hairs. You can correct both issues with a brow brush or spoolie. Pull the brush or spoolie upwards and through your brows several times.[3]
- Whenever you brush your brows, brush them upwards.


Touching-Up Your Brows
-
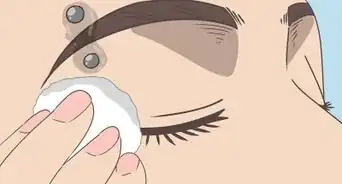
1Highlight your brows with a light concealer. A light concealer applied around the edge of your eyebrows will make your handiwork pop. Additionally, the concealer define the lines of your brows, making them look professionally done.
- Use a flat brush outline the underside of each eyebrow with concealer.
- Use the applicator to create a crisp line along the top of each brow.[4] .
-
2Illuminate the bottom of your brows with eyeshadow. Elevate your look with a dash of shimmery eyeshadow directly under your brow. Dip your eyeshadow brush into a neural iridescent shade and tap of the excess powder. Lightly apply the eyeshadow from the outer base of the arch to the end of the brow.
-
3Set your brows with brow gel. Brow gels are designed to prevent your eyebrow makeup from smudging or fading. Unscrew the brush and wipe off any excess product on the side of the bottle. Lightly comb through your brows in an upwards motion.
- Instead of brow gel, you can use a spritz of hairspray on a disposable spoolie.[5]
Shaping Your Brows
-
1Select a brow shape that enhances your facial features. While everyone has a natural brow shape, it is possible to transform your brows into a shape that complements your features. Individuals with angular features can soften their look with a round brow. Individuals with round faces may with to intensify their look with a sharply arched brow.[6]
-
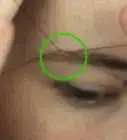
2Pluck away any stray hairs from your eyebrows. Carefully examine each of your brows for stray hairs. Use your tweezers to pluck away stray hairs above and below your brows. Do not alter the shape of your brows.[7]
- If you need to trim or thin your brows, do so with a spoolie brush and a pair of brow scissors. Use the spoolie brush to direct your hair upwards and out. Trim the excess hair that falls above your brow line with a pair of scissors laid horizontally across the top of the brow. Next, use the spoolie brush to bring the hairs down and out. Trim the long hairs that fall below your brow line with a pair of scissors.
-
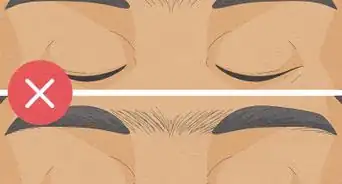
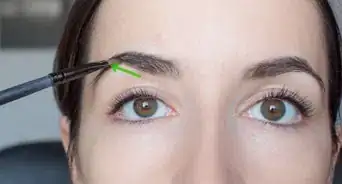
3Line up your brows. There are three important areas of the brow to consider when shaping and filling in your eyebrows: the starting point, the peak, and the ending point. To identify each of these points, follow these steps:
- To locate the start of your brow, place a brush vertically along the outside of your nostril so that the top of the brush intersects your brow. Your brows should begin at this point. Remove any hairs that fall beyond the brush (towards the center of your face) with a pair of tweezers.
- To locate the peak of your brow, slide the brush diagonally across your brow until the brush reaches the outer edge of your iris. This point of your brow should be the highest part of the arch.
- To locate the end of your brow, slide the brush diagonally until it reaches the outer corner of your eye. If any hairs fall beyond the point, remove them with a tweezers; if your brow does not extend to this point, you can add length to your brow with a filler.
- You may mark these three points on each of your eyebrows with a small dot of filler.[8]
-
4Finished.


Community Q&A
-
QuestionWhere can I get the eye brush?
 Community AnswerYou can purchase a brow brush from your local health and beauty store, grocery store, or department store. You may also order a brow brush through an online distributor.
Warnings
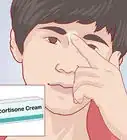
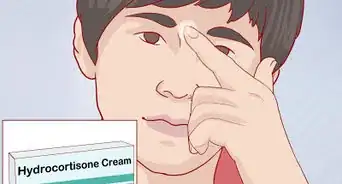
- If your brows don't go back to your natural shape, wash them with water and, if needed, shampoo or makeup remover. They should return to their natural shape after time.⧼thumbs_response⧽
Things You'll Need
- Eyebrow brush
- Spoolie
- Tweezers
- Scissors
- Eyebrow set
- Angled eyebrow brush
- Filler


References
- ↑ http://www.beautylish.com/a/vmqxr/eyebrow-fillers, http://www.instyle.com/news/brow-filler-breakdown-whats-difference-between-powders-pencils-and-pomades, http://stylecaster.com/beauty/filling-in-your-brows/
- ↑ http://stylecaster.com/beauty/filling-in-your-brows/
- ↑ http://www.abeautifulmess.com/2014/08/how-to-fill-in-your-eyebrows-like-a-pro.html, http://stylecaster.com/beauty/filling-in-your-brows/
- ↑ http://stylecaster.com/beauty/filling-in-your-brows/
- ↑ http://stylecaster.com/beauty/filling-in-your-brows/
- ↑ http://stylecaster.com/beauty/filling-in-your-brows/
- ↑ http://stylecaster.com/beauty/filling-in-your-brows/
- ↑ http://www.abeautifulmess.com/2014/08/how-to-fill-in-your-eyebrows-like-a-pro.html, http://stylecaster.com/beauty/filling-in-your-brows/
About This Article


-Step-8-Version-9.webp)