This article was co-authored by Laila Ajani and by wikiHow staff writer, Hunter Rising. Laila Ajani is a Fitness Trainer and founder of Push Personal Fitness, a personal training organization based in the San Francisco Bay Area. Laila has expertise in competitive athletics (gymnastics, powerlifting, and tennis), personal training, distance running, and Olympic lifting. Laila is certified by the National Strength & Conditioning Association (NSCA), USA Powerlifting (USAPL), and she is a Corrective Exercise Specialist (CES).
There are 28 references cited in this article, which can be found at the bottom of the page.
This article has been viewed 69,353 times.
When you’re looking for a good exercise to work your glutes and upper legs, hip thrusts are a perfect addition to your workout routine. While you can do them with your body weight or a barbell, using a dedicated hip thrust or glute drive machine keeps you stabilized and safe. It can be intimidating to try a new exercise machine if you haven’t used it before, but don’t let worrying stop you from discovering a workout you could really love. With these tips, you can use a hip thrust machine safely and confidently!
Steps
Free Weight Machines
-
1Load plates onto the machine’s bars. If the hip thrust machine you’re using doesn’t have attached weights, you’ll need to use free weights like the ones you’d put on a barbell. Find 2 plates that are the same weight to keep the machine balanced. Slide one of your weights onto the metal bar that looks like the end of a barbell found on the side of the machine. Then load the second weight onto the other bar on the opposite side of the machine.[1]
- Only use as much weight as you’re comfortable lifting so you don’t overexert yourself.
- You can add more plates to each bar if you want to increase the weight. Just be sure to use the same amount on each side of the machine for the most balanced workout.
- If you’re a beginner, try lifting about ⅓ or ½ of your body weight. If you’re more experienced, you can try lifting weights that are heavier than your body weight.[2] It will take a little time to find the right weight to complete your reps, so choose whatever you’re most comfortable with.
-
2Secure the strap or padded bar over your hips. Sit down on the machine’s seat so you’re facing the foot rest. Your machine will either have a padded metal bar or a strap with a buckle near your hips so you’re able to lift the weight. If there’s a strap, pull it tight over the front of your hips and buckle it in. Pull on the strap’s loose end to tighten it.[3] If the machine has a padded bar, then swing it over your hips so the end fits in the latch. Secure the latch so the bar sits just over your lap.[4]
- If you’re only doing bodyweight hip thrusts, then you don’t need to use the padded bar or strap since you aren’t lifting weights.
Advertisement -
3Press your back and shoulders into the back support. Lean your upper body back against the support until you’re firmly pressed against it. Make solid contact with the support using the bottom of your shoulder blades and your lower back so you don’t practice bad form. Make sure your back doesn’t arch off of the support, or else you’re more likely to get hurt.[5]
- The size of the back support may vary depending on the machine you’re using. If the support isn’t long enough to reach your lower back, then only but your shoulder blades against it. Just be extra mindful to keep your back straight throughout the exercise.
-
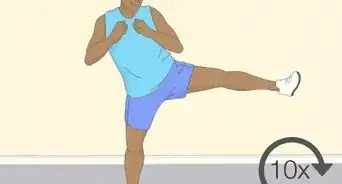
4Position your feet shoulder-width on the foot rest. Bend your knees at a 90-degree angle and place them near the center of the foot rest. Keep your toes pointed forward and your feet shoulder-width apart so you get the most support throughout the exercise. Press your heels firmly against the rest.[6]
- Try putting your feet higher on the foot rest if you’d rather target your hamstrings or lumbar muscles.
-
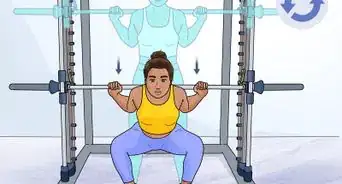
5Lift your hips up to raise the weight out of the safety. Keep your heels and back pressed into the rests so you don’t fall down or slip. Squeeze your glutes together to bring your hips off of the seat. You will be lifting the weights to get into position, so it may feel a little heavy at first. Push up until your upper legs and upper body form a straight line.[7]
- If you’re struggling to lift your hips up, you may have too much weight on the bar. Try using the next lowest weights to see if you can manage it easier.
-
6Disengage the safety to work your full range of motion. Look for a vertical safety bar that’s supporting the weight on the machine. Push the locking bar forward or pull the lever to turn off the safety. That way, you can lower your hips and the weight even further so you get a more even workout.[8]
- Once you disengage the safety, you’ll be supporting the weight on your own and it could drop. Have someone nearby to spot you so you don’t get injured.
-
7Drop your hips until they form a 90-degree angle with your body. Using slow and controlled movement, relax your glutes to move your hips back down. Now that you turned the safety off, the weight will drop lower than it did before so you can feel get a deeper workout. Once you reach the bottom of the motion, hold your position for 1 count.[9]
- Avoid letting your hips drop quickly because you could hurt yourself.
-
8Push the weight up with your hips to finish a rep. Squeeze your glutes together to force your hips back up toward your starting position. Keep your core engaged so you can lift the weight back up easier. Once your legs and body are in line, hold that position for another count.[10]
- Be careful not to overextend your hips since you could damage your muscles.
-
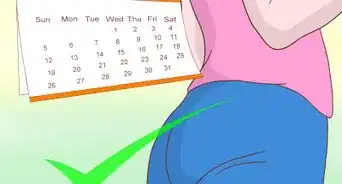
9Try to do 1–3 sets that are each 6–12 reps. Continue lowering and raising your hips until you finish all of your reps. Take a short 60-second break in between each of your sets so you have some time to recover. Once you finish all of your sets, you should feel exhausted but not completely burnt out.[11]
- If you aren’t able to finish all of your reps and sets, try decreasing how much weight you’re using.
-
10Activate the locking bar when you’re finished exercising. Once you complete your last set, lift your hips one last time to the top starting position. Pull the locking bar toward you to re-engage the safety so you don’t have to support the weight anymore. Slowly lower your body back into the seat so you can relax.[12]
- If you struggle to lift the weight back up so you can activate the safety, ask a spotter to help you.
- Don’t forget to put the plates away so the next person doesn’t have to.


Weight Stack Machines
-
1Slide the pin into the weight you want to use. Look for the stack of weights on the side or back of the machine and find the metal pin inserted through them. Find the weight in the stack that you’re comfortable lifting and push the pin through the hole as far as you can.[13]
- Make sure you insert the pin completely so it doesn’t damage the machine or cause the weights to slip.
- Start by lifting about ⅓ or ½ of your body weight if you’re a novice lifter. If you’re more experienced, try using weight that’s equal to or heavier than your body weight.[14]
-
2Lower the foot rest if you want to work your quads and glutes. Find the lever or button on the side of the foot rest that allows you to change the position. Bring the foot rest down to one of the lower positions and make sure it clicks or locks into place. Since your feet will be lower and you’ll have to extend further during the exercise, you’ll feel more of a burn in the fronts of your legs and glutes with each rep.[15]
- You may not be able to adjust the foot rest height depending on the type of machine you’re using.
-
3Raise the foot rest to target your hamstring and lumbar muscles. If you’d rather strengthen the backs of your legs and your lower back, you’ll have to dip down further at the bottom of your thrust. Use the adjustment lever or button on the foot rest and raise the foot rest to the highest position. You can always lower it back down a few steps to find the best setting that works for you.[16]
- Adjusting the foot rest takes a bit of trial and error. If you try it at one height and don’t feel comfortable, just take a short break to adjust it again.
-
4Lower the locking bar over your hips. Your machine will have a padded locking bar that goes over your hips to help distribute the weight. Reach up to the bar and squeeze the handle to disengage it. Keep holding the hand and slowly bring the bar down to the lowest position you can so it presses against the tops of your hips. Let go of the handle to lock the position.[17]
- You won’t be lifting the weight stack when you lower the locking bar.
-
5Push your shoulders against the seat. Lean back to the shoulder rest so the bottoms of your shoulder blades line up with the bottom of the rest. Keep your lower back straight and your core engaged so you get the most out of your workout without the risk of getting injured.[18]
- Some machines may have a full back rest. If your machine does, then make sure to keep your lower back pressed against the rest as well.
-
6Plant your feet shoulder-width apart on the foot rest. You should be able to stay in a seated position when you put your feet on the foot rest, but you may need to lift out of your seat slightly. Place your feet flat against the middle of the foot rest so your toes point forward. Press firmly into the foot rest with your heels so you get the most support.[19]
- In this position, your hips, knees, and ankles should all be bent at 90-degree angles.[20]
- You can try moving your feet lower on the foot rest if you want to work your glutes and quads more. Conversely, placing your feet higher on the foot rest will develop your hamstrings and lower back muscles.[21]
-
7Lift your hips off the seat until they touch the locking bar. Press into the back support with your shoulders and the foot rest with your heels to support your body. Slowly squeeze your glutes together to activate your hips and raise them straight up. Once the tops of your hips make contact with the locking bar, hold your position.[22]
-
8Lower your hips until your upper legs and back form a 90-degree angle. Start in the top position so your hips form a straight line with your back. Slowly relax your glutes and bring your hips down toward the ground. Keep your chin tucked and look forward as you lower yourself down so you don’t strain your back. Once your upper legs and back form a 90-degree angle, hold the position for a count.[23]
- Make sure your feet stay flat against the foot rest, or else you won’t work your muscles as efficiently.
- Some machines will have handles you can hold onto, while others will not. If your machine doesn’t have any handles, keep your arms out at your side or behind your head.
- Keep your core activated while you’re exercising to help activate your glutes even more.[24]
-
9Drive your hips to the starting position to finish your rep. Squeeze your glutes together to raise your hips back up so your back and upper legs are straight. Press against the supports with the bottoms of your shoulder blades and heels for additional support. As you reach the top of your rep, hold the position for 1 count to keep your glutes activated.[25]
- Be careful not to lift or arch your lower back while you’re performing hip thrusts since you won’t work your muscles as efficiently.
- Avoid using jerky or erratic motions while you’re exercising because you’re more likely to get injured.
-
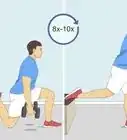
10Aim to perform 3–4 sets that are 20–25 reps each. Maintain your form throughout the entire workout so you work your muscles evenly. At the end of each set, take about 30–60 seconds to rest before you start the next one. After 3–4 sets, you should feel exhausted but not completely burnt out.[26]
- If you can easily perform 20–25 reps without getting tired, try increasing your weight.
- Conversely, if you struggle to finish all your reps and sets, you may need to lower your weight.
-
11Raise the locking bar to get out of the seat. When you’re finished with your sets, drop your hips back into the seat and relax. Squeeze the handle on the side of the locking bar and keep it held down. Lift the locking bar up to the top position and let go of the handle to lock it in place.[27]
- Since you’re squeezing the handle, you won’t be lifting the weight stack anymore so you don’t need to lower or adjust the weight.
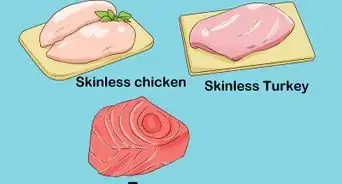
- You can do a hip thrust exercise with a dumbbell. Get into the hip thrust position where you are lying down, your legs are bent, and your feet are flat on the floor.
- Instead of putting a barbell on your hips, put either one or two dumbbells. You may not be able to go as heavy with dumbbells as you would with a barbell, and it might be awkward and a little uncomfortable.
- Put them on top of your hips, with the hip thrust position, and perform the movement.


Warnings
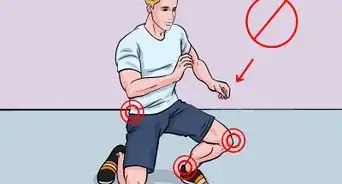
- If you start feeling pain while you’re exercising, stop immediately so you don’t hurt yourself. Do the exercise with a lower weight or try again in a few days.[29]⧼thumbs_response⧽
References
- ↑ https://youtu.be/duB4mw5iqFY?t=10
- ↑ https://strengthlevel.com/strength-standards/hip-thrust/lb
- ↑ https://youtu.be/D_9gSOM6U5M?t=39
- ↑ https://youtu.be/duB4mw5iqFY?t=26
- ↑ https://youtu.be/D_9gSOM6U5M?t=77
- ↑ https://youtu.be/D_9gSOM6U5M?t=62
- ↑ https://youtu.be/duB4mw5iqFY?t=34
- ↑ https://youtu.be/duB4mw5iqFY?t=38
- ↑ https://youtu.be/D_9gSOM6U5M?t=113
- ↑ https://youtu.be/duB4mw5iqFY?t=46
- ↑ https://www.stack.com/a/hip-thrust
- ↑ https://youtu.be/duB4mw5iqFY?t=53
- ↑ https://chunkfitness.com/fitness-articles/exercise-equipment/weight-lifting-equipment/weight-stacks
- ↑ https://strengthlevel.com/strength-standards/hip-thrust/lb
- ↑ https://youtu.be/nME5wVVCfc4?t=296
- ↑ https://youtu.be/nME5wVVCfc4?t=301
- ↑ https://youtu.be/chKPPyE9bA8?t=18
- ↑ https://youtu.be/nME5wVVCfc4?t=224
- ↑ https://youtu.be/ksB3UllJWbo?t=35
- ↑ https://www.panattasport.com/resources/upload/2018-panatta-hip-thrust-en.pdf
- ↑ https://youtu.be/nME5wVVCfc4?t=275
- ↑ https://youtu.be/nME5wVVCfc4?t=67
- ↑ https://youtu.be/BiuADRUAyBU?t=167
- ↑ https://youtu.be/ksB3UllJWbo?t=86
- ↑ https://youtu.be/duB4mw5iqFY?t=43
- ↑ https://youtu.be/nME5wVVCfc4?t=334
- ↑ https://youtu.be/chKPPyE9bA8?t=72
- ↑ https://well.blogs.nytimes.com/2013/04/05/ask-well-more-repetitions-vs-more-weight/
- ↑ https://www.mayoclinic.org/healthy-lifestyle/fitness/in-depth/weight-training/art-20045842
About This Article